Blog

  • knife making workshop

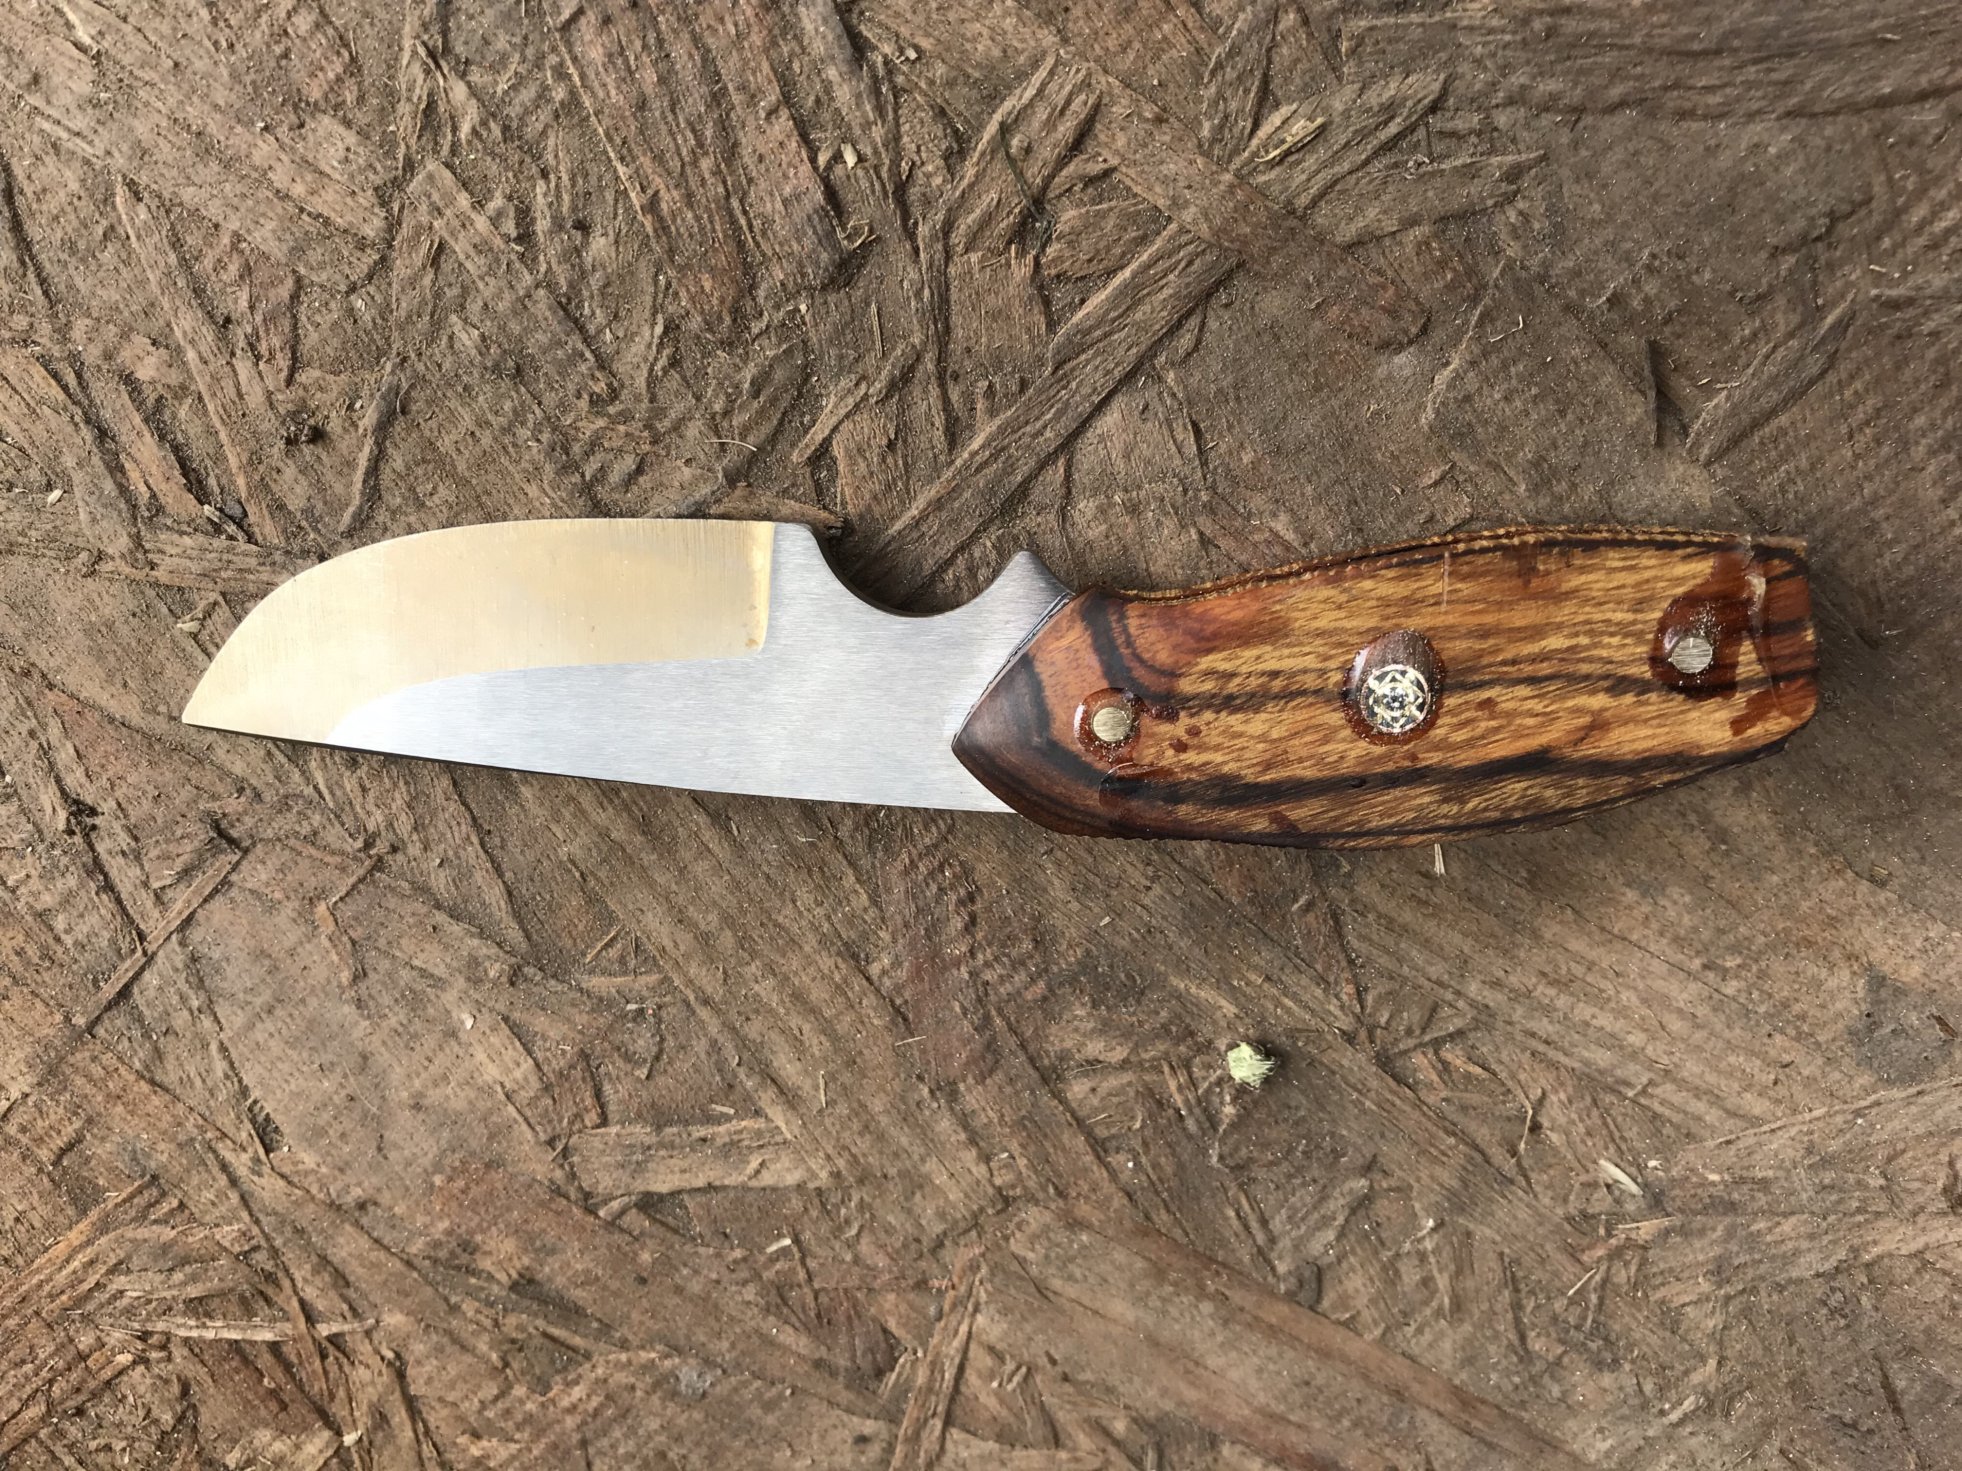
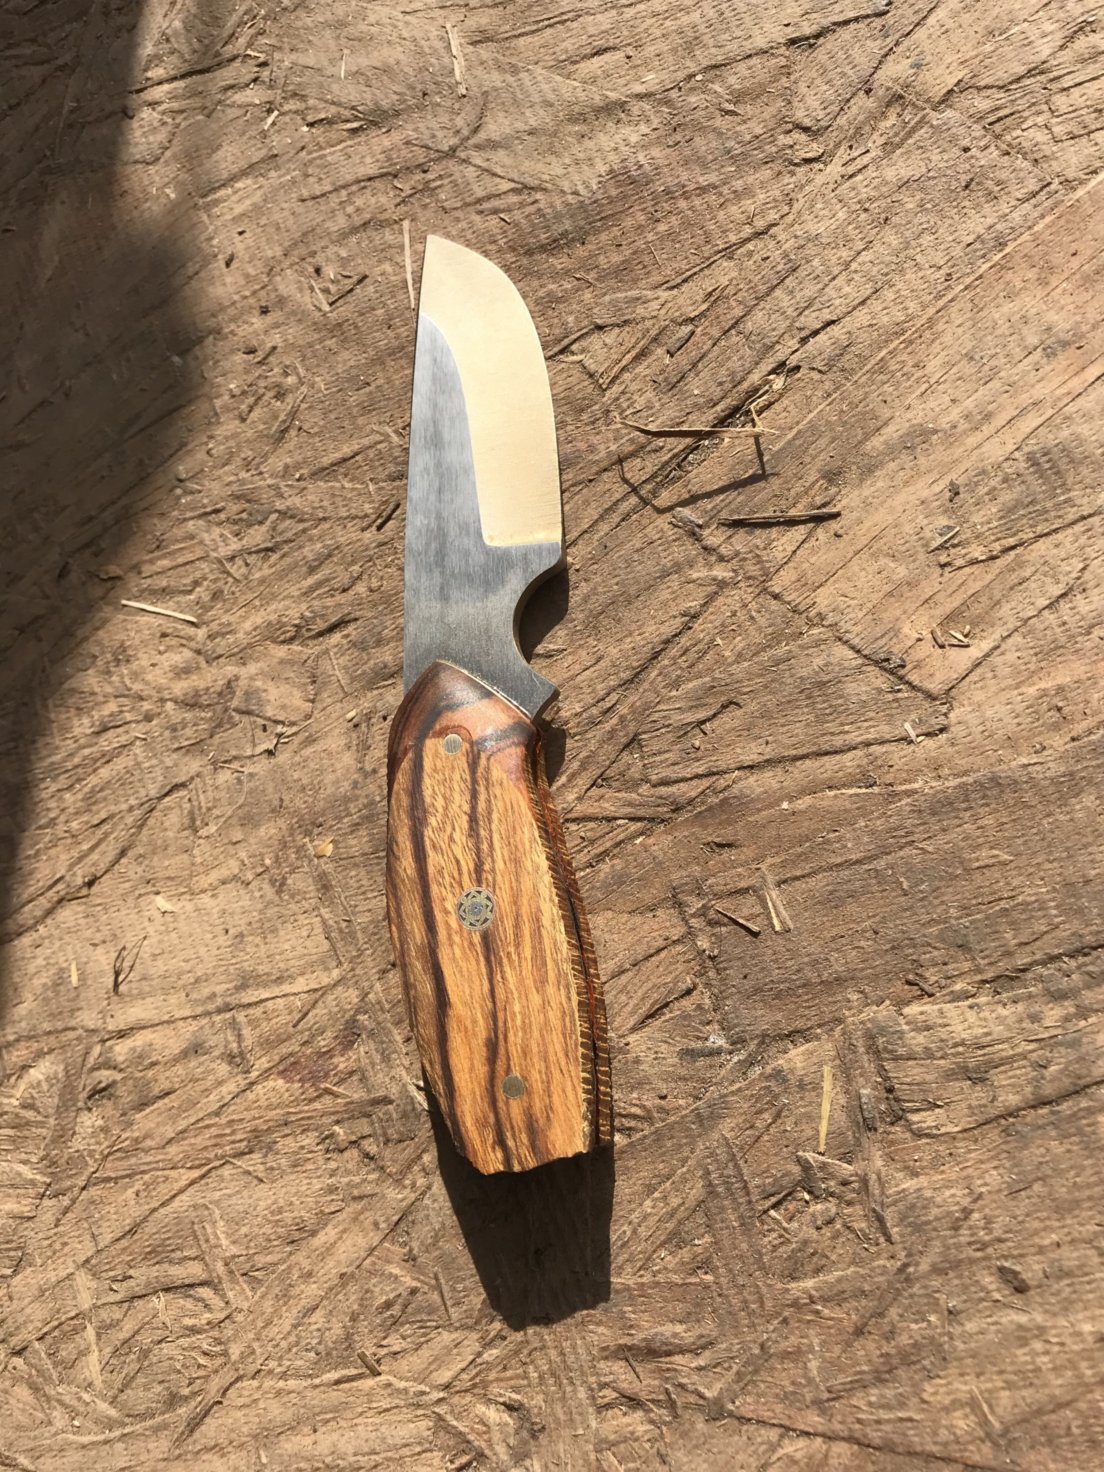
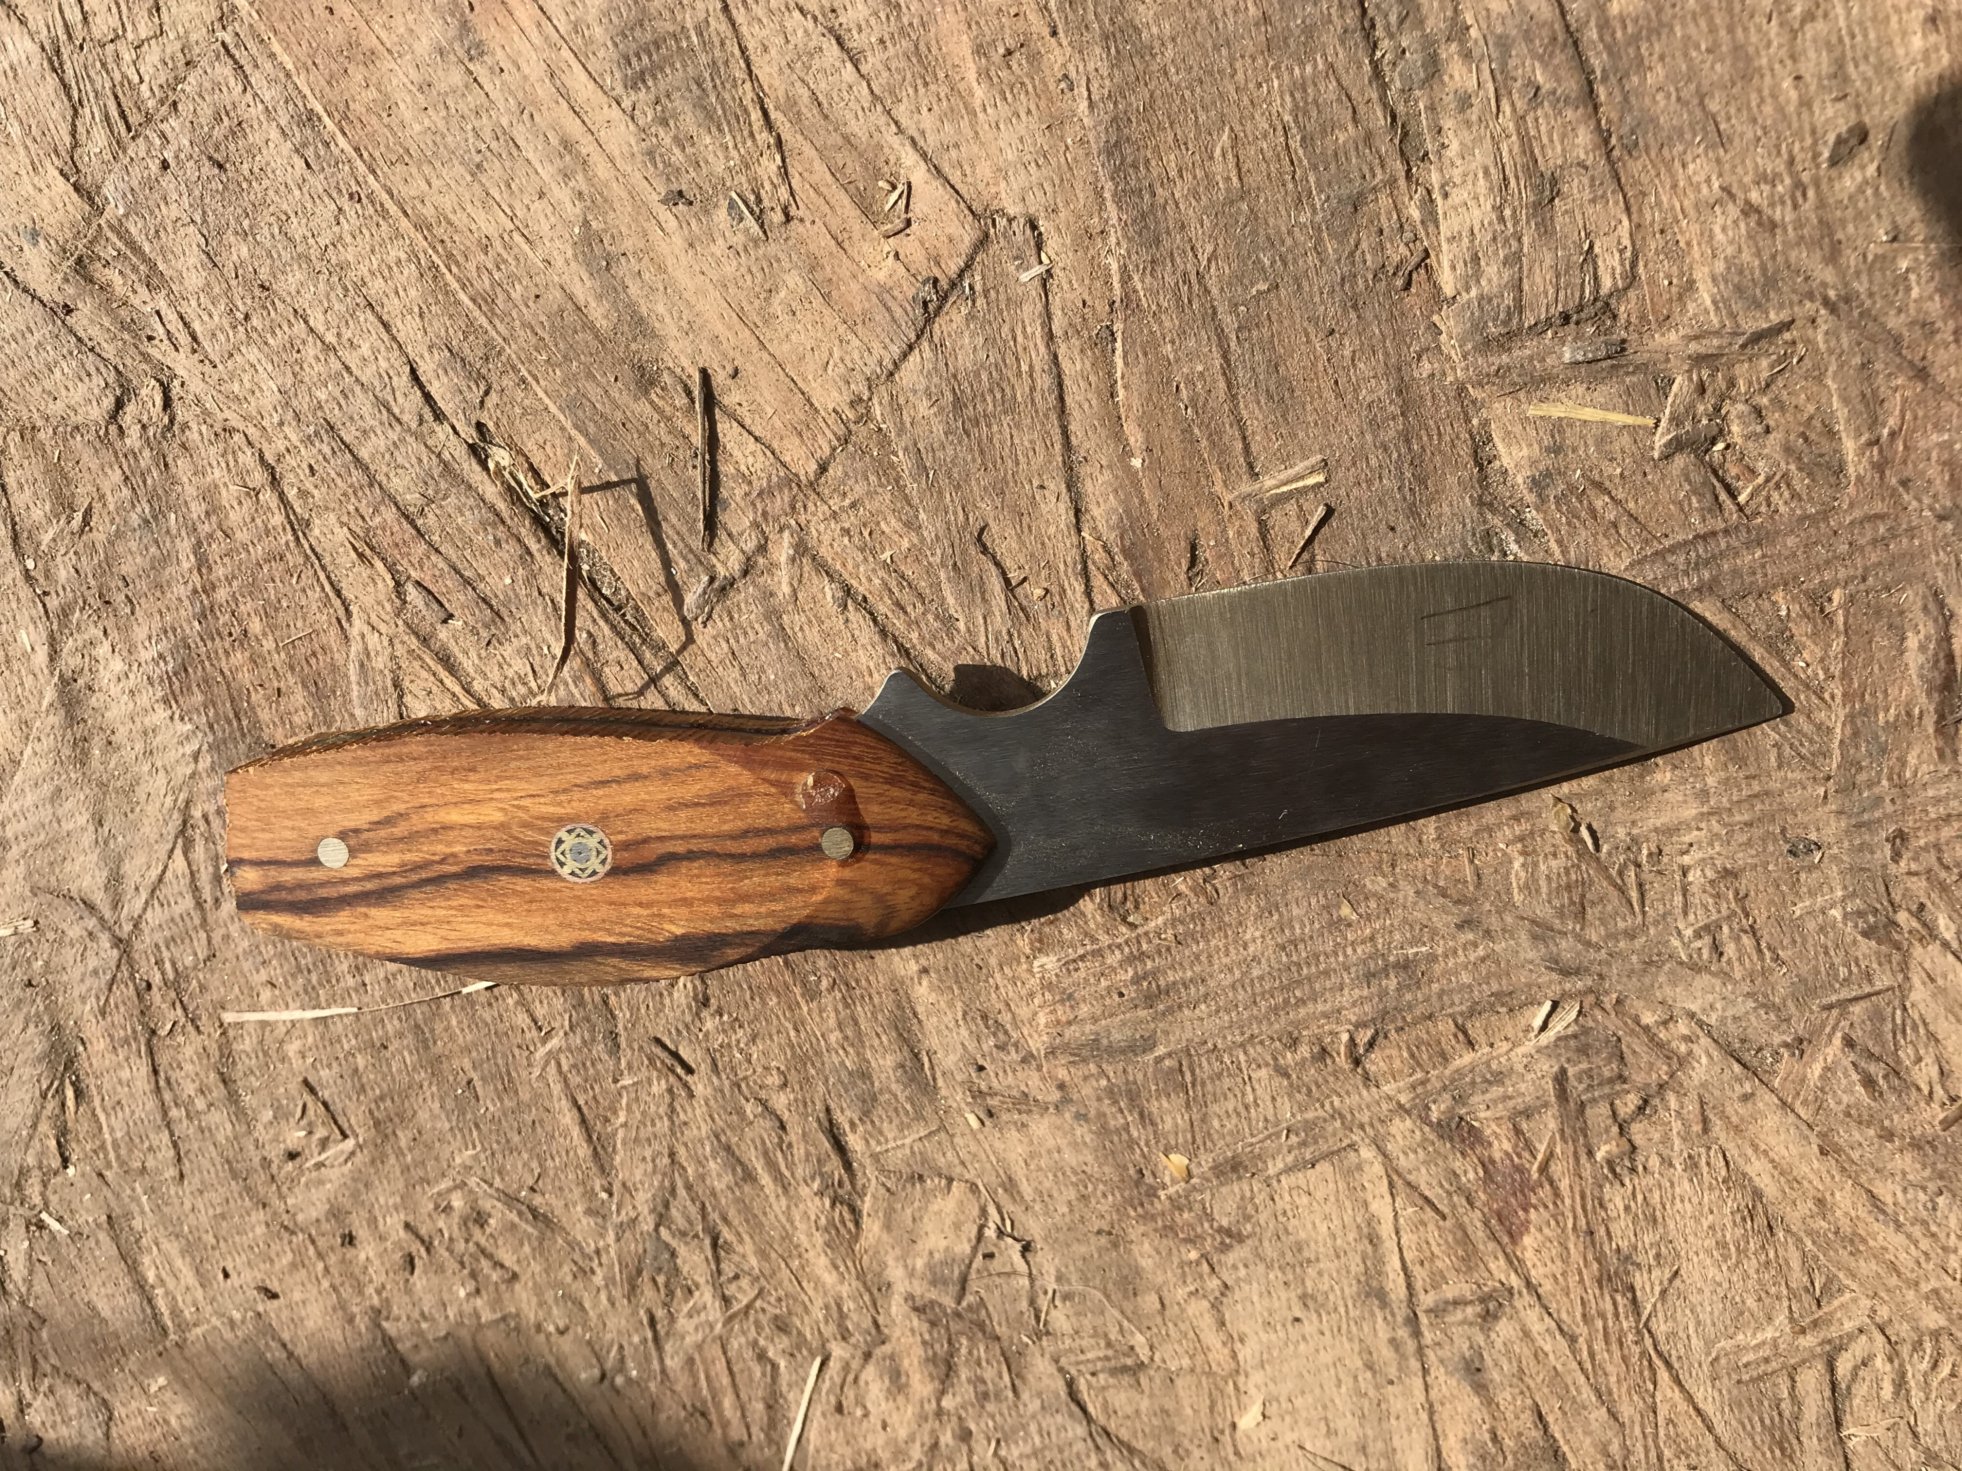
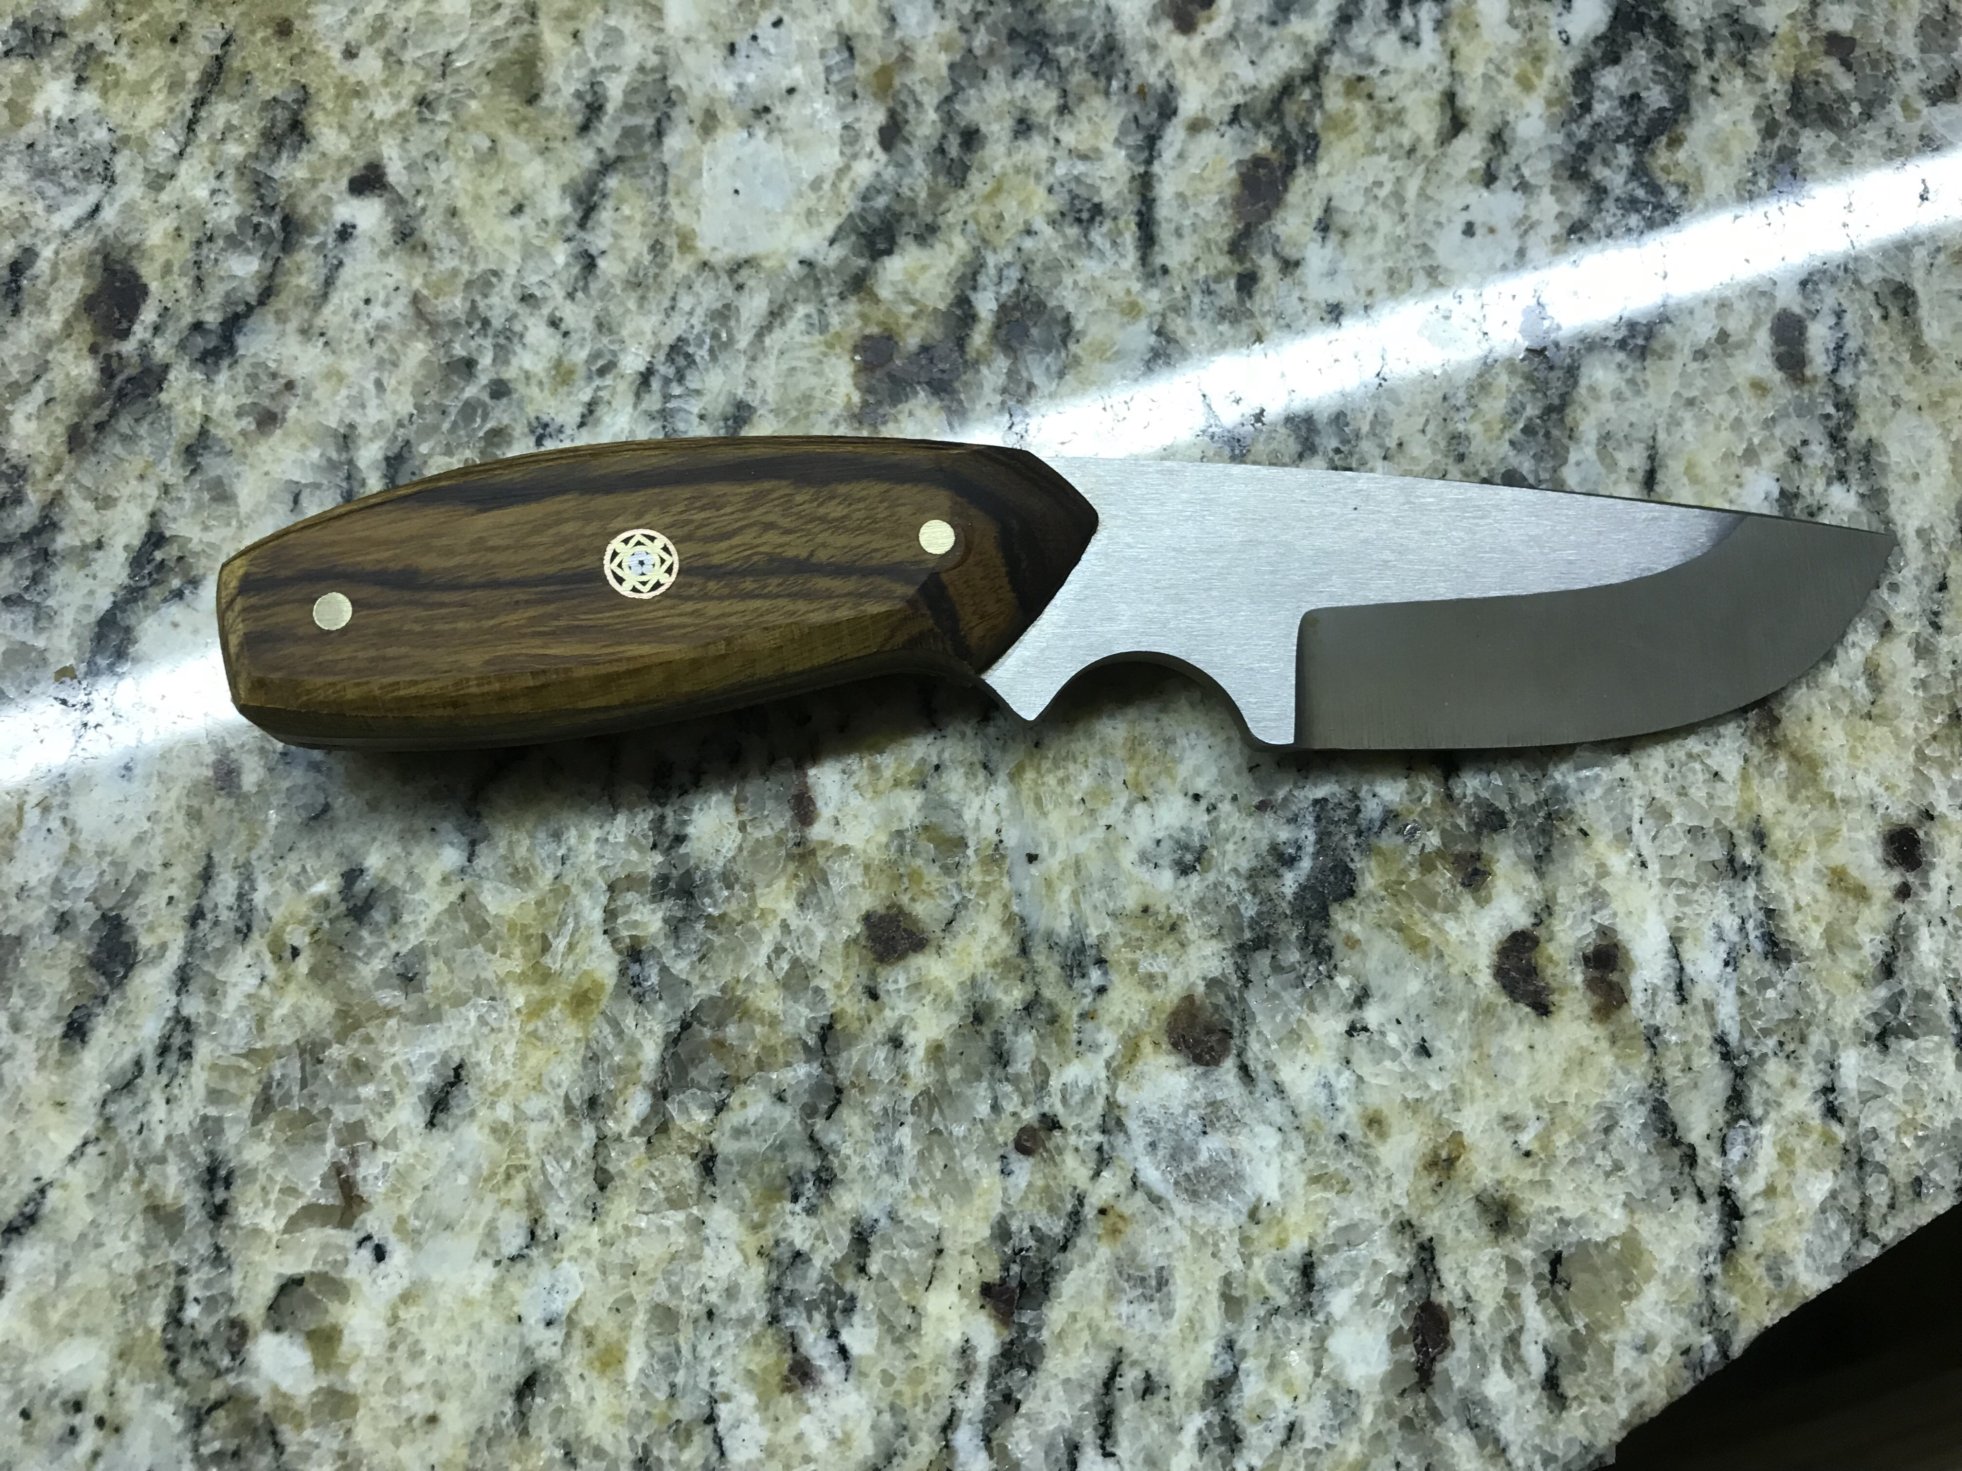
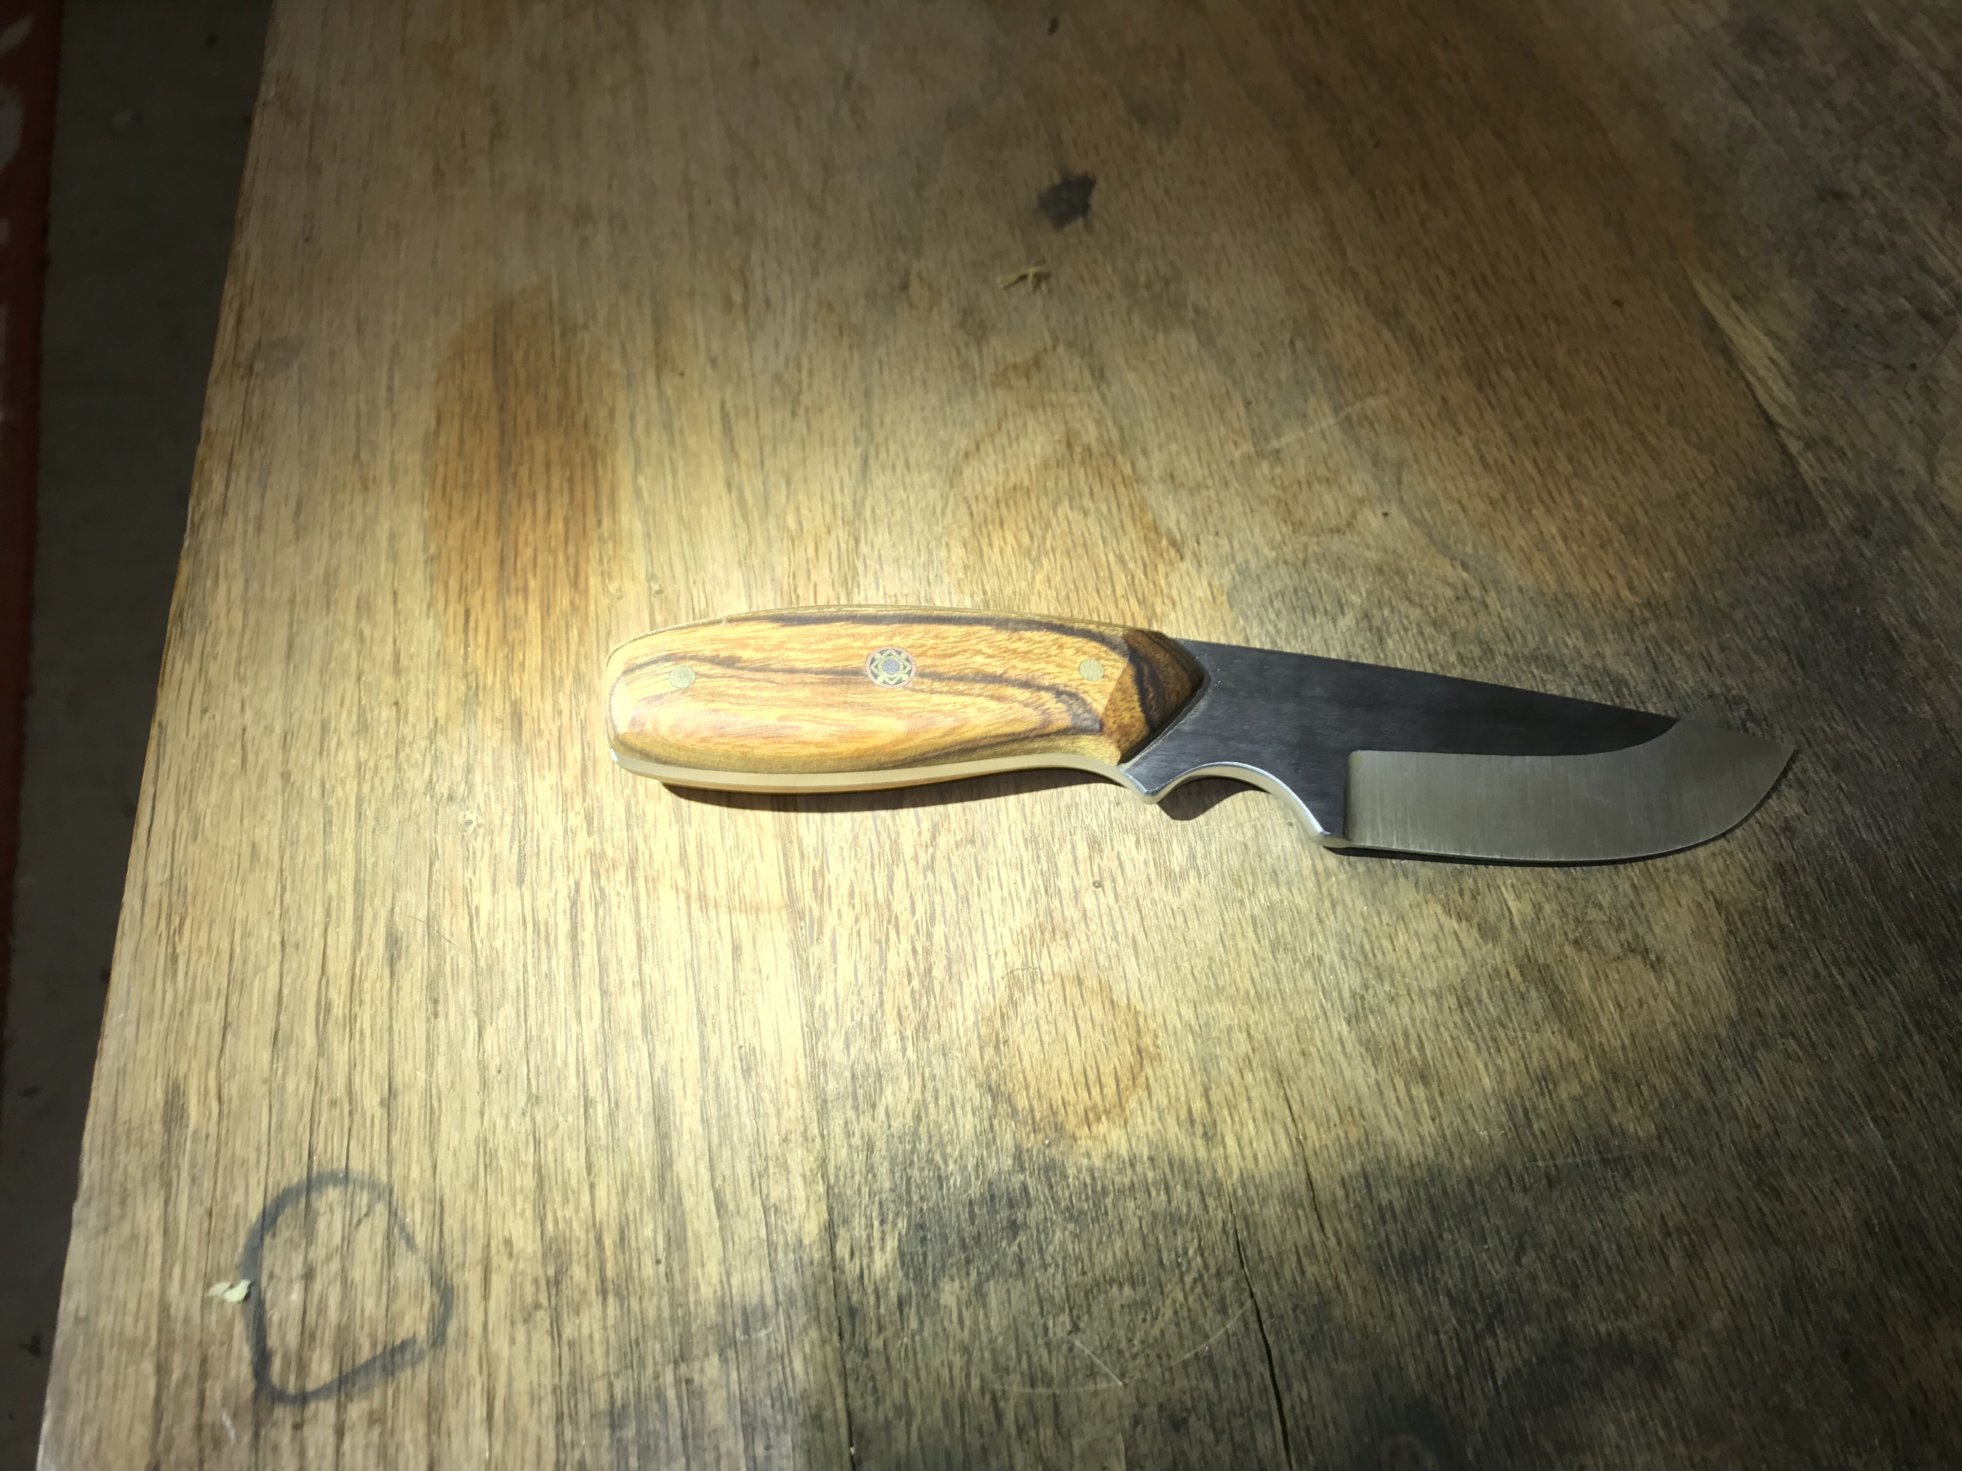
    November 2017, I attended a TSP workshop that had an additional workshop on making custom knives.

    Patrick Roehrman of MTKnives (owner & master craftsman) mentored 8 attendees.

    I’m not a huge fan of neckknives, but I’m a fan of learning from a master craftsman. The workshop was an additional $400.  The workshop provided time, talent & materials so when we finished we have a high-end custom knife that sells for $500(if you can even get one, there is a very long wait to buy a knife built by Patrick), plus we get the know-how of someone that has made thousands of knives and spent thousands of dollars/hours learning their craft. The what-not-to-do, is priceless.

    Many times Patrick would come to the rescue and “fix” our newbie “signatures” (our mess-ups).

    There were many times when it was comforted having the master looking over and helping out when irreversible damage is about to happen. Learning from mistakes is good, but learning from a completely wrecked knife-build is expensive….and frustrating.

    The most expensive training is the training you don’t have…and you fail.

    To me if you/we have to use a blade for self-defense, that is a very very bad day. Much better to use a handgun for an unexpected attack.  Knives are a support-tool for the mission. A neck-knife IMO is for EDC cutting and repair and possible improvised tool for other tasks.  My EDC includes a Husky razor blade, SpyderCo endura wave, protac light & sog multi-tool (which also has a blade..that I never use).  I abuse the husky razor blade on amazon boxes and almost all my cutting. If I need a longer blade (ex cutting food), I use the spyderco….and now I have the option to use THE KNIFE I MADE!

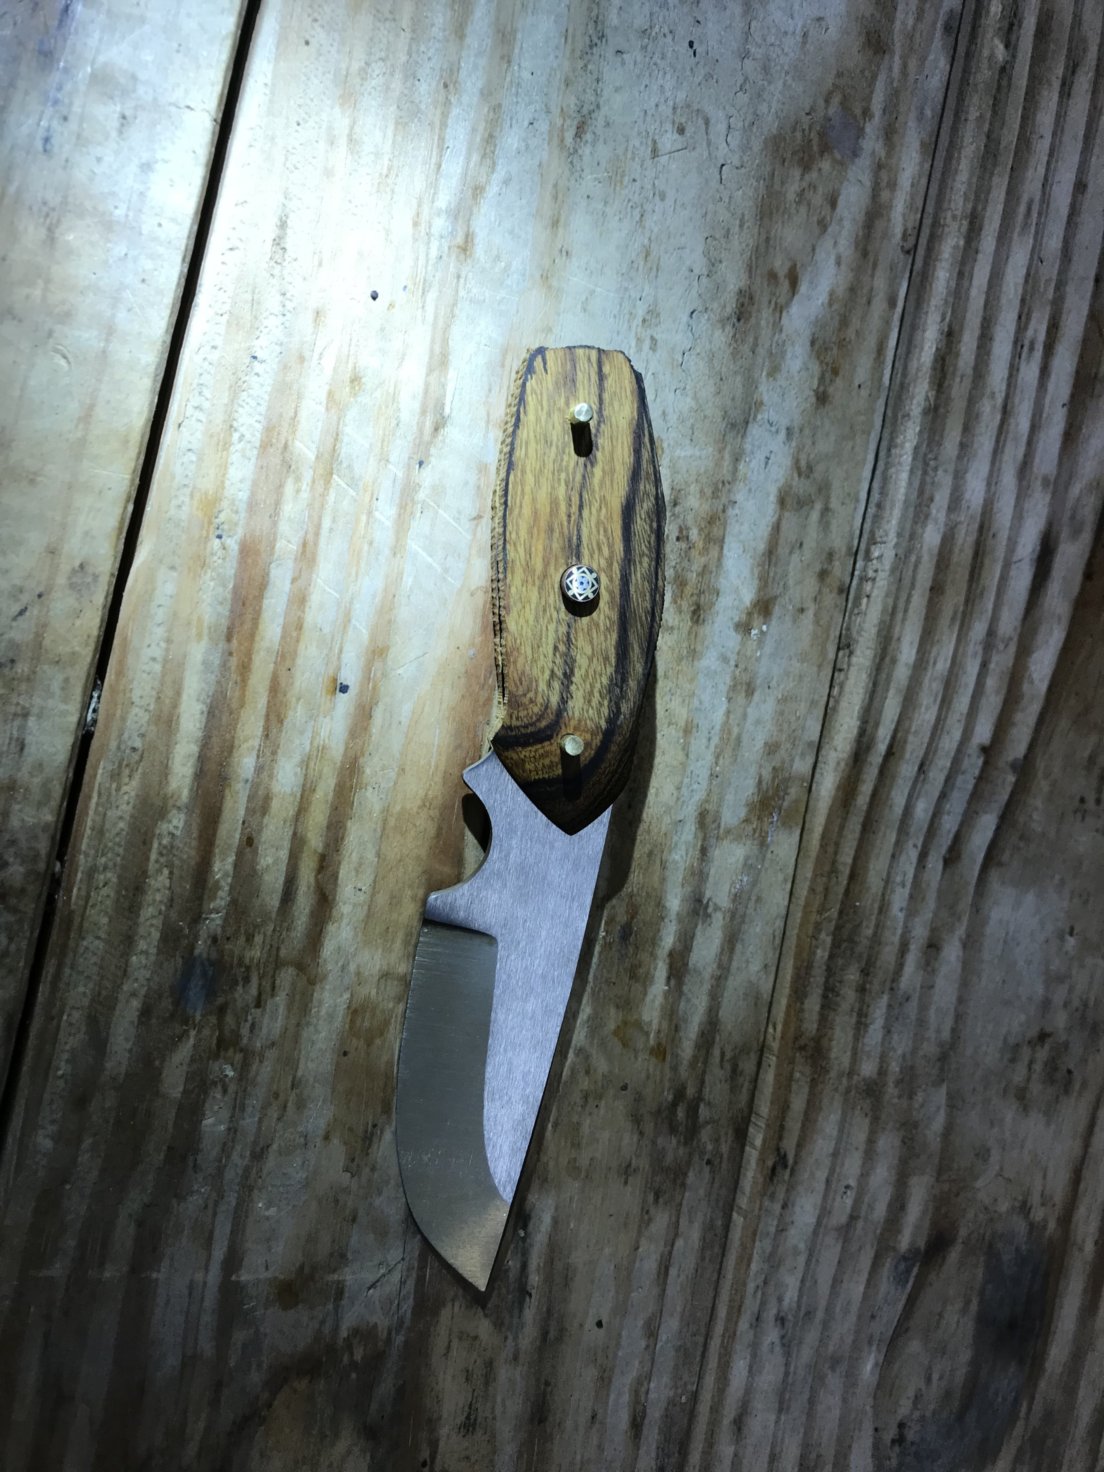
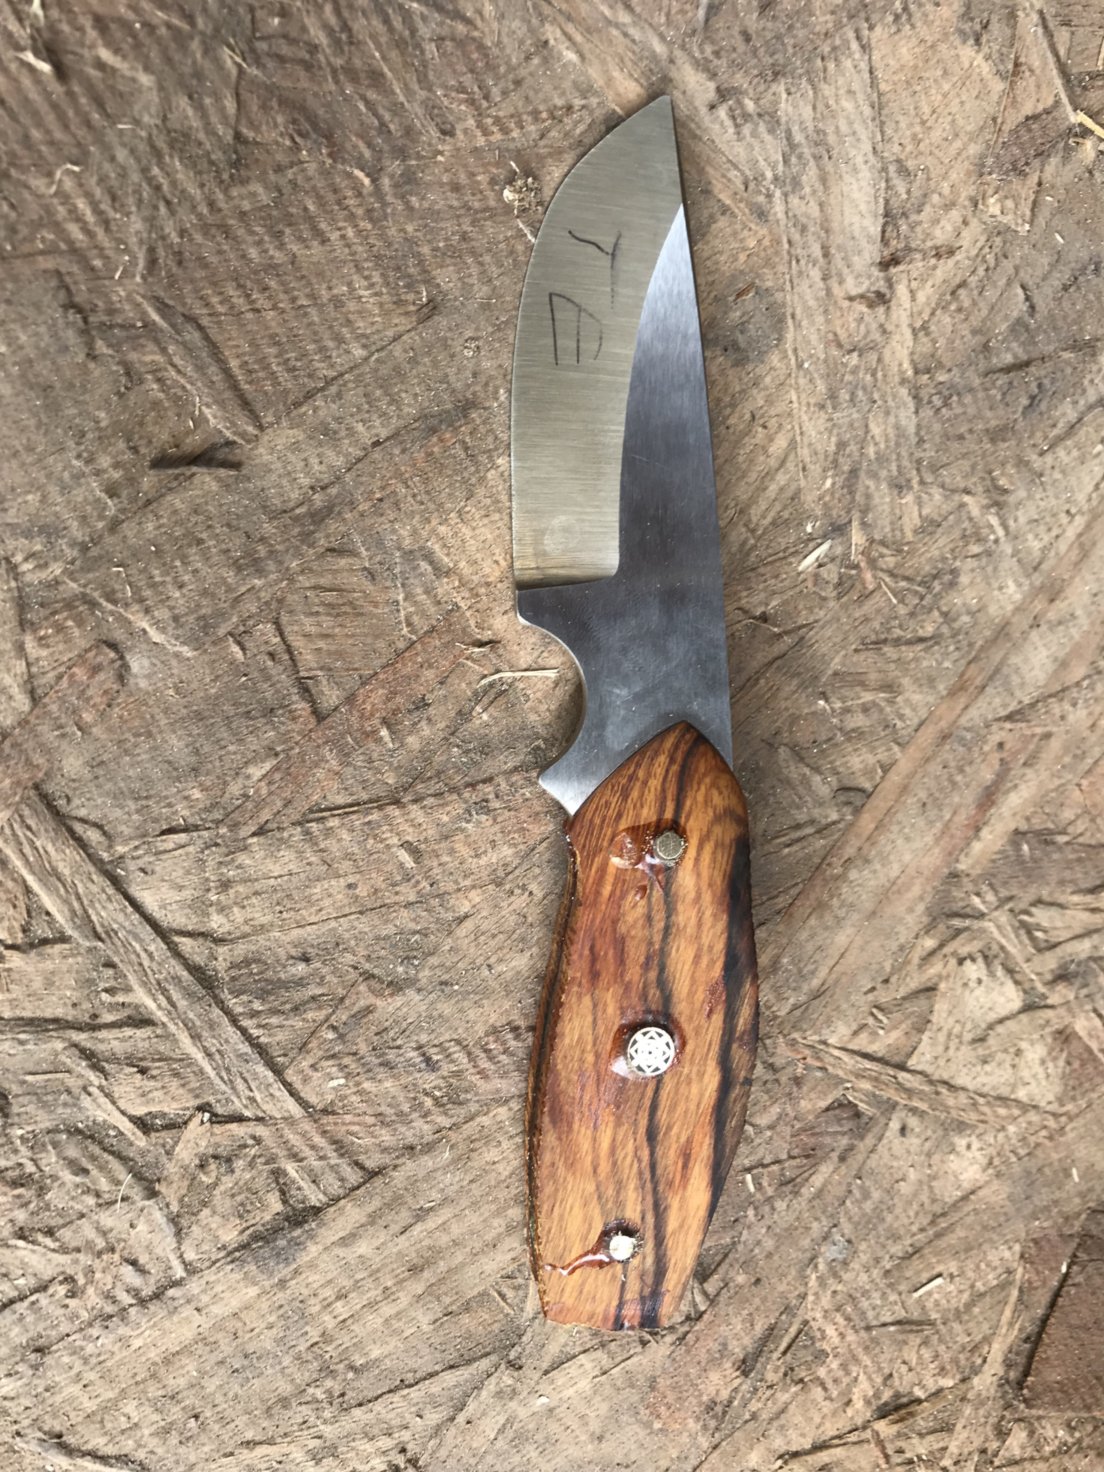
    Using commercial knives is fine, but at a certain point in life, its worth it to have a blade made by a craftsman…not a robot.  Patrick’s knife is much much sharper than a brand new razor blade!  The people I’ve shown the knife Patrick helped me build, say they have never seen a knife that sharp! Yep, Beyond Razor Sharp!

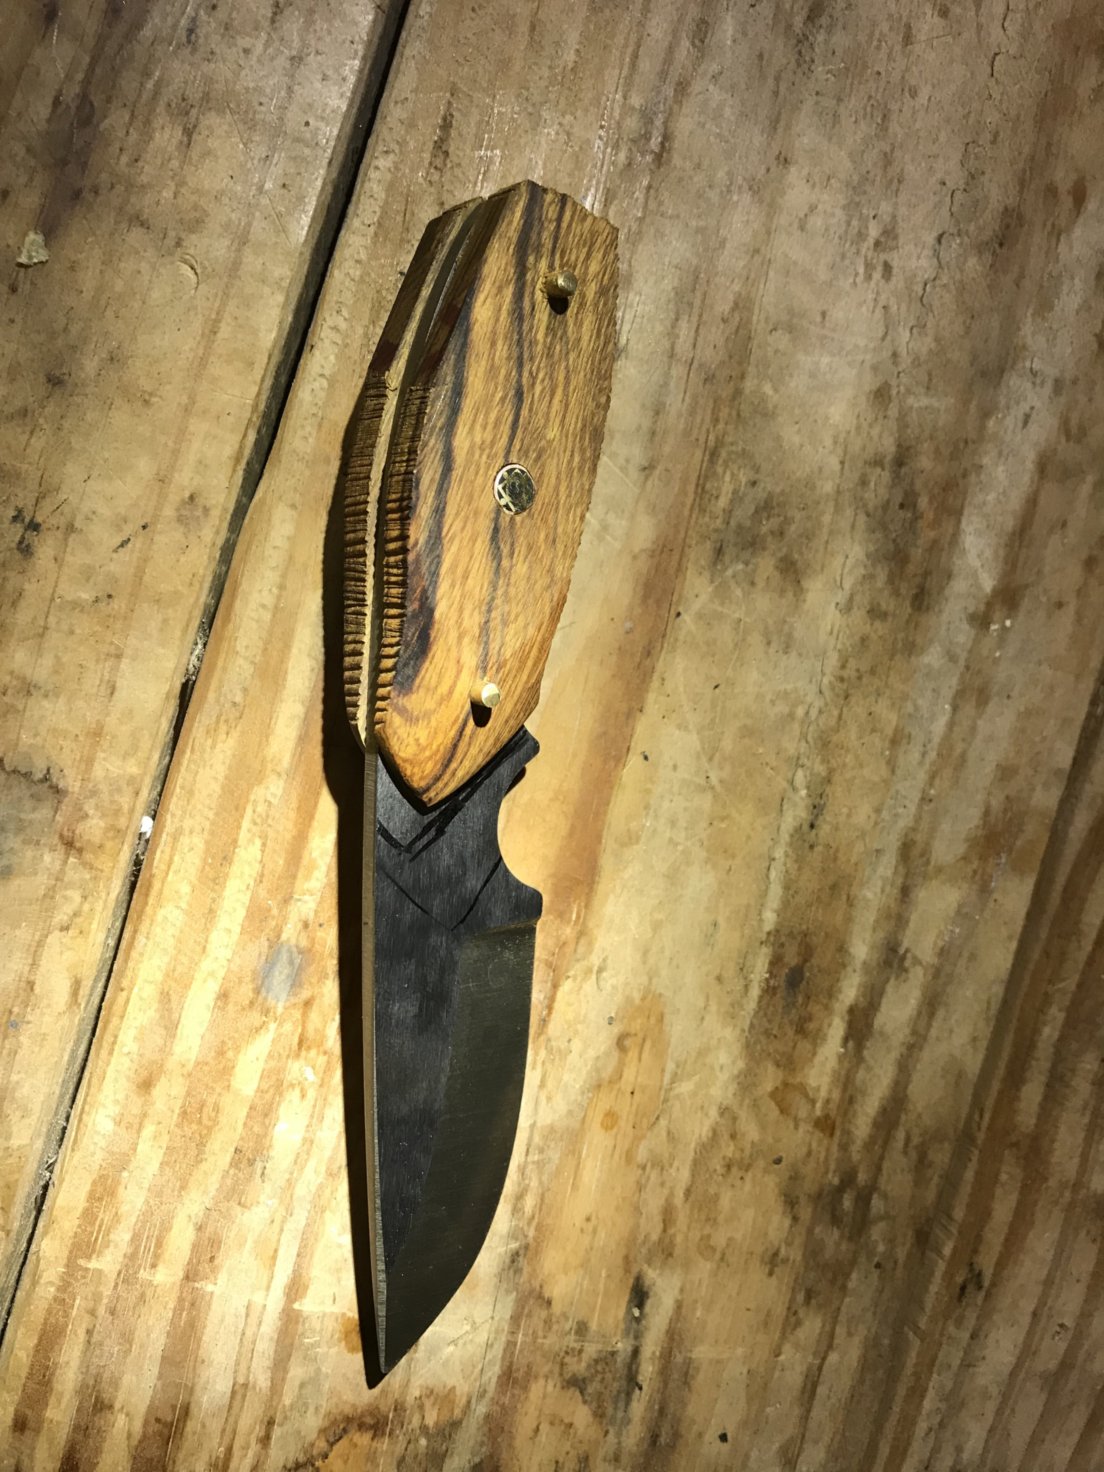
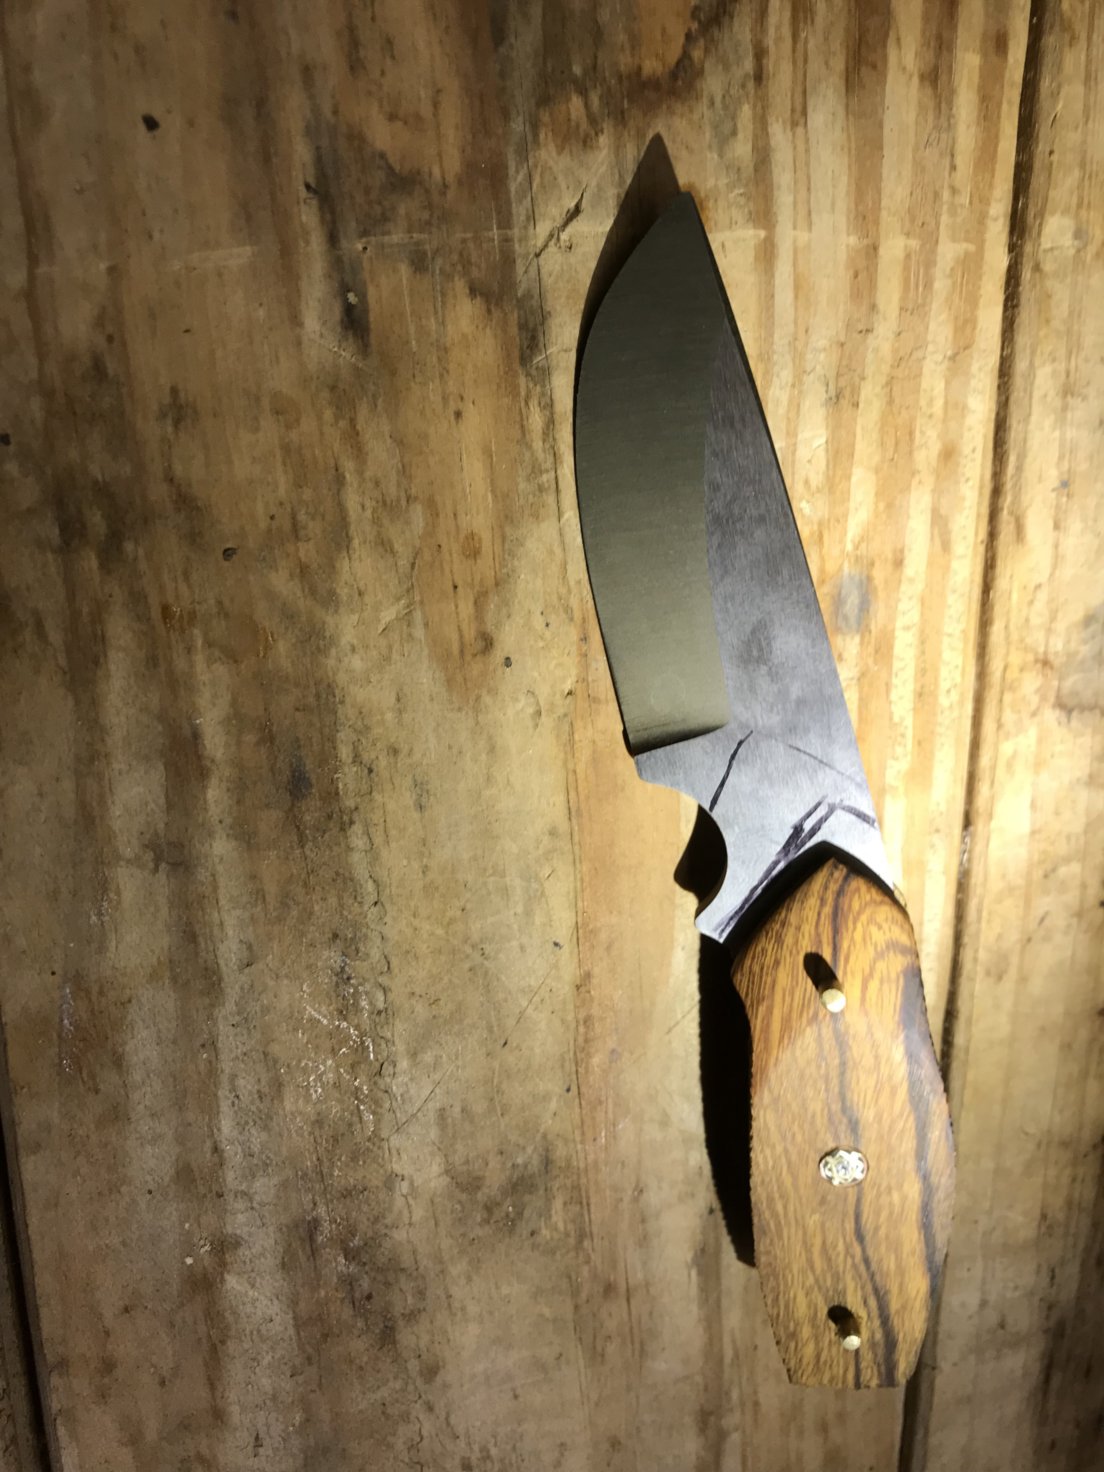
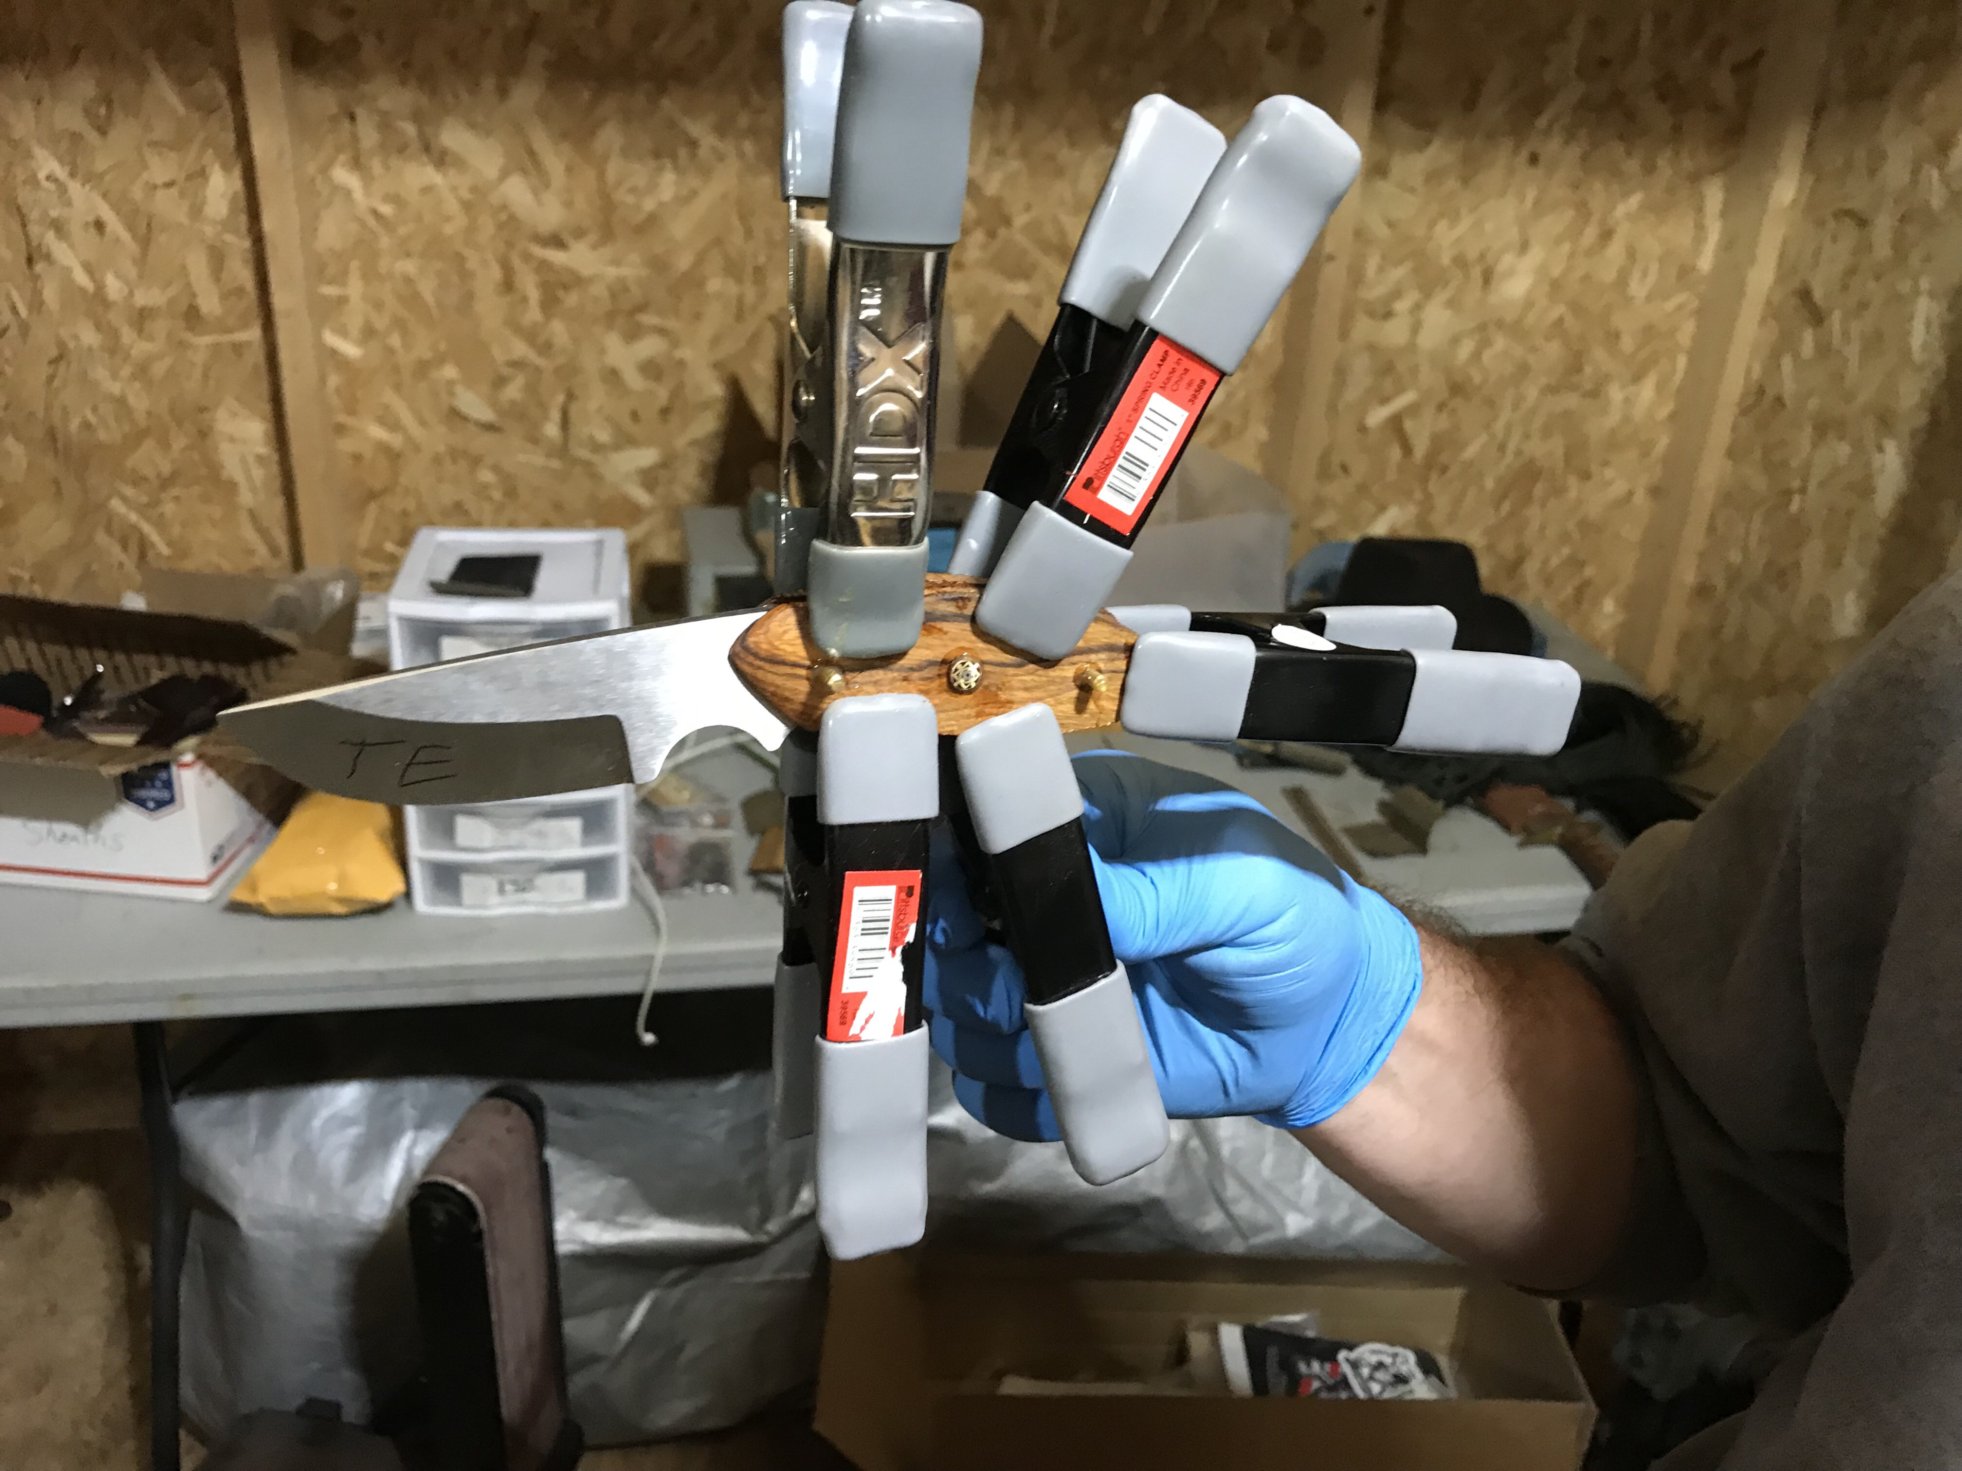
    As you can see from the photos, we had a lot of success and I’m very pleased with the outcome.

    PLEASE support Patrick, we want him making knives for life! He is a good/solid guy and has a large family. I think I’ve purchased everything he has for sale online.  DOLLAR VOTES FOR GOOD PEOPLE!

    I suggest you buy his starter knife(The Genesis II), I know you’ll love it! I hope someday you can upgrade to the knife I built.

    BUILD PHOTOS

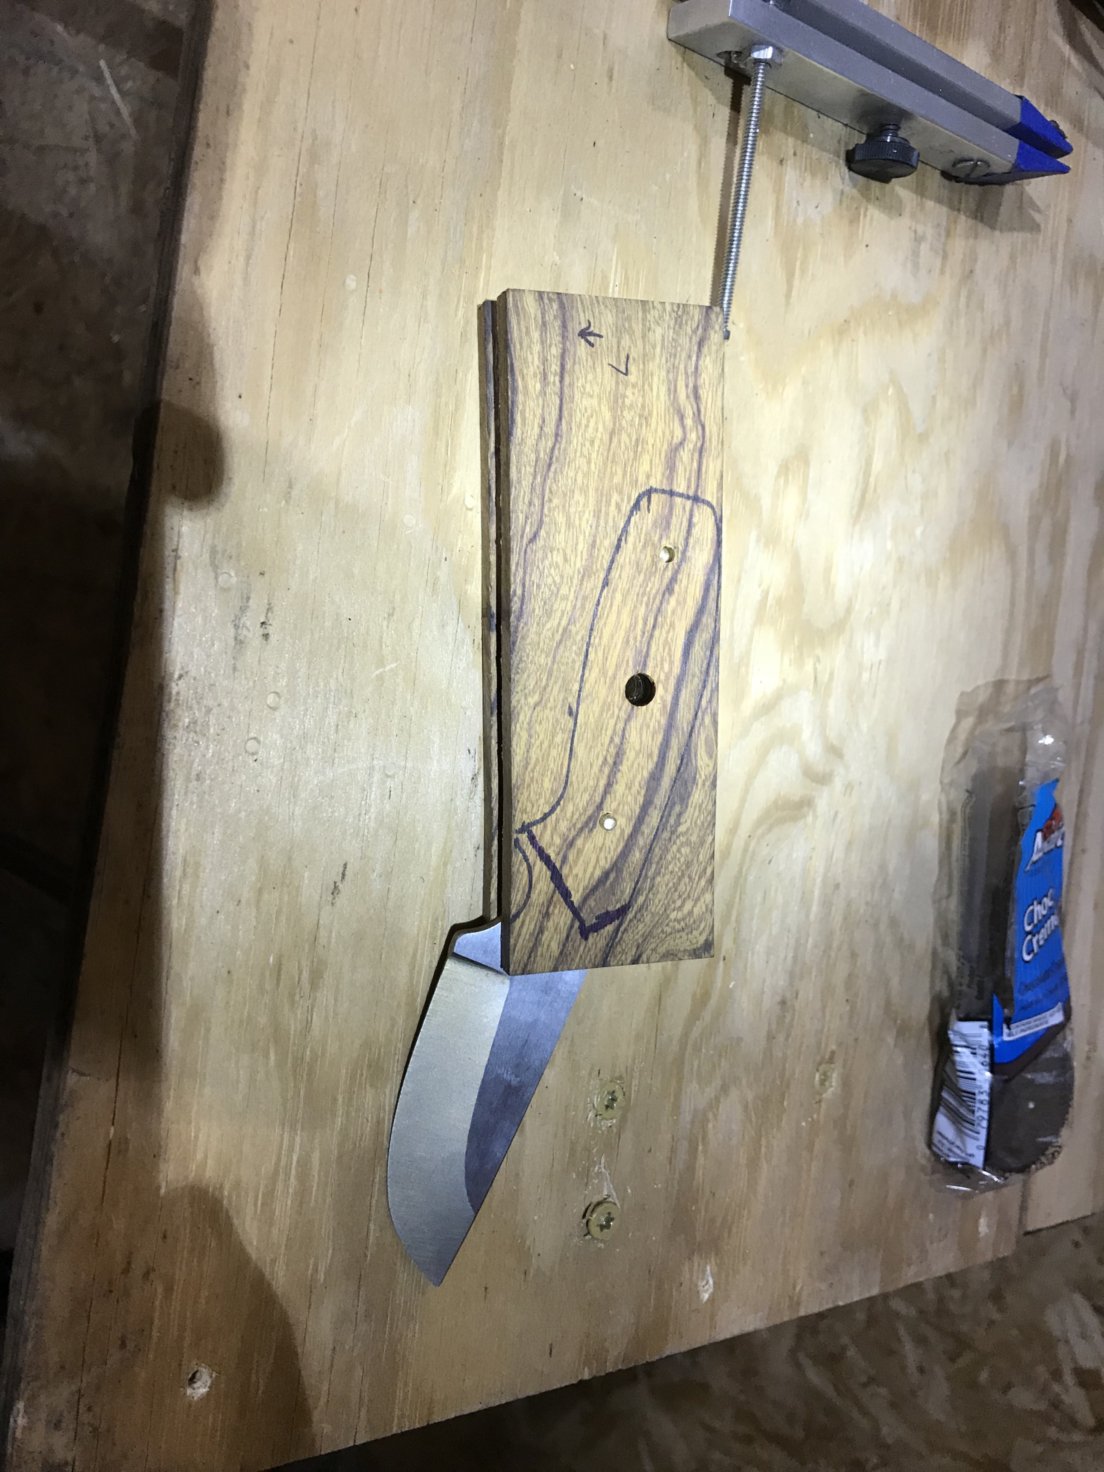
    Trying to determine where you want the grains to show-up on the handle takes the experts eye.   Doing woodwork, the eye really loves to see the curves of the grains, so set-up is critical IMO.


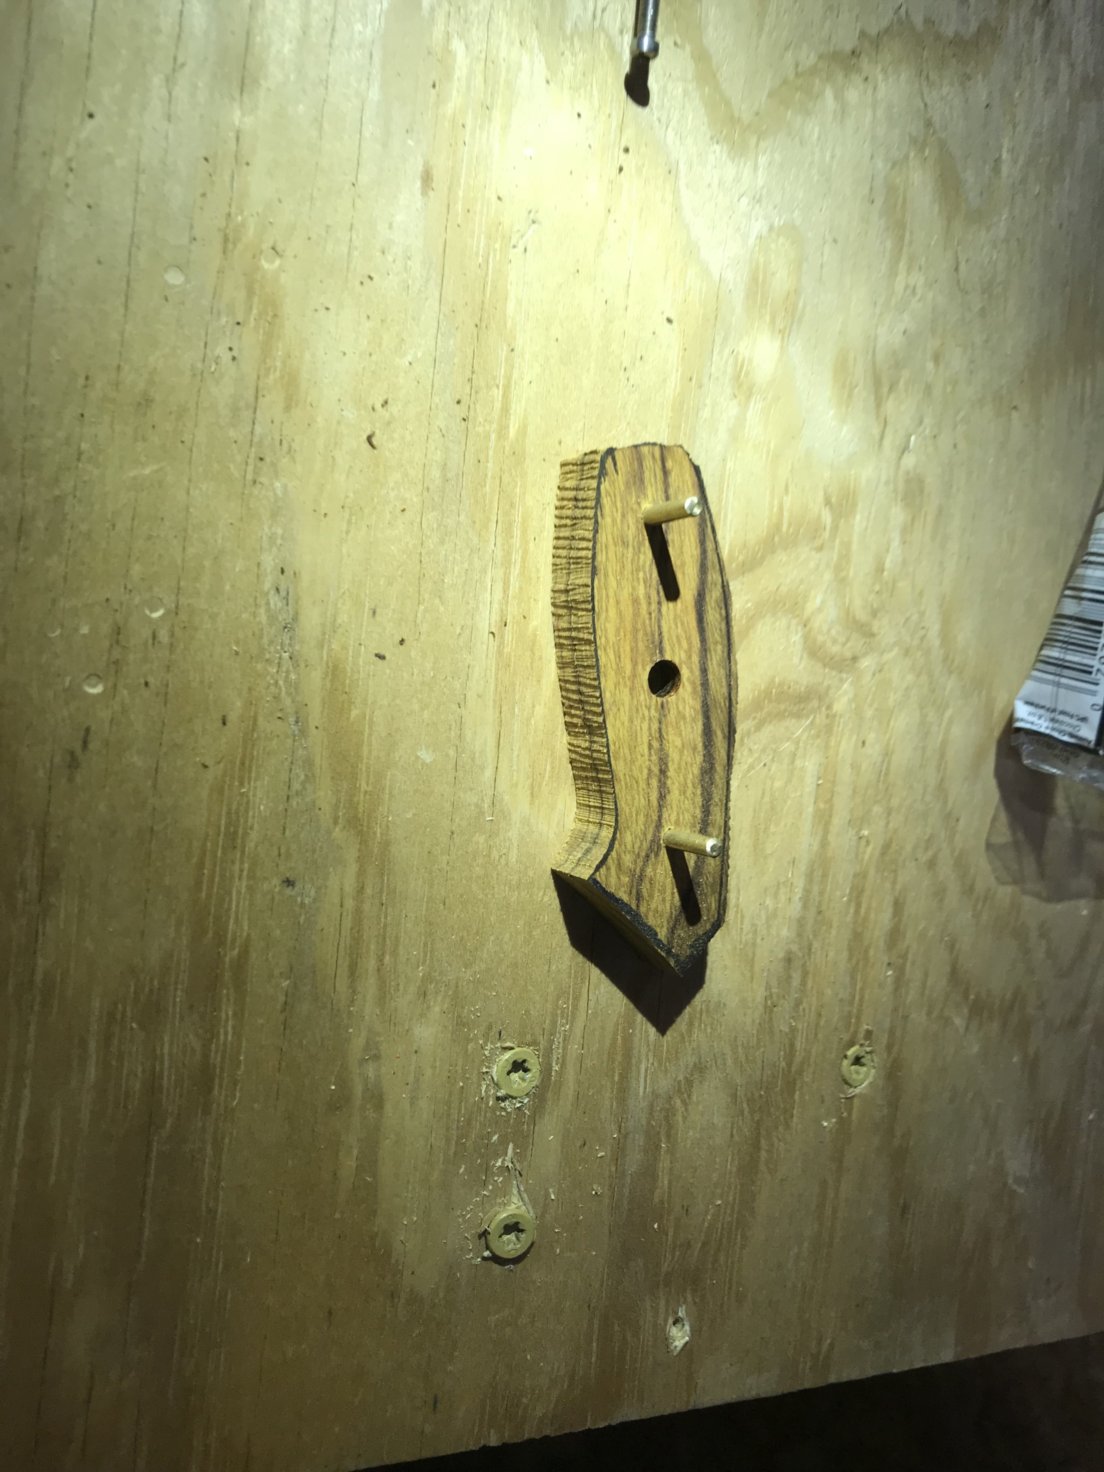
    Here is the photo after a bandsaw, we cut to the OUTSIDE of the marking. So we can grind/sand down to be flush with the steel.

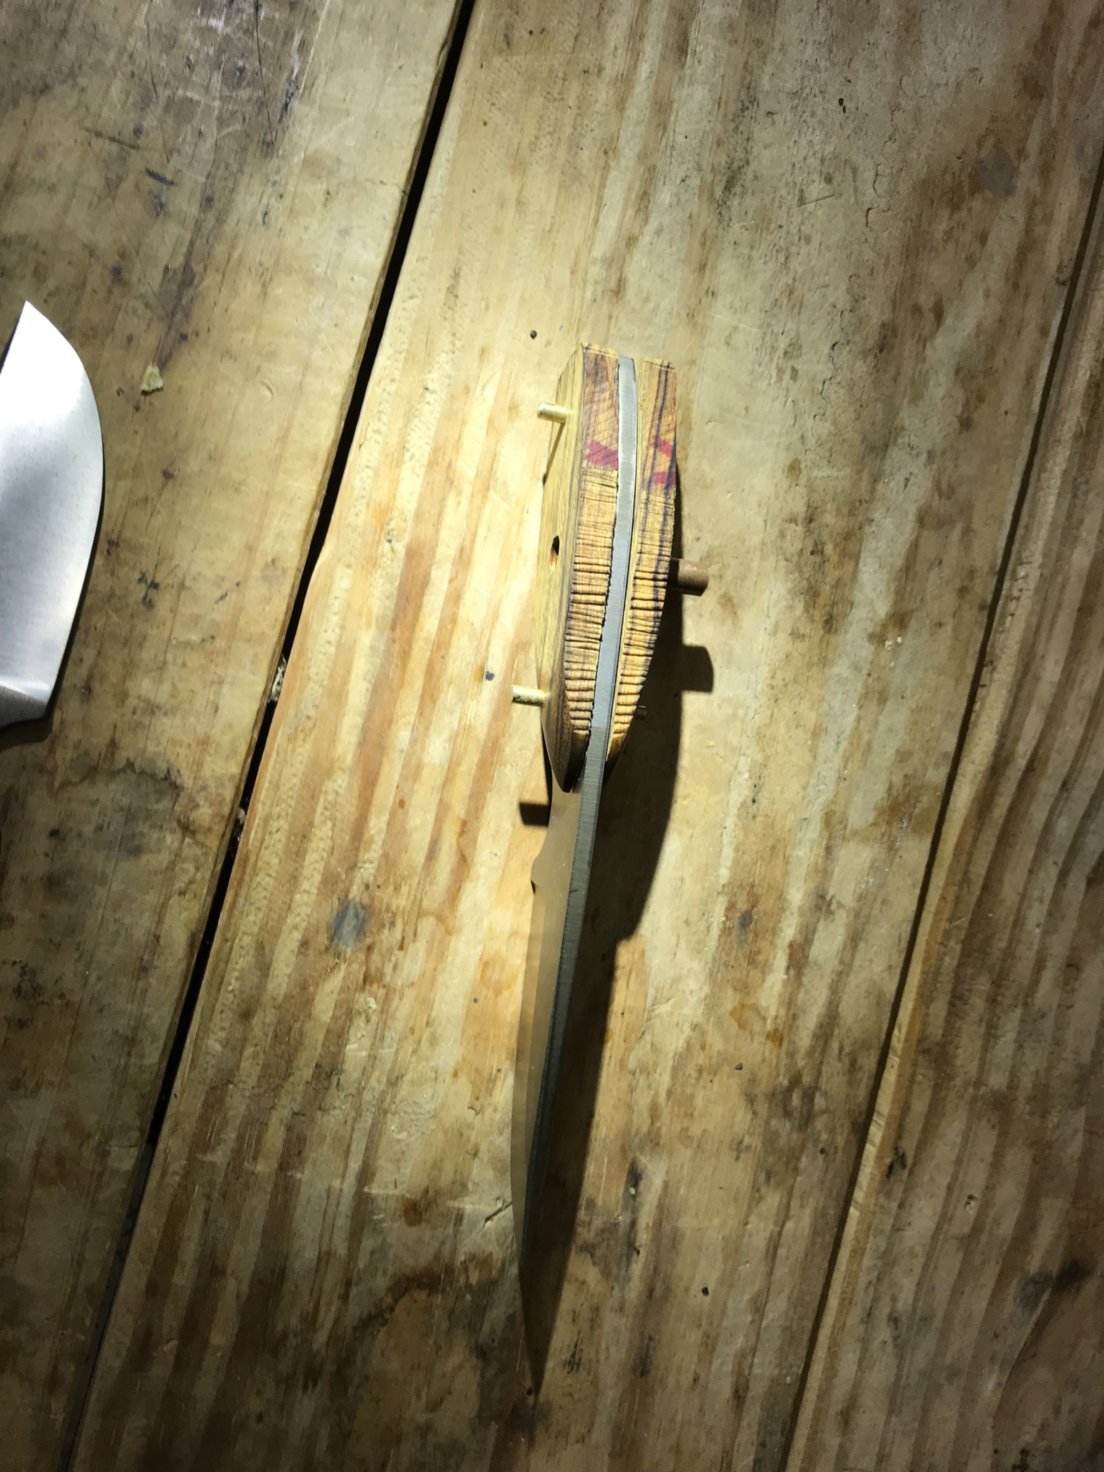
    First night, we worked hard to get it ready for the epoxy. Using a q-tip to clean along the edge. We also sanded to perfection the part we wouldn’t be able to sand w/o marring the blade (think front of handle area).


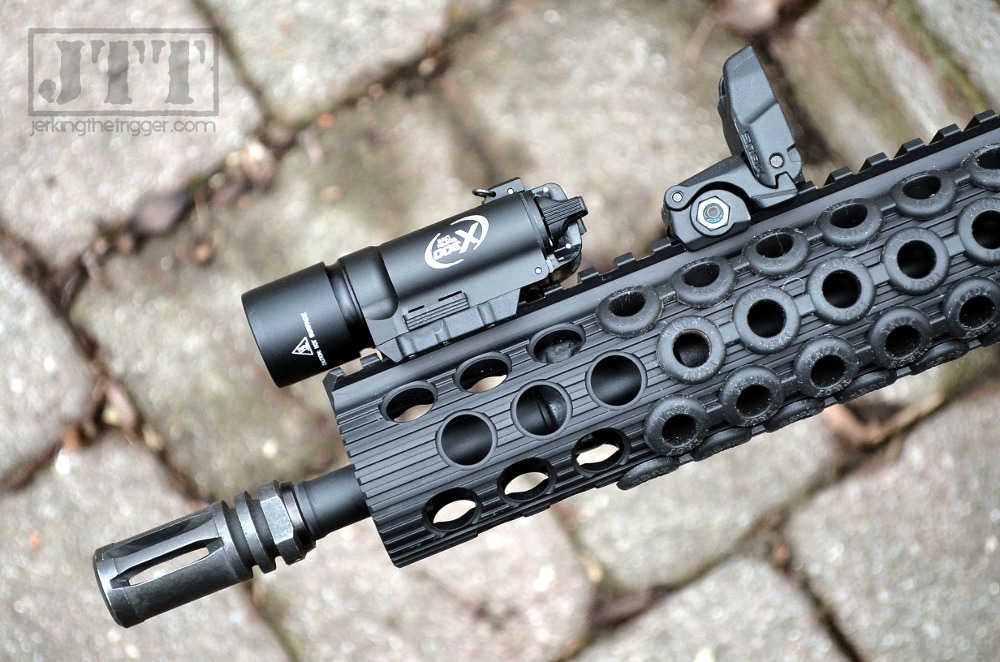
  • Selecting an AR15 weapon mounted light

    Now, I know what you are thinking, keep the “mall ninja” stuff off my AR15!  I agree. But, there is a time & a place to have a flashlight on your AR15 for proper threat identification & illumination (NOT to blind them and NOT to disoriented the attacker). Once the treat is properly identified, then corrective action can be taken 😉

    Having a light on a long-gun IS a requirement because you can not hold, sight and fire with one hand; like a handgun in the Harries Technique.


    MY REQUIREMENTS:

    • rugged and dependable — hey, its a self-defense tool, why bet your life on junky gear?!?
    • 1st I do NOT want light “negligent discharge (ND)”, so if the light is a bit slower to activate, that is better than it flipping on while slinged or deployed or patrolling”.
    • I don’t want the “profile” to stick out and bump/bang/snag on everything.
    • It’d be nice if the light didn’t get a lot of muzzle flash and thus significantly impact the lights effectiveness from getting “soiled” by carbon build-up.
    • not too heavy and not too bulky.
    • somewhat consistent with my other long-gun light system.
    • possible future Night Vision, thus the ability to throw IR (Infra-red) really helps night vision
    • I want to be able to run the ar15 the same way I have trained with thousands of repetitions and not unset/upset my muscle memory for a light (thus, the light can’t be in the way and not too far forward that I forget and I have to move my hand later to turn the light ON).
    • Clear/not get in the way of MBUS (backup iron sights).  12 oclock seems ideal, if it clears optic & mbus. Otherwise 3pm for a right handed shooter means the field of view is not impacted by the light on the left side of the rifle (using your support eye, you don’t want a bunch of prime view blocked by a piece of hardware.
    • Possible/desired standardization on all long-guns. Quick move the light to a different long-gun, that has basically the same mounting system.
    • Not get in the way of a sling (thus a 6 oclock light mount…is going to get extra stress from a 6 oclock sling-mount


    Streamlight TLR1-HL.

    PROS

    1. 800 lums
    2. small & rugged
    3. turn light on from support-side or primary side (left or right handed).
    4. Mount just in front of MBUS (backup iron sights)
    5. use on a handgun if needed
    6. momentary light ON OR stay-on option.

    CONS

    • The retention screw MAY come loose after time without proper lock-tight or thread-mate.


    If you are a surefire fan, you may consider getting “ears to protect” the on/off switch so you don’t ND the light!

    http://www.unitytactical.com/shop/exo-surefire-x-series/


    Option2:

    InForce WX-05-2 InForce, Mlx, Multi Function Weapon Mounted Light, 700 Lumens, Gen 2, White/Infrared LED, black

    PROS

    • I like the low profile and ruggedness
    • IR for night vision (IF you buy the correct version).
    • 700 lums

    CONS

    • Lower than competing LUMs
    • The slant on/off could be a con and also could be a pro IMO. After working with it, I believe the slant is a big pro!

    Recommended rail/slant:


    Another option is a traditional light combined with this with magpul’s light mount.

    This mount works on nearly anything and everything, even if you don’t have a rail, you can put screws into your plastic handgaurd.

    Option3

    Streamlight ProTac Railmount 2L Dedicated Fixed-Mount Long Gun Light

    streamlight dedicated weapon mounted protac. I’m currently experimenting with this one on my sig516.

    I like that it comes with a tail-cap OR a pressure tape. I think unscrewing the tail, so you don’t ND the light unless/until you need it at night might work.  If its in your home and its your grab long-gun (after you have a lull from using your handgun that is ON YOU), then it might make sense to have it “ready to go”.


    PROS

    • Very similar to my duel-fuel protac for my EDC.  CR123…great.  AA battery…great (very flexible).

    CONS

    • pokes out more than I’d like that can snag on gear etc.

    For my preference, with this setup…my support hand is a bit too close to the mag-well for my “muscle memory”

    upsize to the 1000 lums streamlight!


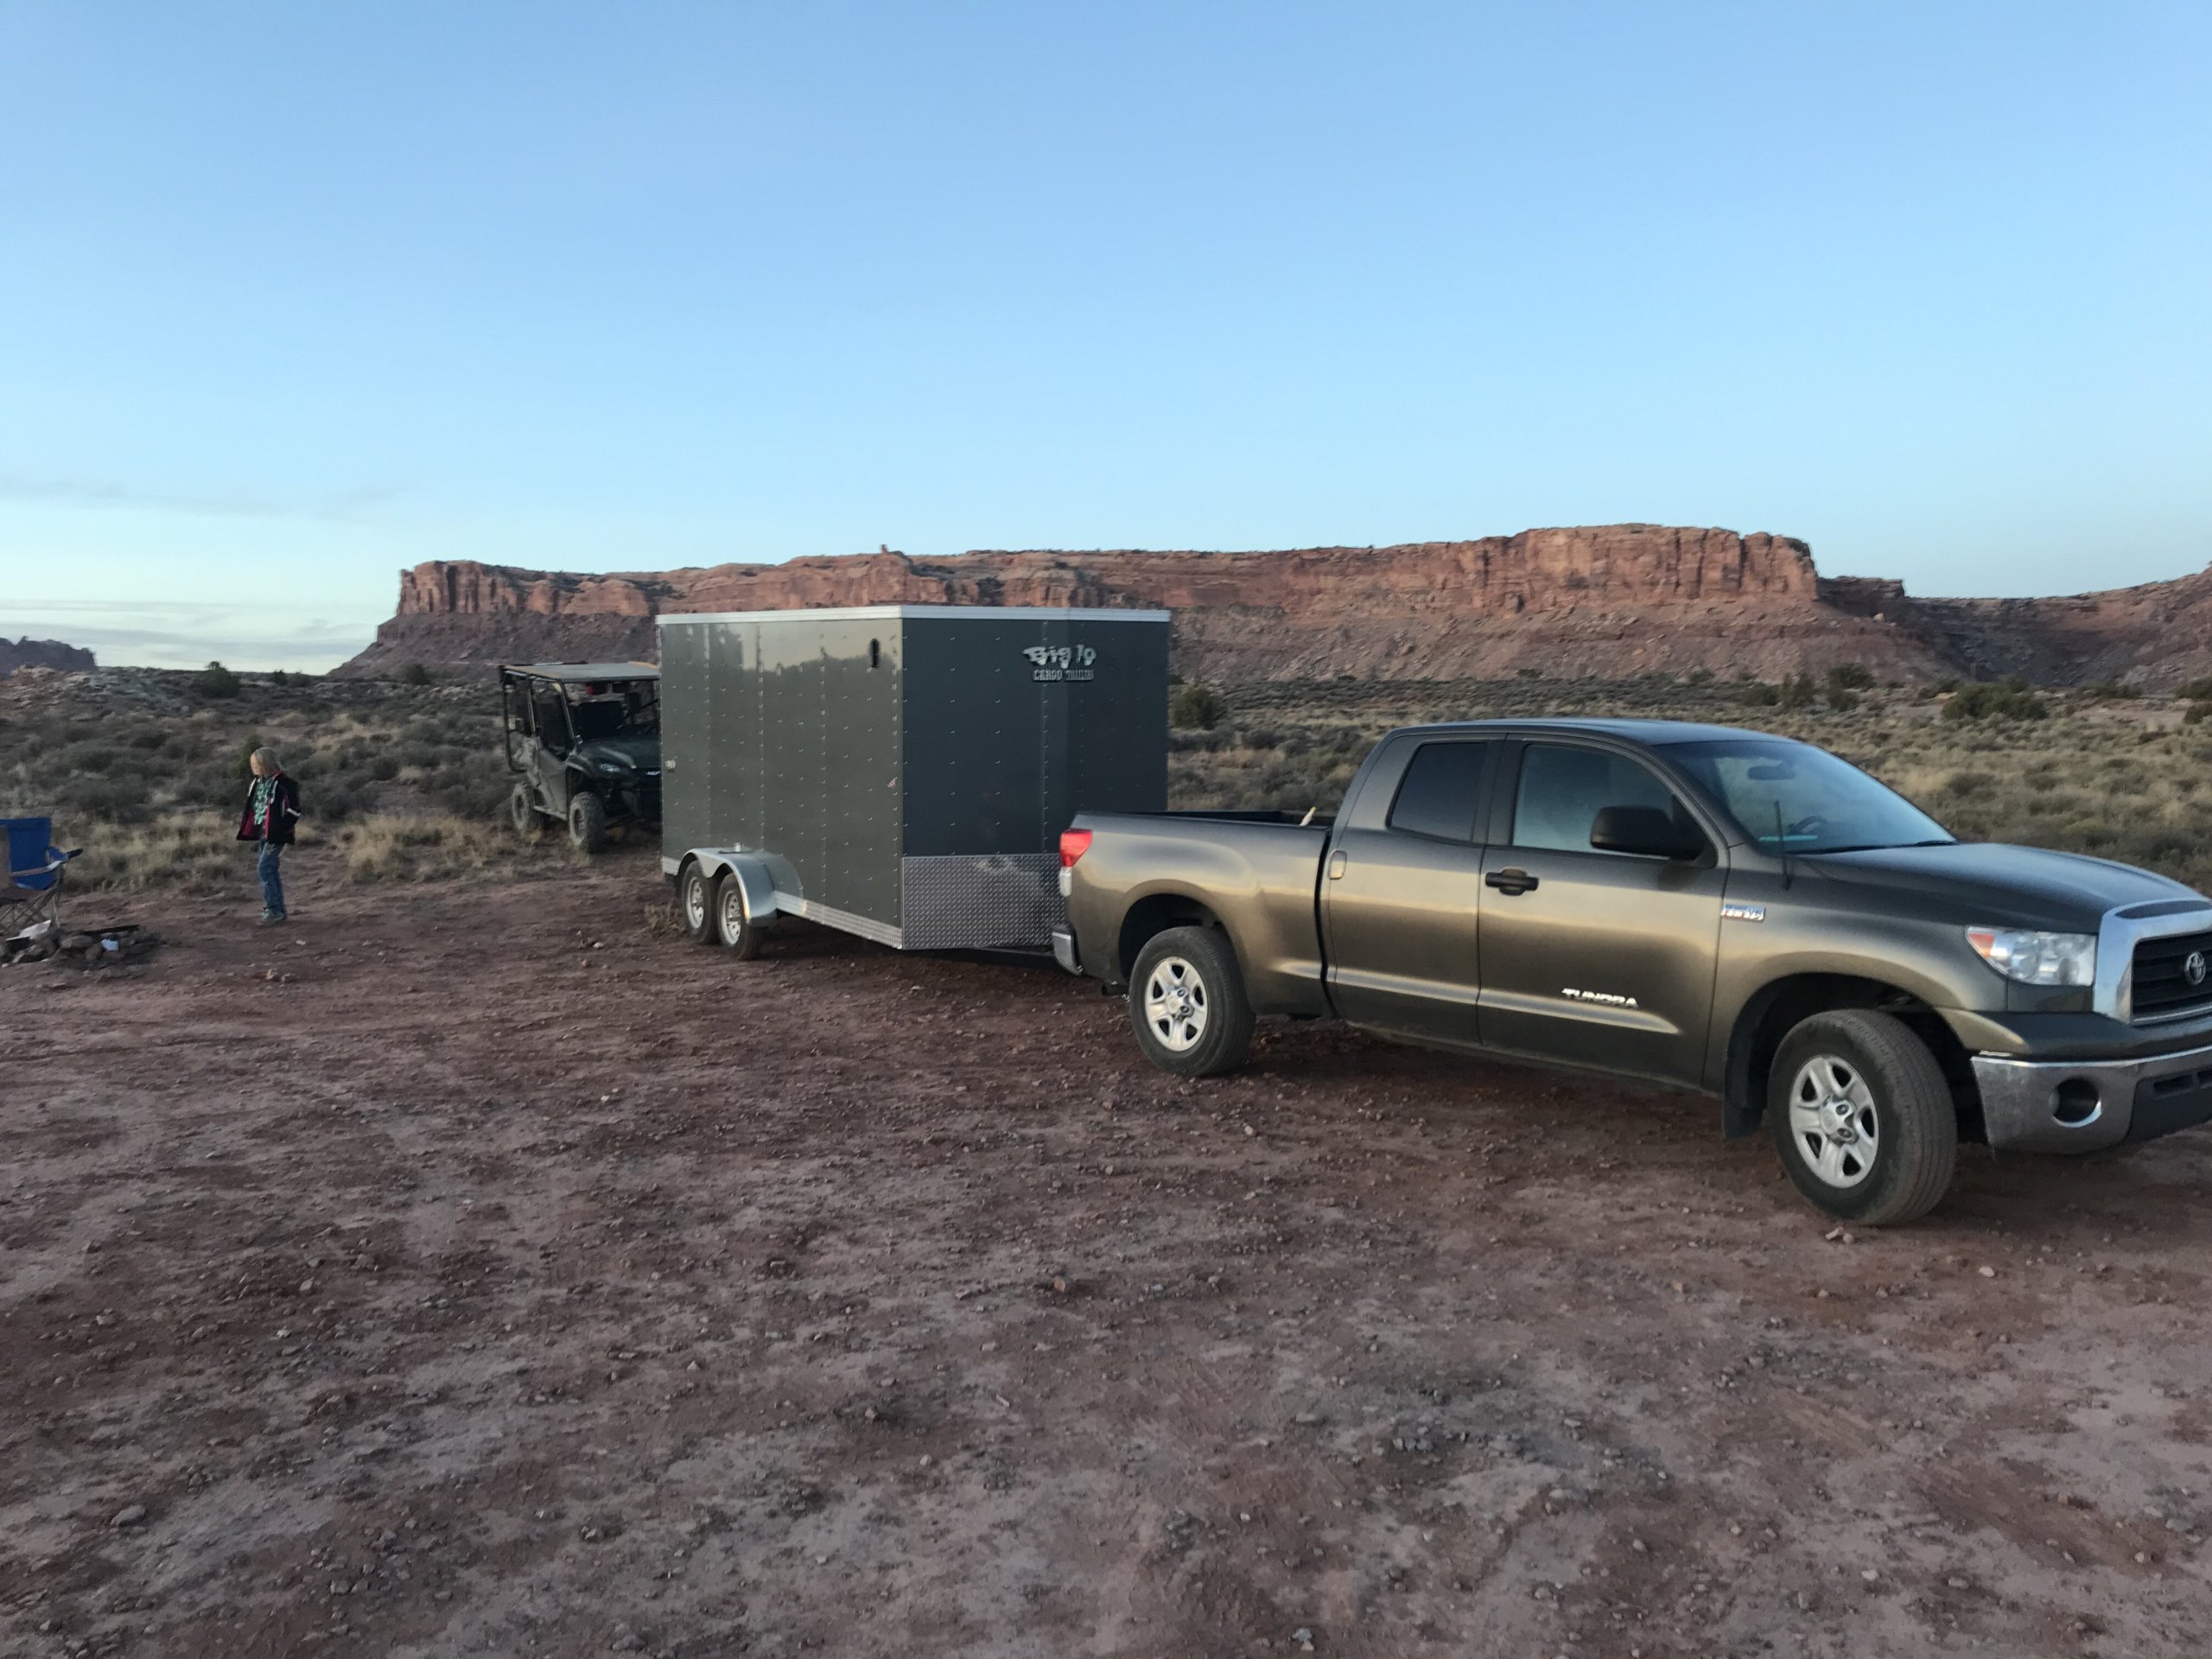
  • Preparedness Trailer

    Being able to hook-up and evac with “most critical” gear is….priceless.

    REQUIREMENTS: Multi-use trailer for every day use & emergency response. This is NOT a convert to RV and NOT convert to tiny-house.

    MULTI-USE:

    1. Store Motor sports
    2. Store evac gear
    3. Help folks move, including self.
    4. storage shed with wheels.
    5. hook-up and evac if needed.


    March 2018, added a 30′ motorhome!!!


    I will be adding to this blog as I build-out my prepper trailer.


    Bed-liner Trailer Ramp Project

    EQUIPMENT LIST:

    USC Defender Pro Epoxy Truck Bed Liner Kit

    OR  Rust-Oleum Professional Grade Truck Bed Liner Kit

    Anti-slip Paint Additive

    air compressor

    Painters tape


    A nice surprise, the trailer came with a nice-thick primer. After doing research, I determined the primer would need to come off.  I spent an hour pressure washing the ramp!


    LESSONS LEARNED:

    roll bedliner on, one gallon barely did the ramp sprayed on. Rolled on, I had enough for the entire trailer, ramp and custom fab rack (hanging from rafters) (see UTV article).


    Bug Out Trailer Shelves

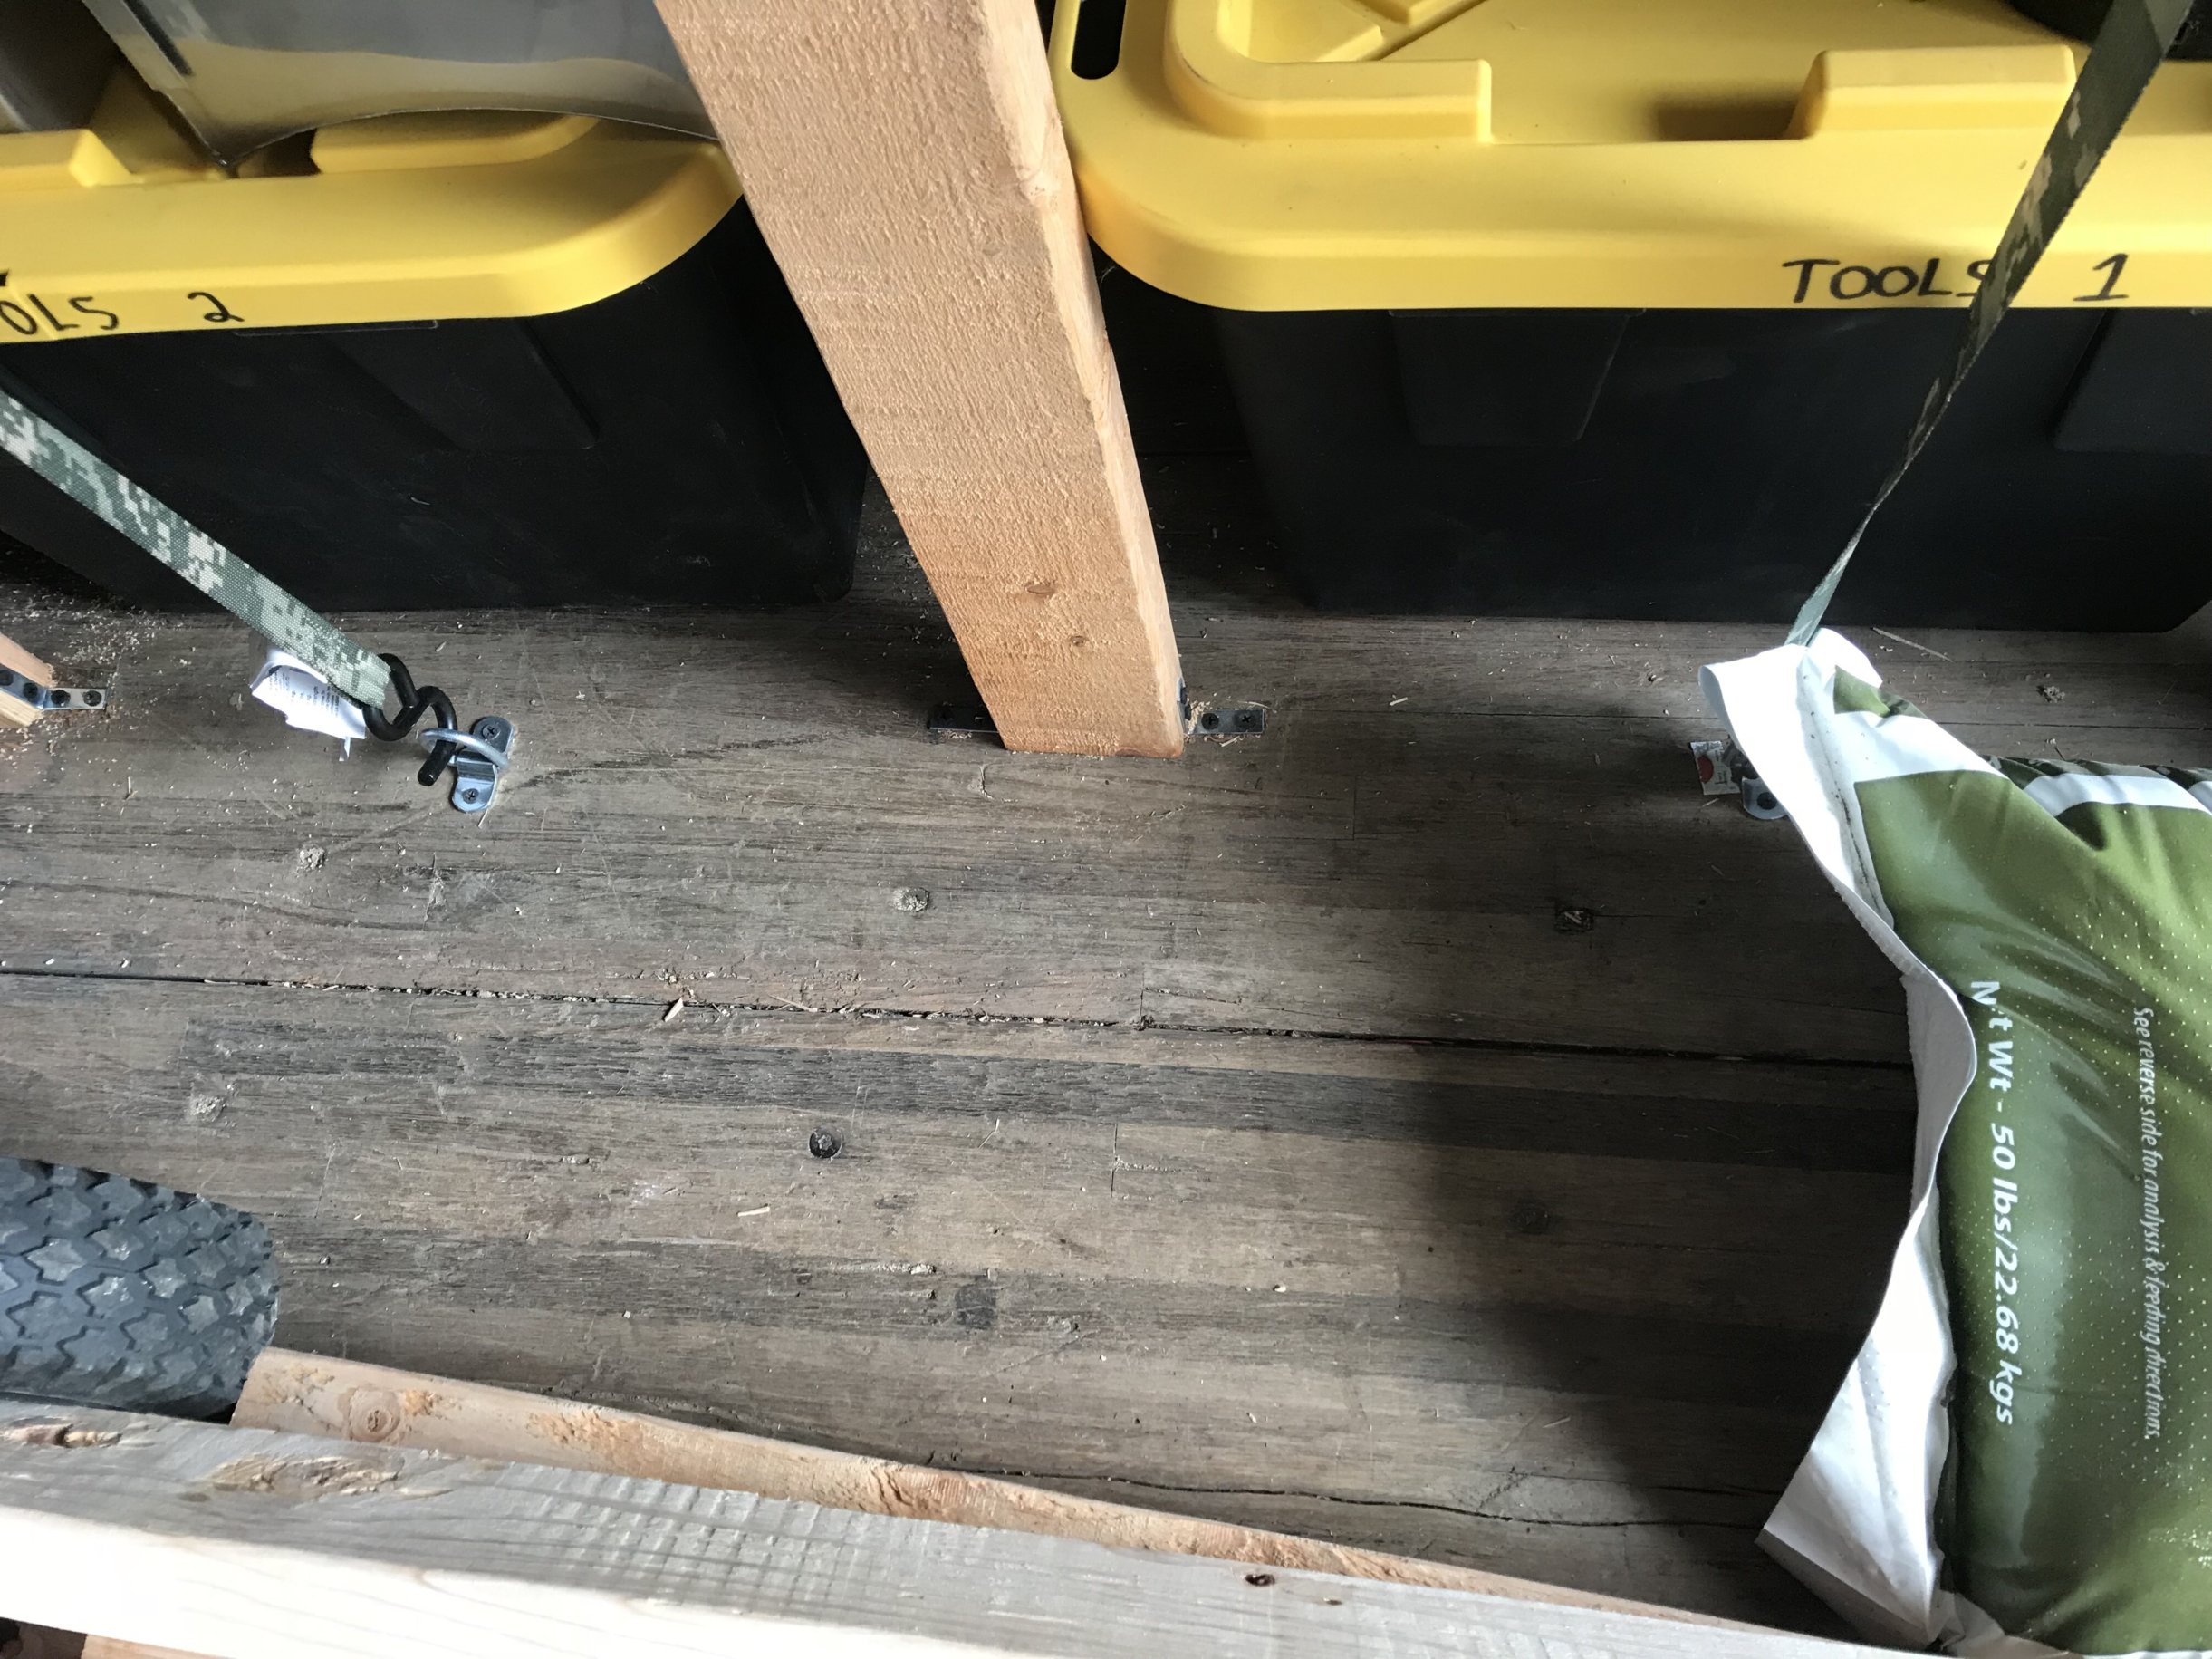
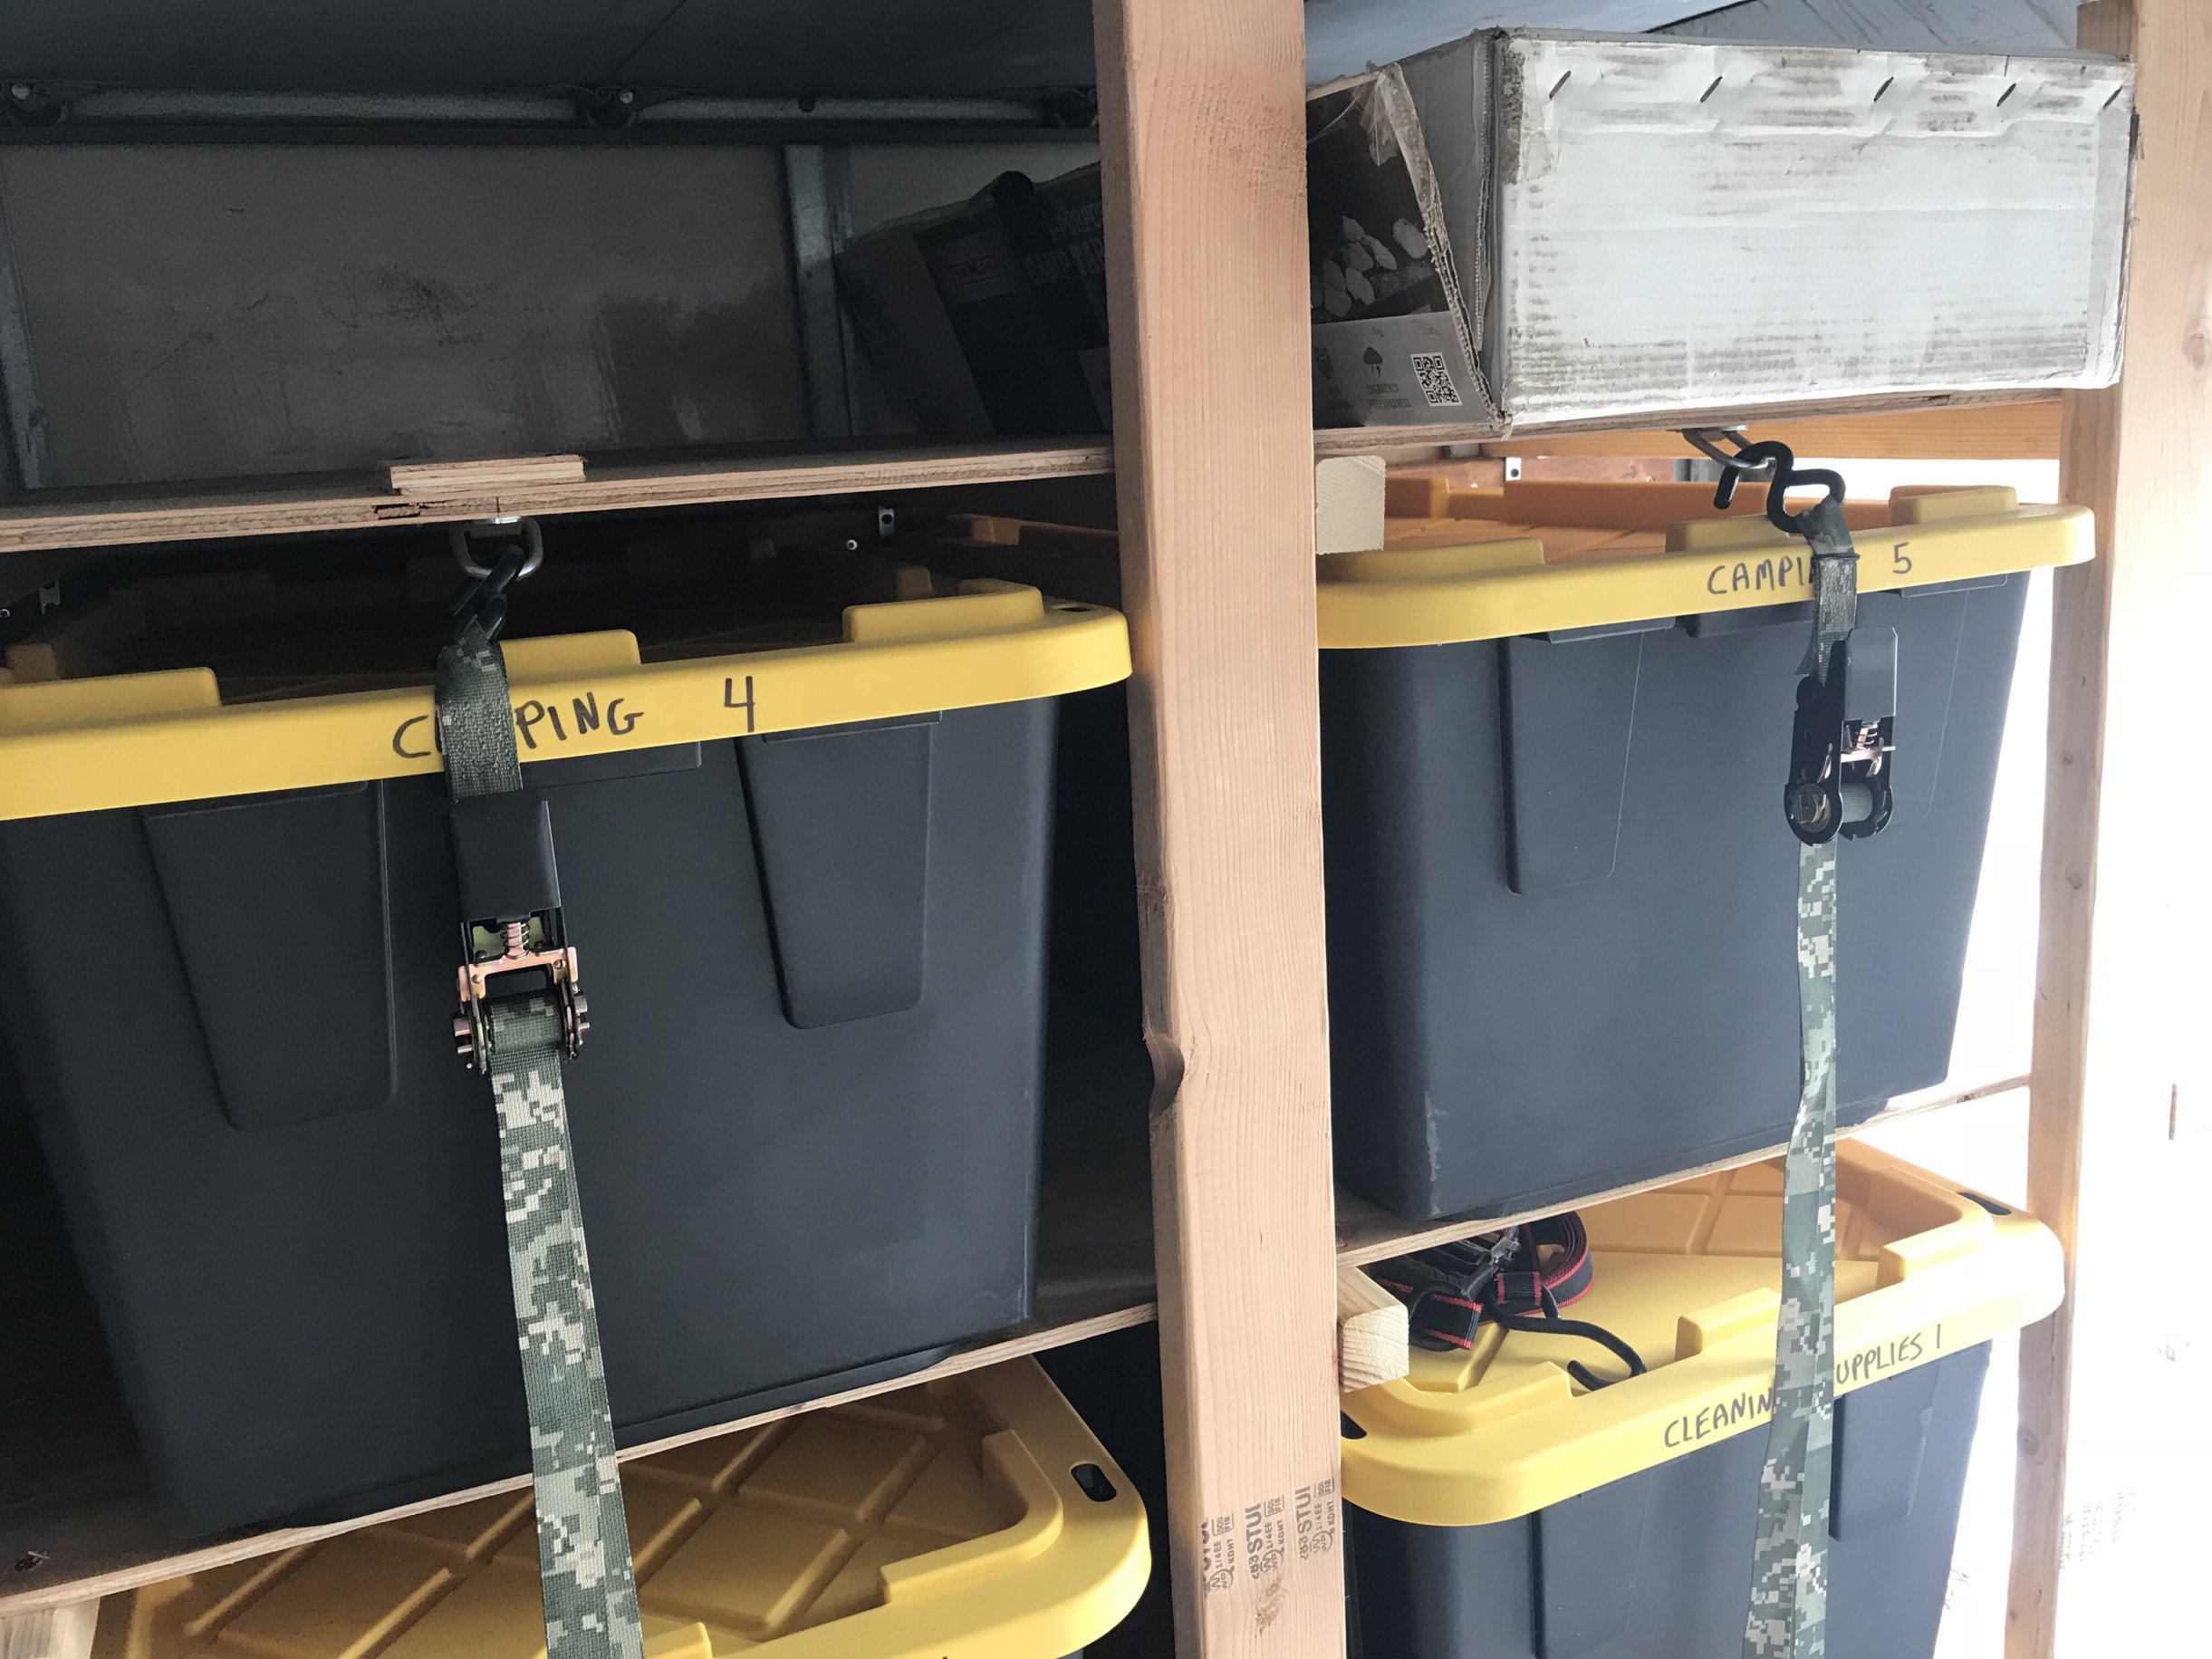
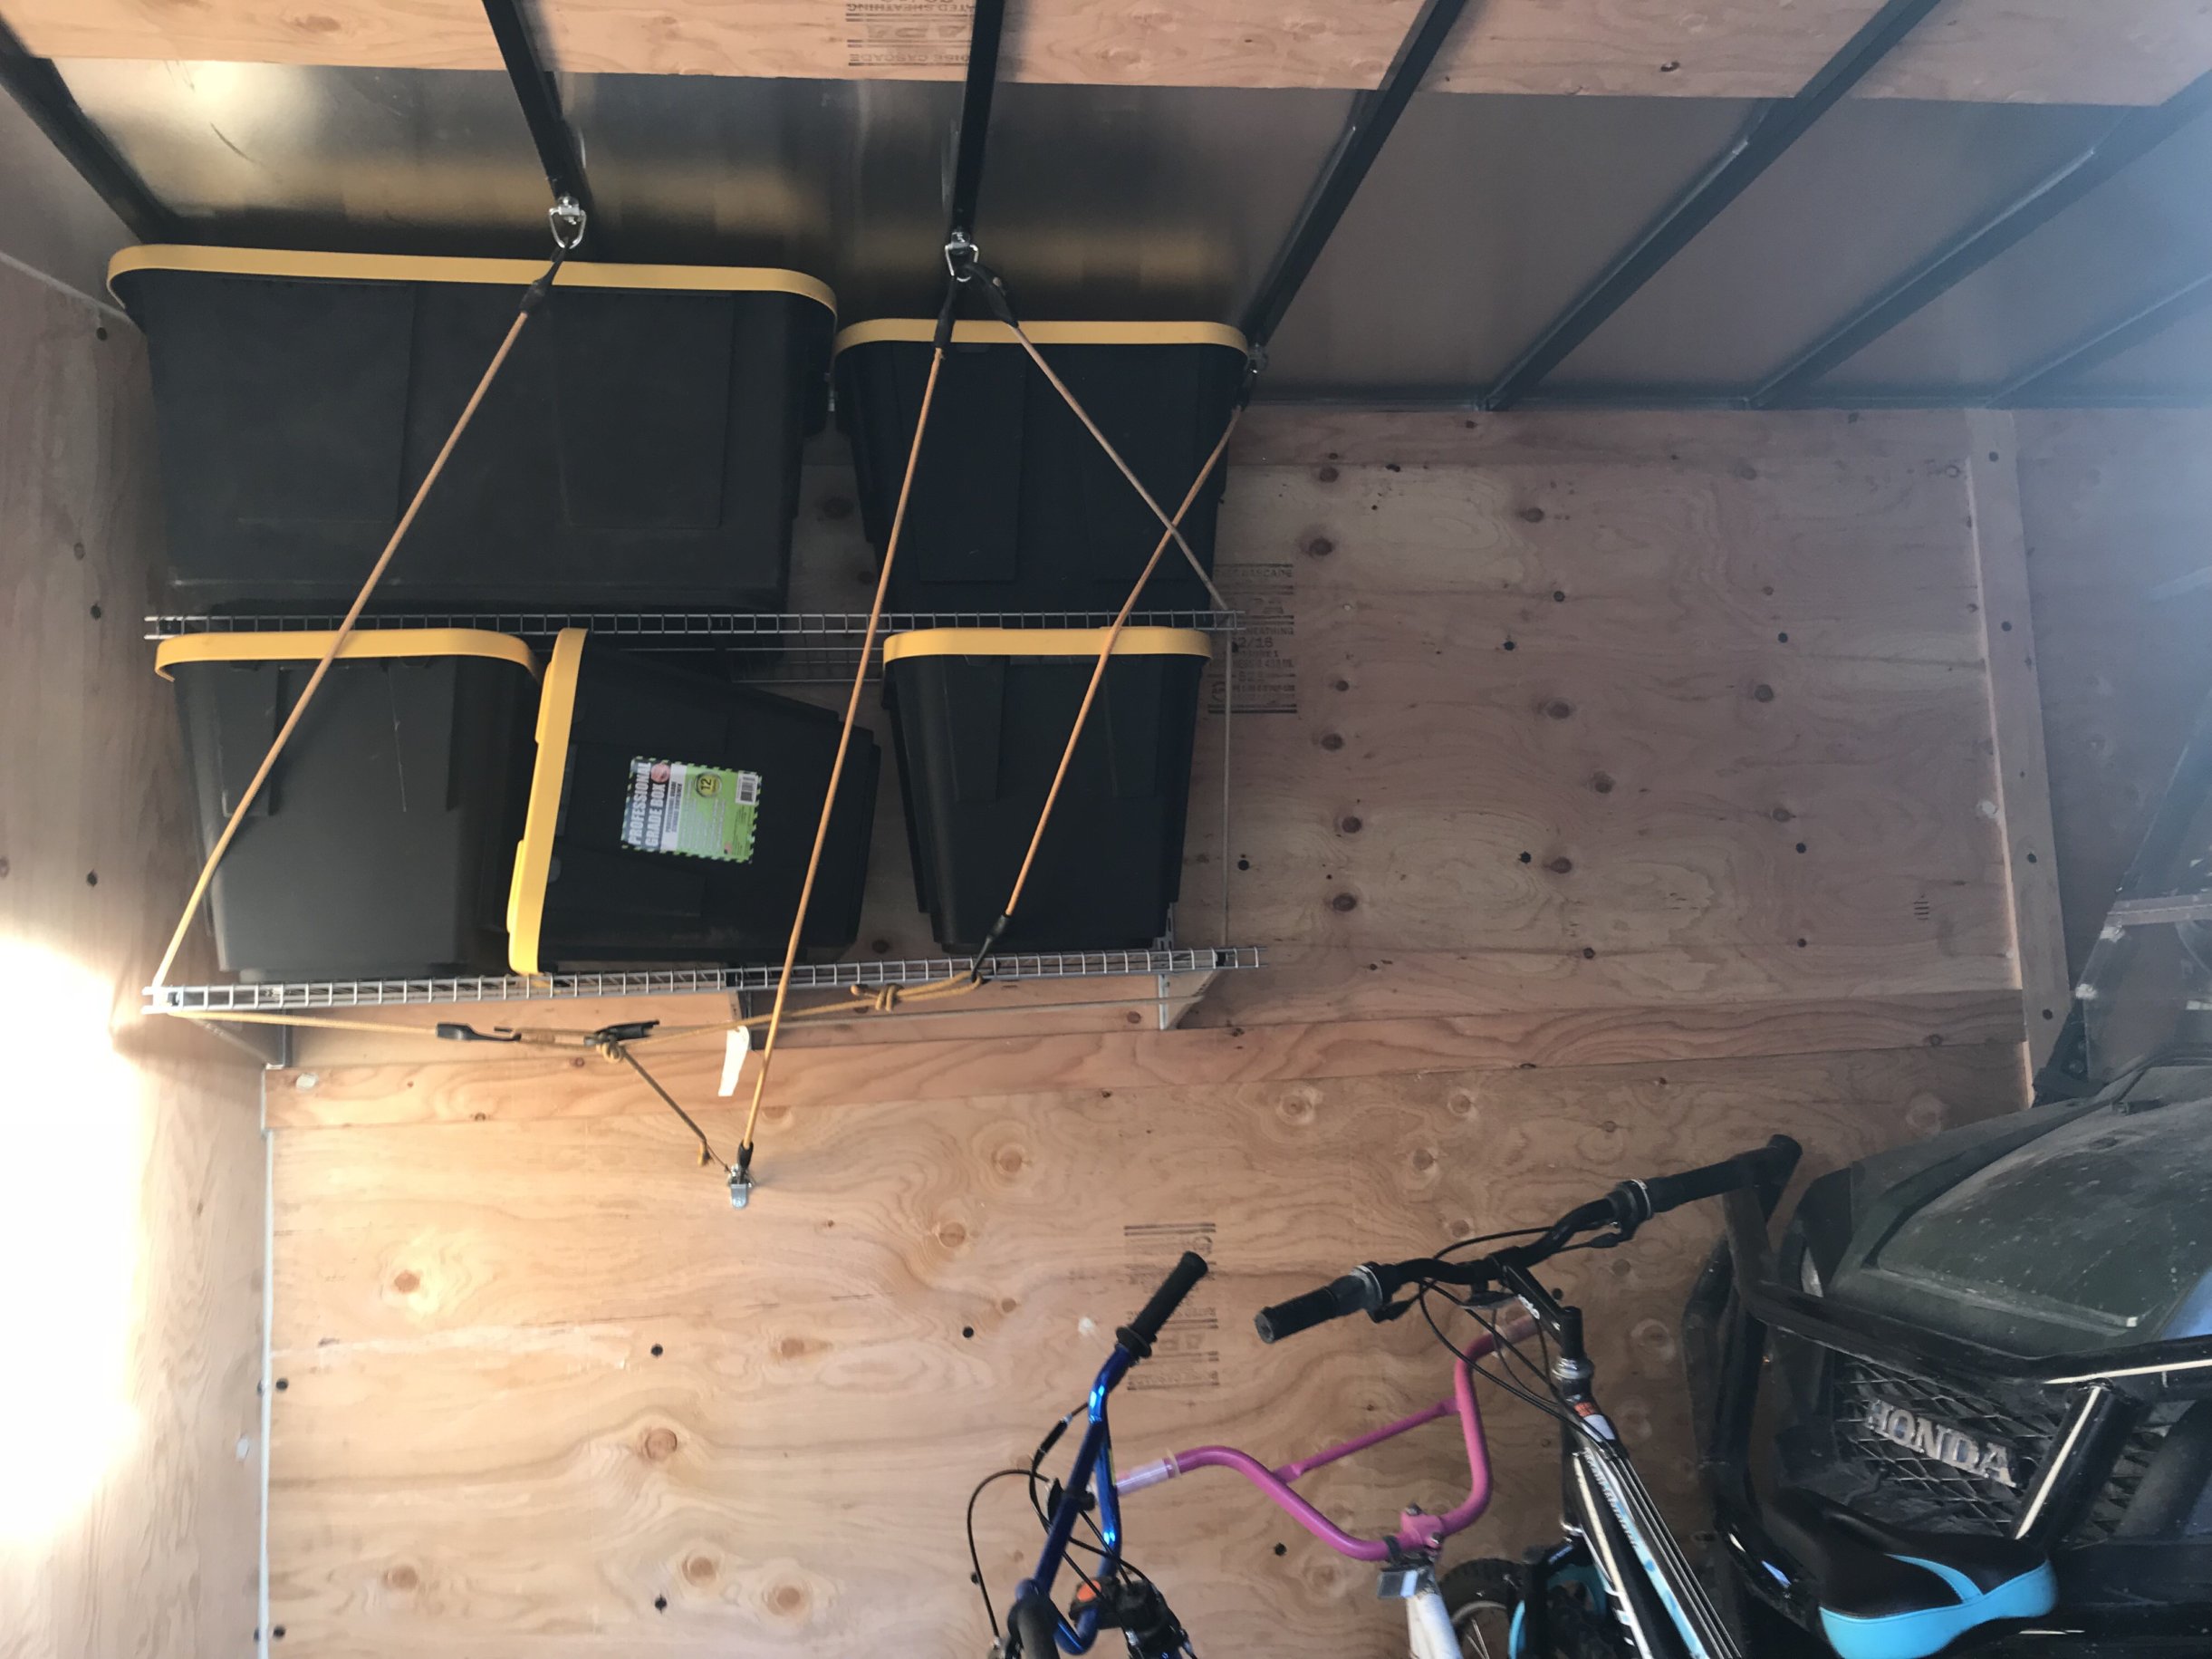
    Please note with these shelves, d-rings on top and bottom with ratchet or cam-straps. ALSO, for home-made shelves, ENSURE you pre-drill or you will split the wood!!

    ply wood is recommended over particle board for strength & weight.  Use of hardware is a good idea, adds strength…w/o the weight of all steel construction.


    For my trailer, I want to be able to remove the shelves quickly for motorsports and hauling large items, so I went with rubbermade/lowes shelves.

    Please note d-rings with self-tapping screws and bungee cords. These shelves are rated at 350 lbs. I can also use the d-ring for LED lanterns, drying clothes, helmet hooks etc.

    Here is my setup:


    I also built a work-bench, but its high enough to not get in the way of motorsports…and I’m too tall, so the workbench works. I plan to do a battery bank under the workbench. I used cardboard to fit the 3/8 plywood and predrilled ALL screw holes so as to not split the wood.


    SPARE TIRE

    I mounted this on the inside, a bit harder to get to, but on those tight turns, it is worth having inside the frame.


    ATV HITCH

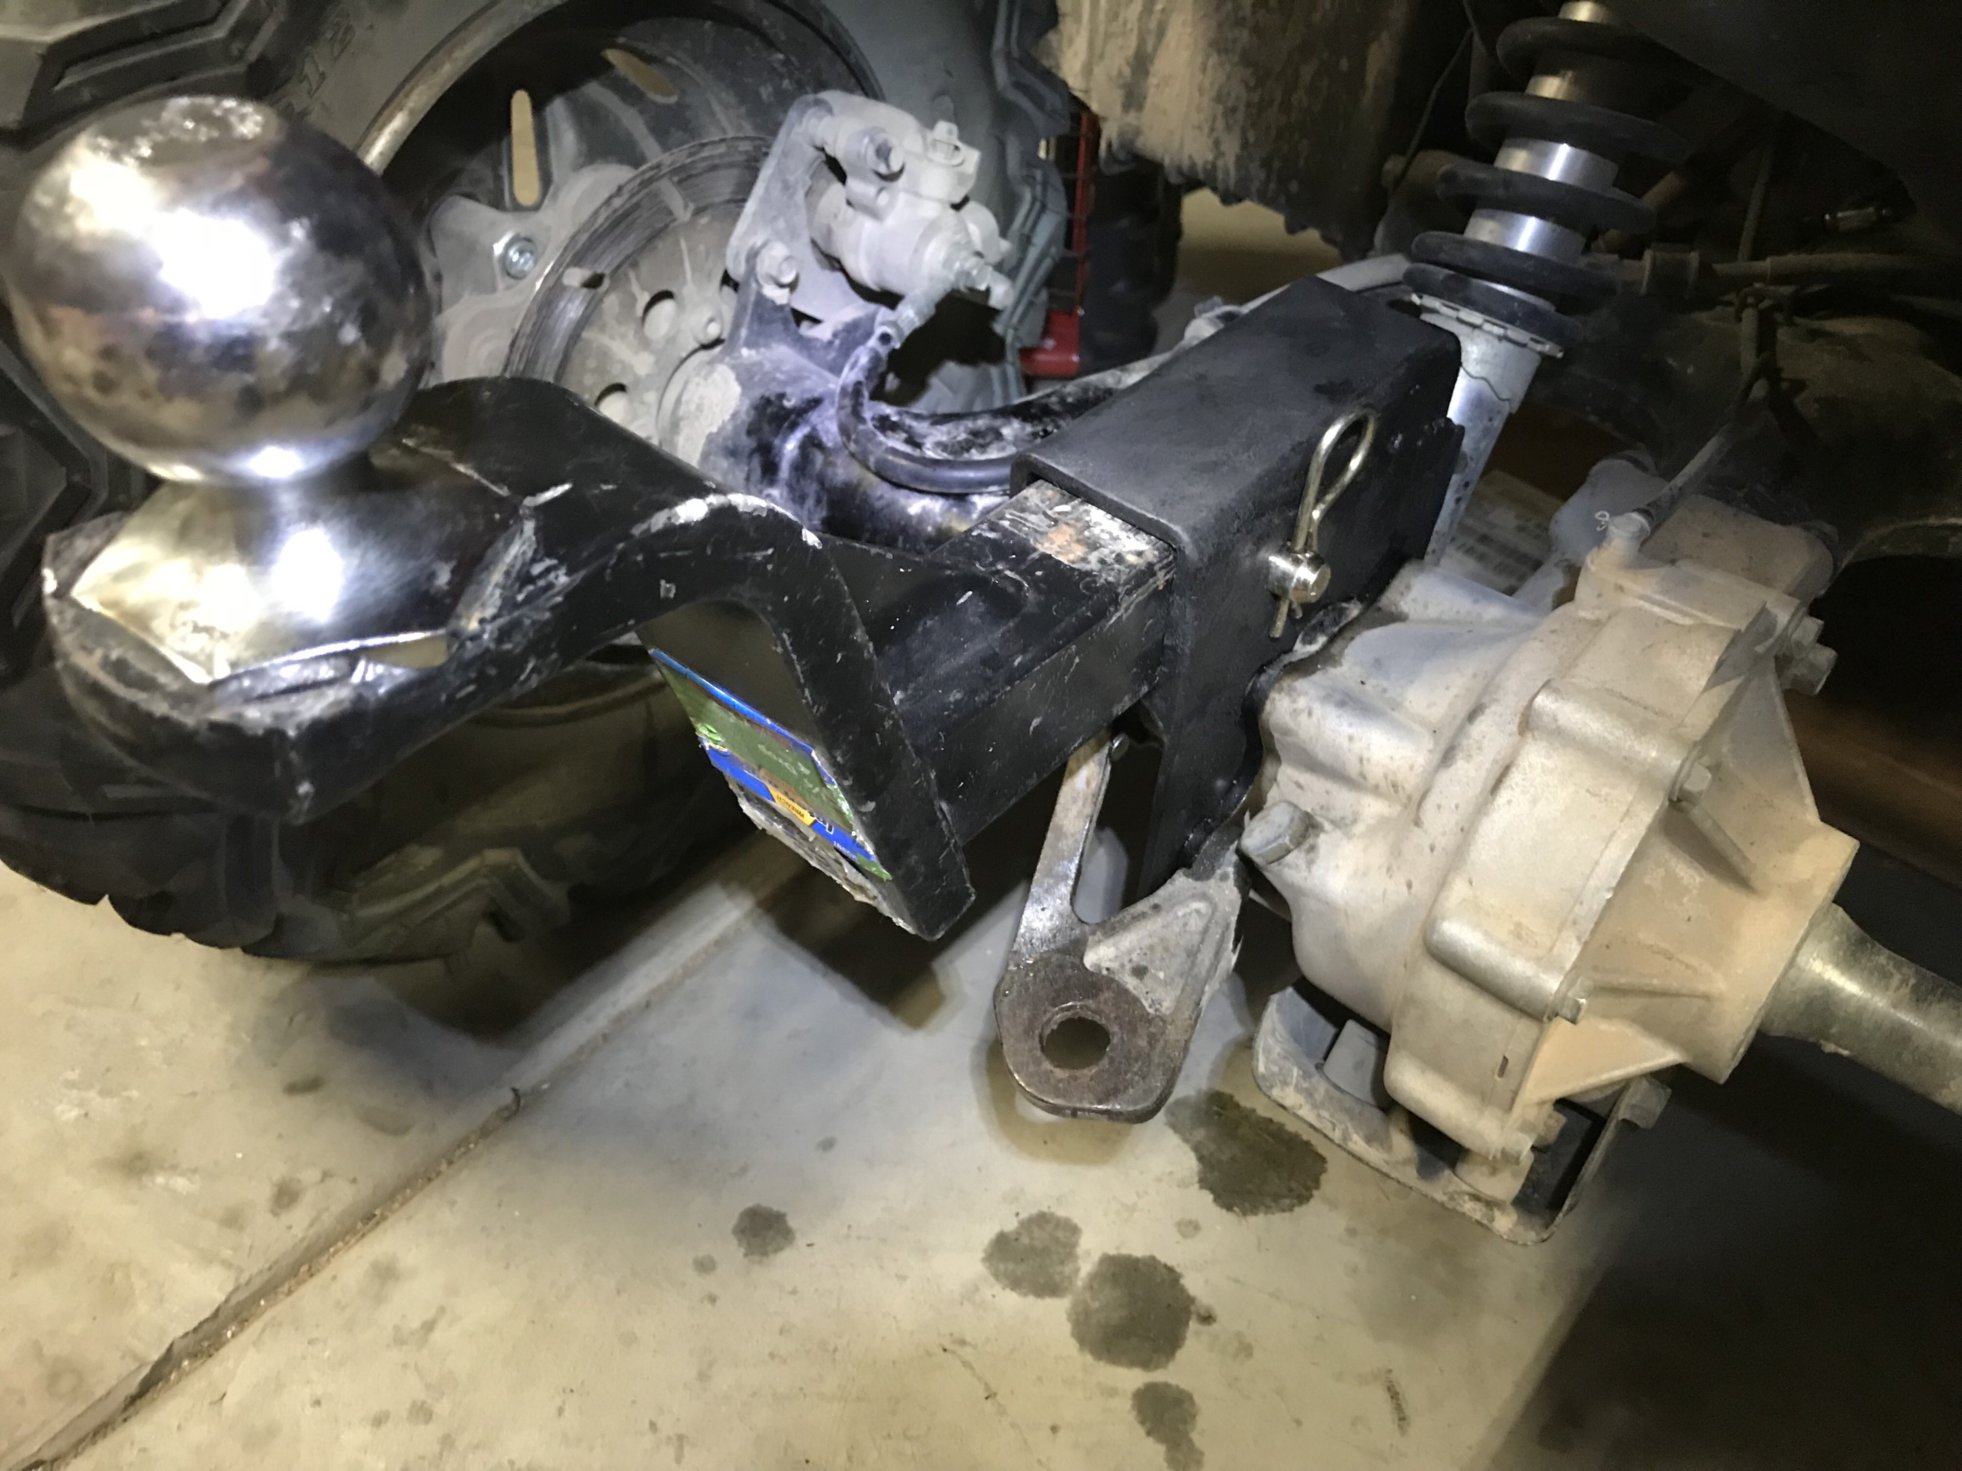
    I was going to use my UTV, but its too big to properly backup the trailer, with the street facing ramp, I need my smaller ATV to get the trailer out of my side-yard. So, I welded this up.  I anchored into the differential with 5 bolts. I used cardboard to get it fit’d right, then I cut it out and welded it to a 2×2 receiver hitch. 

    Preparedness Trailer Evac Ideas and likely future projects


    Huge generator? Or store small generator?

    SecureIT gun cabinet? I installed it, but then decided I’d rather have a workbench.

    Solar & battery bank

    Water storage, filters

    ⅔ of storage is taken up by side-by-side 

    Gas cans on outside of trailer.

    Food & a way to cook it.

    Shelter

    Sleeping bag bin

    Firestarter kits

    Tie-downs

    x Shelves

    x Hygiene – toilet.

    Action pack – of food prep & non-perishable food items.

    Weather related.

    Volcano 1 burner stove. And propane tank

    x Big buddy heater

    Ham radio -base station. And built in antenna.


    Tools – axe, mini-aircompressor, car-kit.

    Winch – come-along or hand winch

    hunting/butcher items


    Prepper Trailer v2

    Well, I lent out my trailer and it got totaled. So, here is version 2.

    I decided not to put in a work-bench, but to just use a table. This will give me more space. I hope to fit two dual-sport motorcycles and my UTV in the trailer, thus clearing out my garage for the winter.


    Today, Oct 20, 2018 I put bedliner on the trailer. More than a week ago I pressure washed it and ran a fan for 24 hours. It felt bone dry after 24 hours, but it sat in the sun for a week.

    Prep-work, just a quick painters tape around the edges. I wanted to protect the siding.

    Last time I used an egg beater, but this time I tried the purpose built mixer.

    Believe it or not, the egg beater was way better at mixing.  But once it was mixed, I used the longer mixer.  I put about 1/4 cup of “play sand” in the 1 gallon and mixed it well.  Then rolled it onto the floor of the trailer. When I got to the ramp,  I put in about 1/4 cup of sand for non-slip on the ramp. It was pretty gritty, but seemed ideal.

    After bedlining the trailer and tailgate.  I had about 1″ of bedliner left in the 1 gallon bucket. I also had some brackets for my UTV, that I forgot to do last time, so I brushed it on there and hung them up to dry for a while. After a few hours I put them in my “oven” for about 20 minutes with the door open so it didn’t get too hot.

    Again, rolling the bedliner is much much better because it doesn’t take as much material and I believe you get better coverage.


    While I was at it, I re-bedlinered my pickup truck tailgate. Turned out great!

    Once it was completed. I shut the doors and it was 90 degrees inside. about 12 hours later, it was cured and hard enough to walk on. The heater shutoff, likely cuz not enough oxygen.  So, I cracked the doors and started the heater before going to bed.


    TSP Bugout trailer notes

    BOT 1 notes

    costoco yellow/black tub/totes storage. rugged & water proof, stackable.
    My local costco has them for $9 for large or two small for $10 ish

    tote of water, food, gear.

    cargo trailer – consider logo so as to not raise suspicion/or not to look transient.

    bob wells rv living – https://www.youtube.com/results?search_query=bob+wells+cheap+rv+living

    If moving, why not buy a cargo trailer and keep it, instead of renting.

    tarps for rain protection, privacy etc


    BOT 3 notes

    heater that vents out.

    https://www.toyotomiusa.com/factoryOutletStore/L-73-Toyotomi-Laser-Vented-Heater


    laser to fake bad-guys when out of country.


    HT Ham radio that can tune into FM radios.

    bug out to walmart parking lot, driveway, homedepo, near PD, @ friends house,  blm land


    antitheft – remove tires,


    Use trailer for adventures and simulate a real response.

    impact wrench, test portable air compressor. or battery powered impact wrench.

    storing valuables in “pain cans”.

    compact 12 ga:

    Midland Backpack 12 Gauge

    racks and roof storage

    https://www.amazon.com/s/ref=nb_sb_noss_1?url=search-alias%3Daps&field-keywords=trailer+latter+rack

    Pet gear, food, multi-leash.


  • UTV Honda Pioneer 1000 mods-upgrades

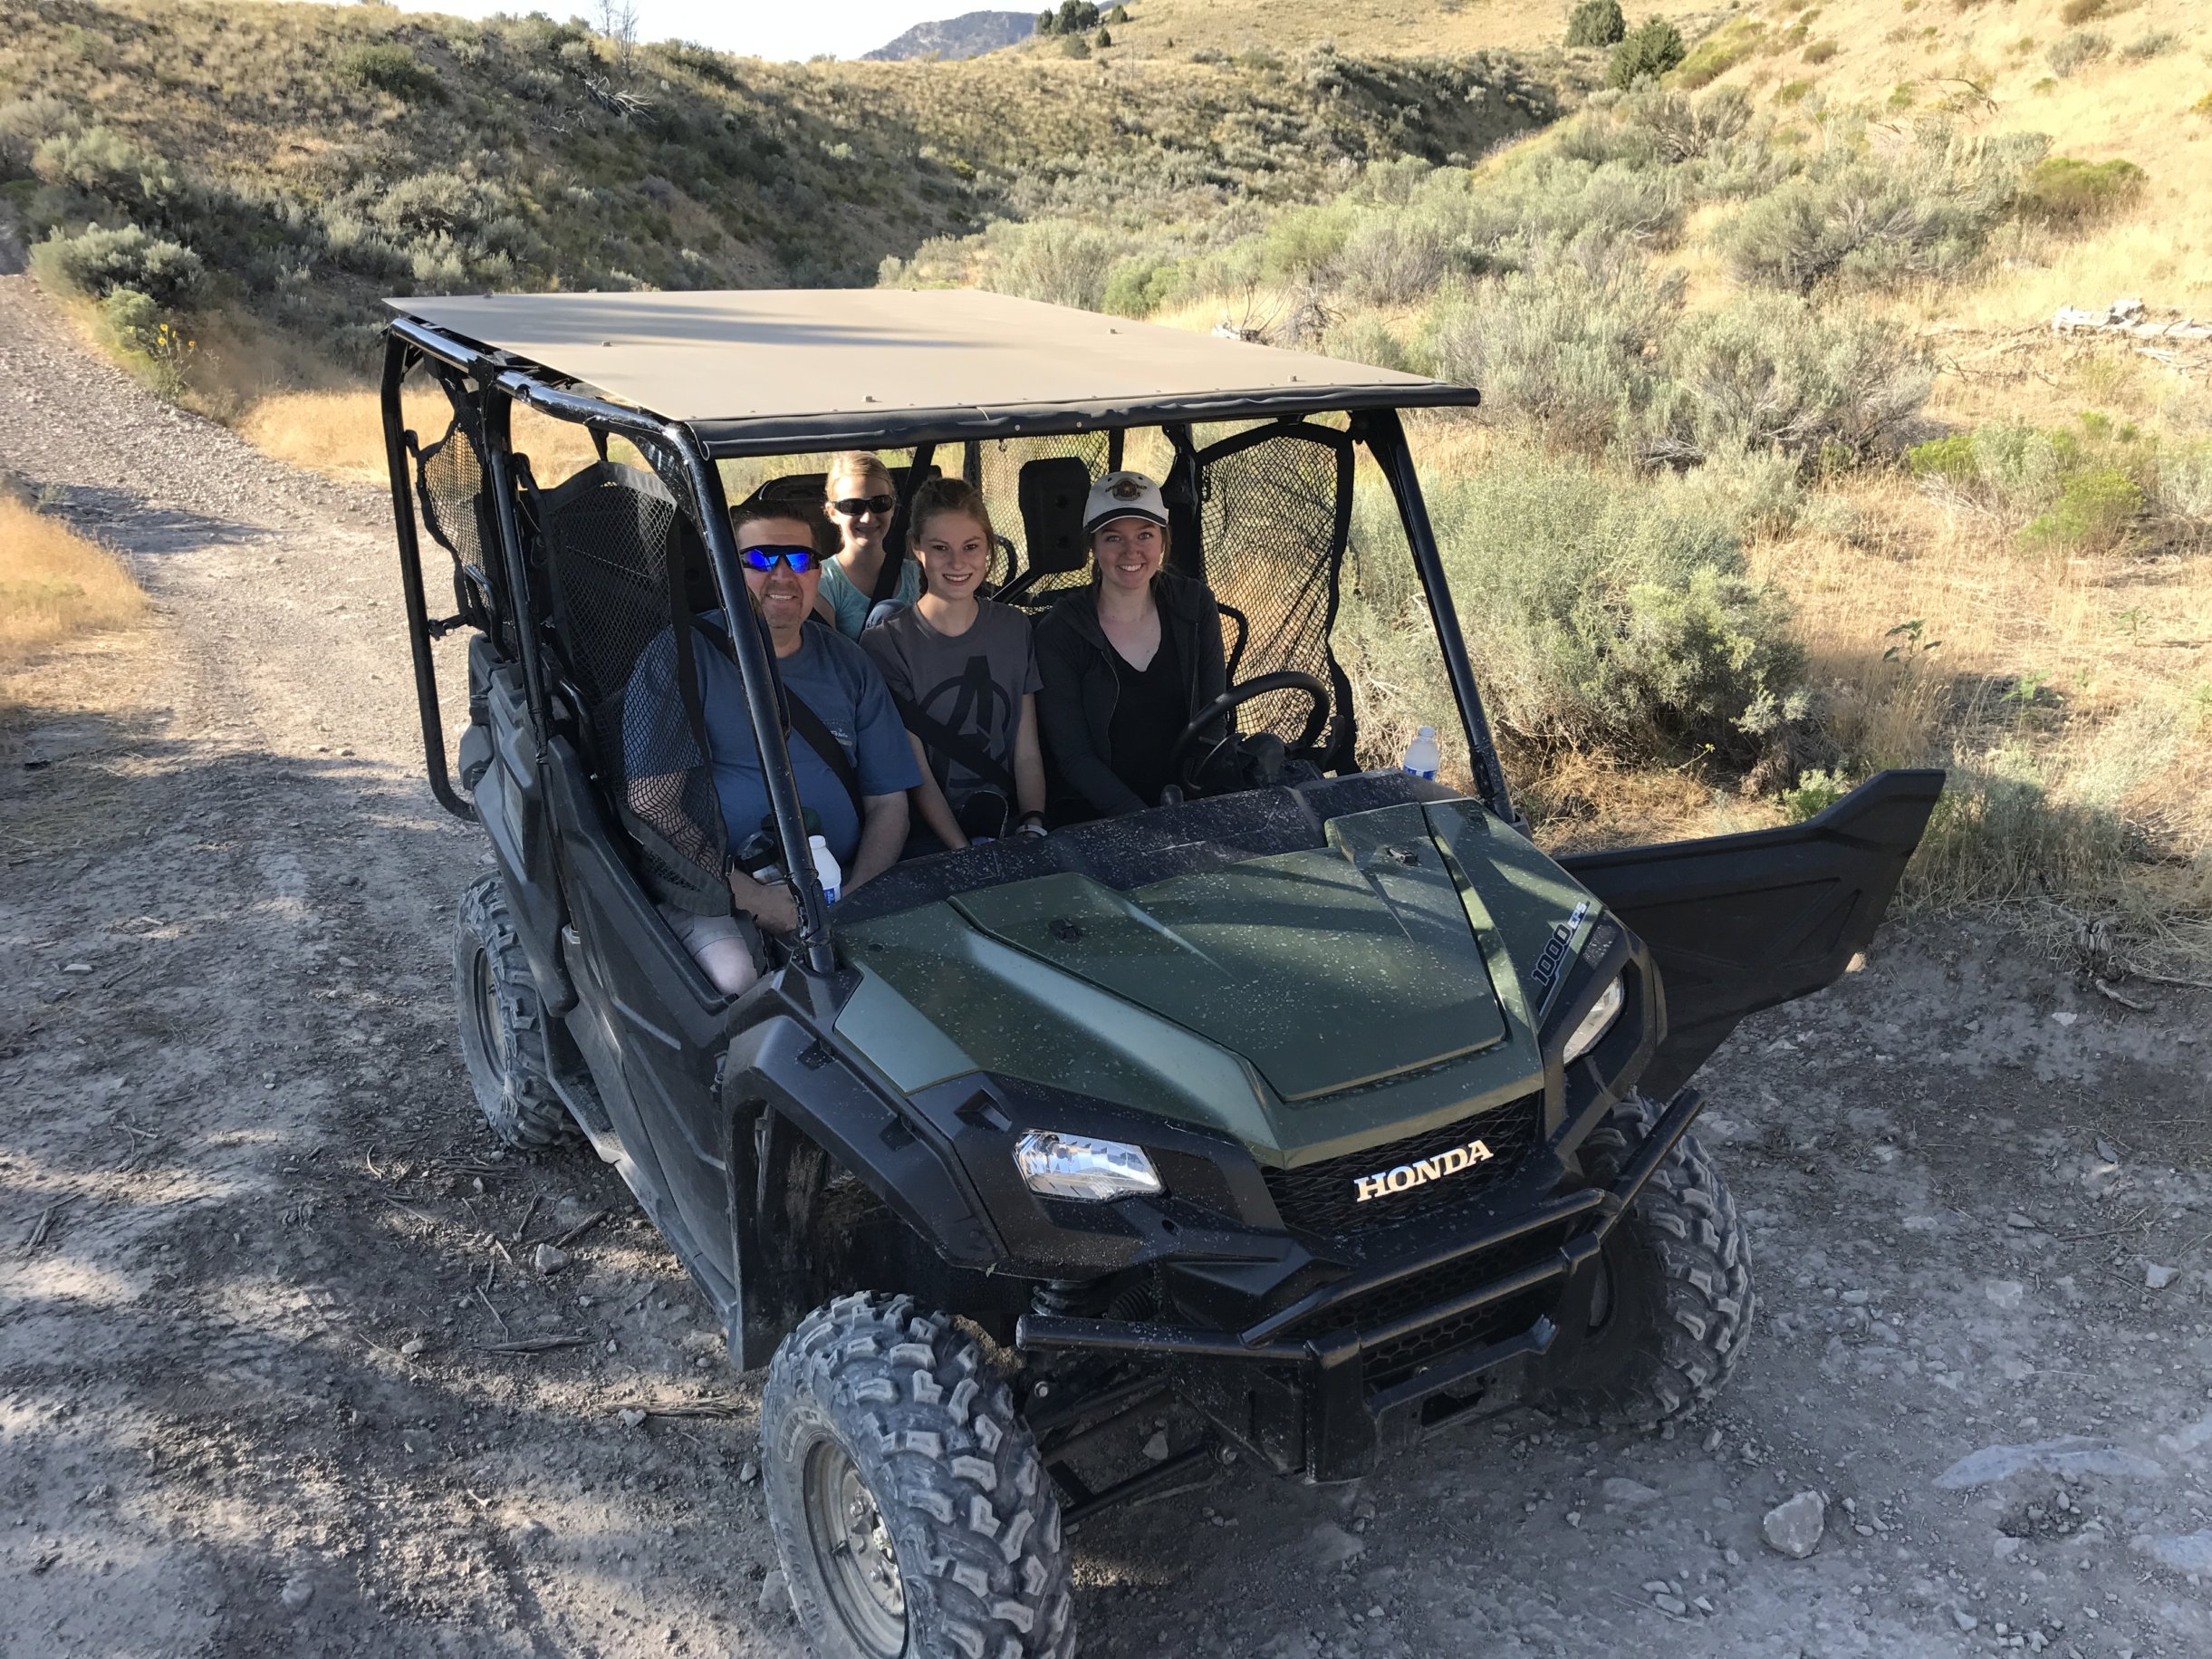
    Side-by-side UTV/ATV DIY Roof for a Pioneer 1000-5 2016/2017/2018.

    The dealer wanted a fortune for a plastic roof.

    My roof requirements.

    1. storage of cargo
    2. heavy cargo like an elk
    3. provide shade in the summer
    4. protect against wet/ice
    5. not damage the roll-cage.
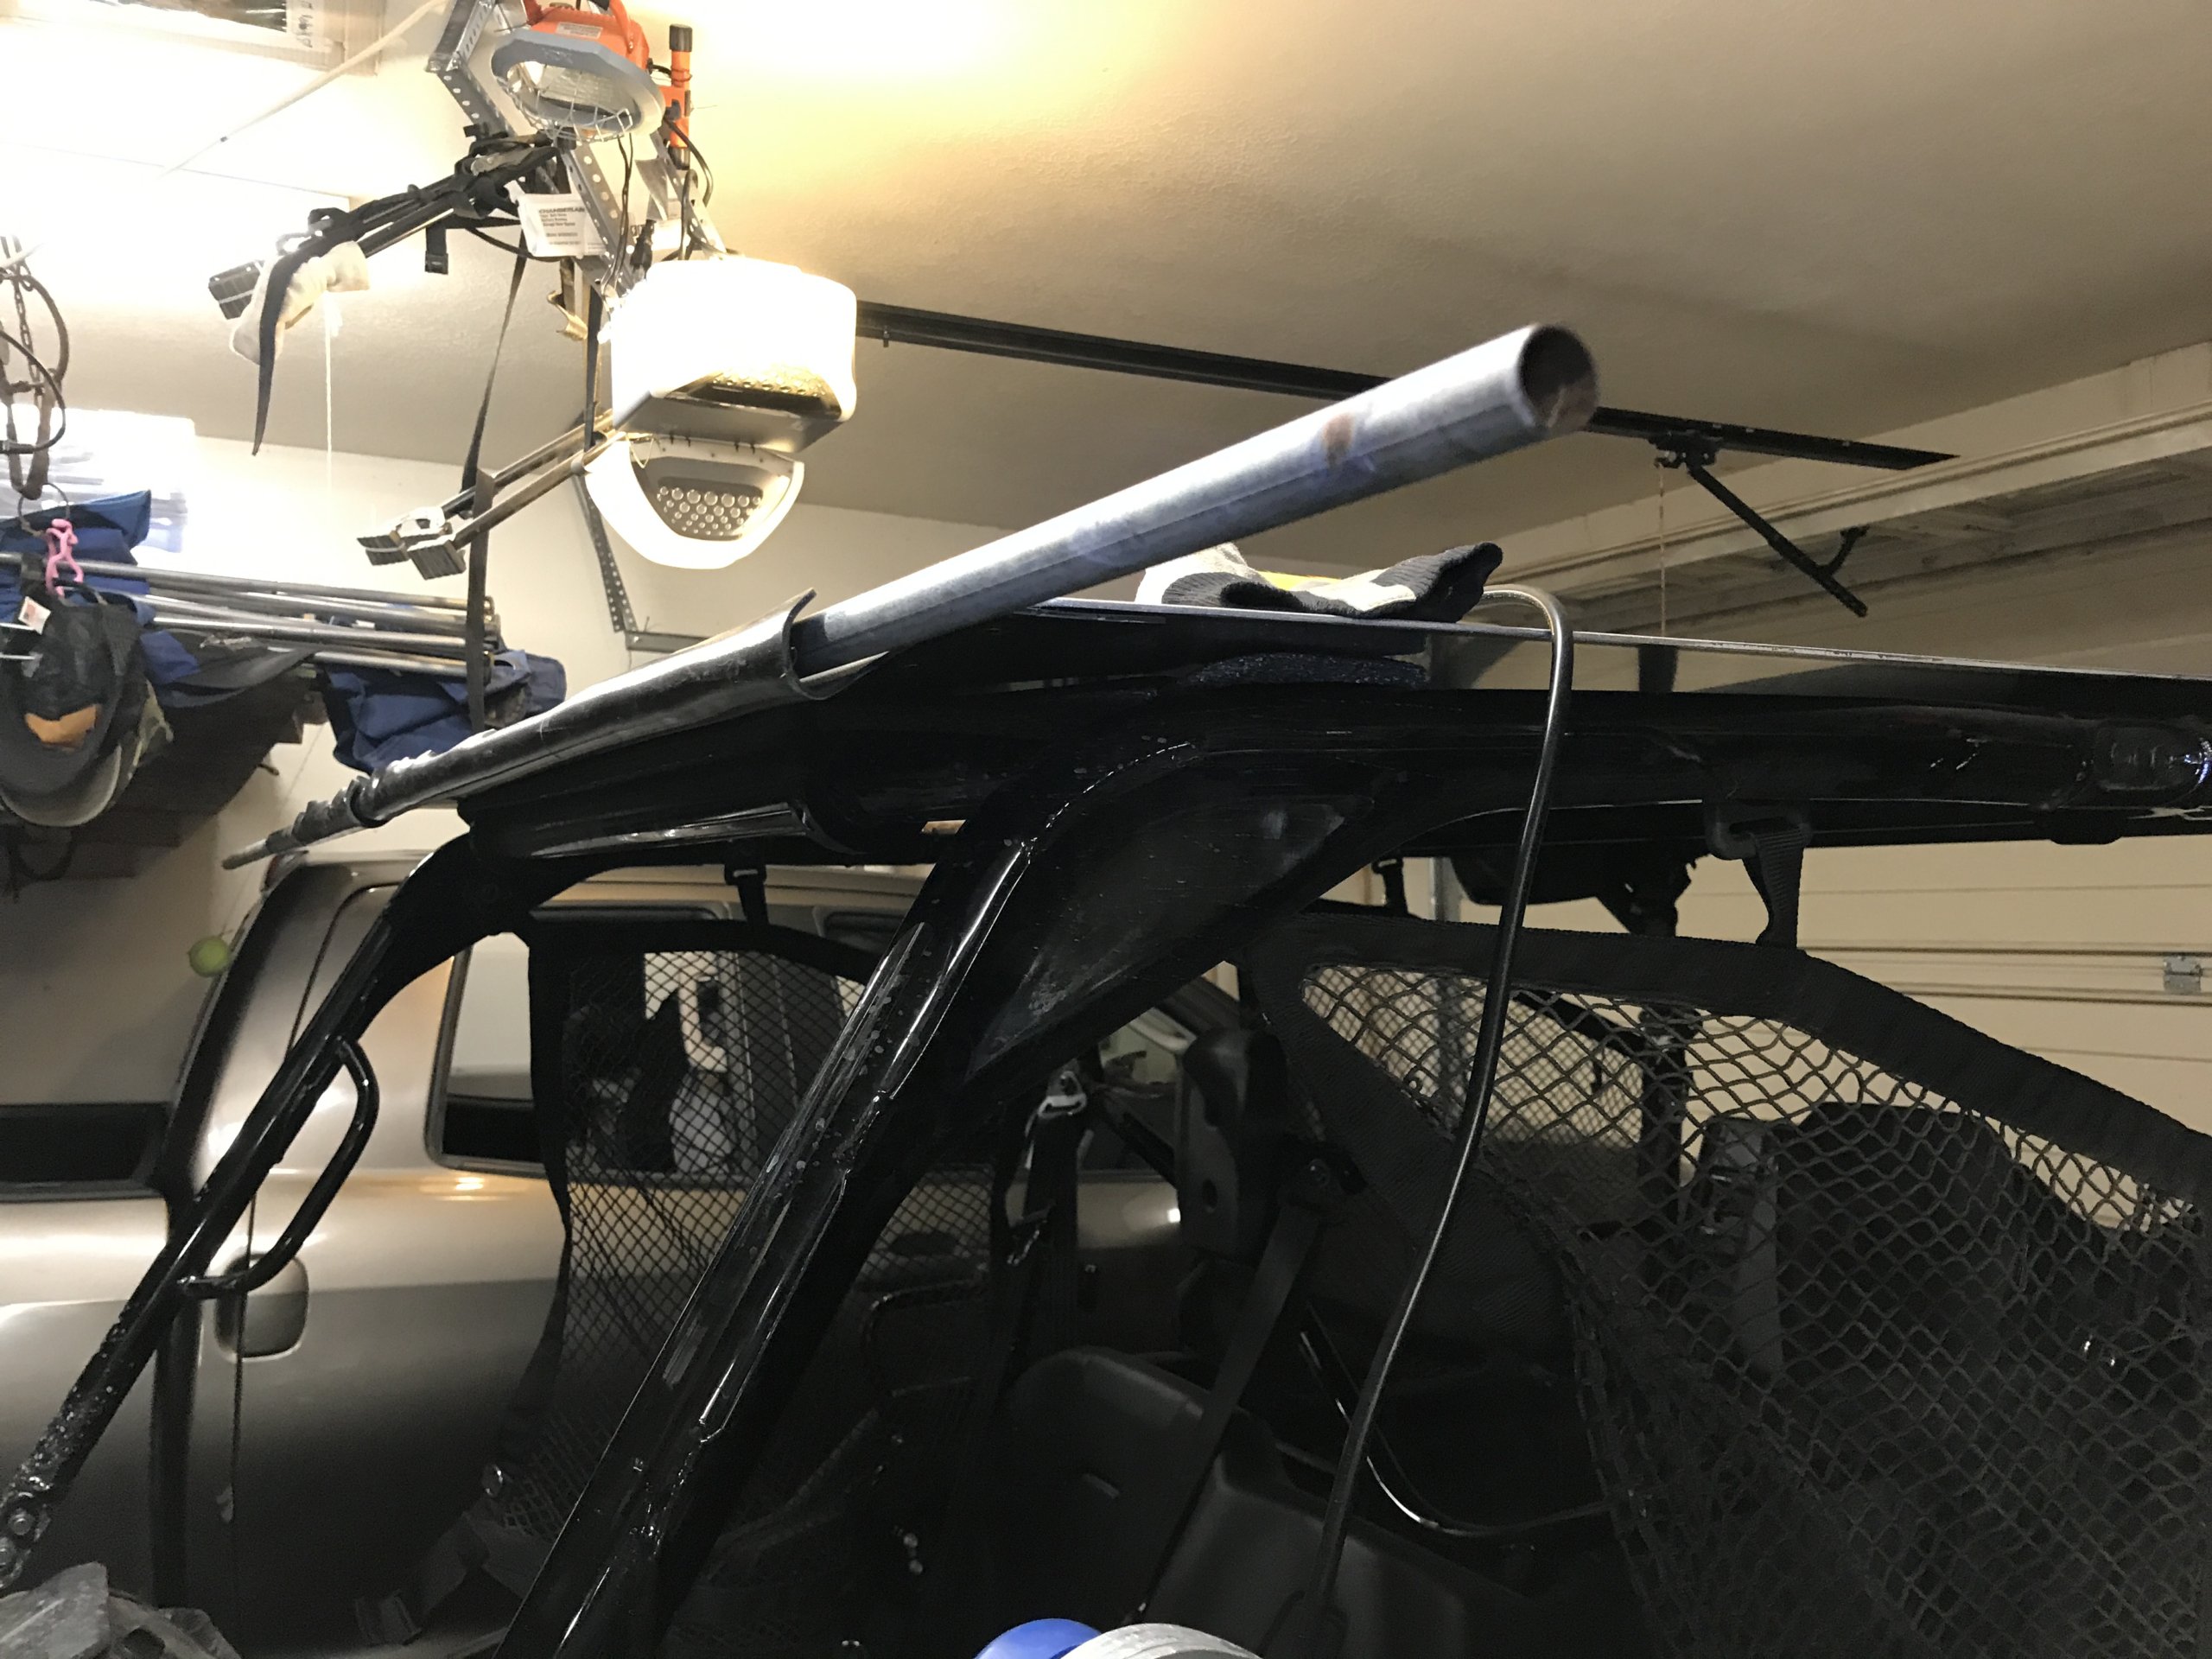
    6. not rattle or “flex noise”.


    Coyote Tan, matte/camo Cerakote (ceramic paint)…going for “discrete camo”


    ROOF BUILD


    5x8 1/8 aluminum sheet.
    5×8 1/8 aluminum sheet.


    I got a quote for a 5×8 1/8 aluminum sheet from metal mart, it was just under $400!  So, I called Affiliated Metals in SLC and got a quote for $180 out the door for the same sheet.

    The 1/8 turned out to be a bit thicker when I mic’d it.  But, I was already home and figured I’d make due with what I had.

    TIPS/TRICKS.

    1. I measured and added 4 inches. I wish I’d added 7 inches and then if needed cut it twice. Once the sheet is not too wobblie, a saws-all can cut it pretty easy.
    2. I used long sheets of paper, but I would recommend cardboard to line-up the bolts from the mounts.
    3. If you can find a metal-bender, make the sheet 10″ longer and then bend a rain-troth/groove.  I used .9 kydex to fabricate a rain gutter.
    4. I tried a rivet gun, it was too thick for the one I had.
    5. I used a long pipe to use as a mold for the kydex “rain gutter”.


    MATERIALS – about $300 ish.

    1. $180 5×8 sheet of aluminum
    2. $20-40 of .9 kydex  (I had it on hand because I make pouches (mag pouches, flashlight pouches) out of .9.  I didn’t have a piece long-enough, so I had to use two pieces.
    3. Heat gun
    4. saws-all
    5. drill & bits
    6. $4.00 of Chicago screws (again from my leather working. Tandy leather has 100 for $35 ish. Most people that will be a life-time supply. I buy them in 1000s and get them down to about 10 cents a piece.
    7. Threadmate installed wet to dry more permeant.
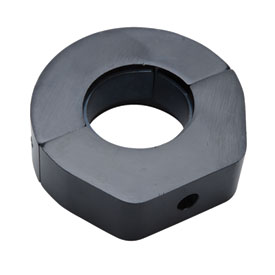
    8. $54 ($6x$9) UTV roll-cage mounts AKA “Tusk Center Hole UTV Clamp 1 3/4″-1 7/8″ – 2017 HONDA Pioneer 1000-5”
      1. TIP, I wished I’d bought an extra one to support the middle of the sheet in the center bar of the UTV.

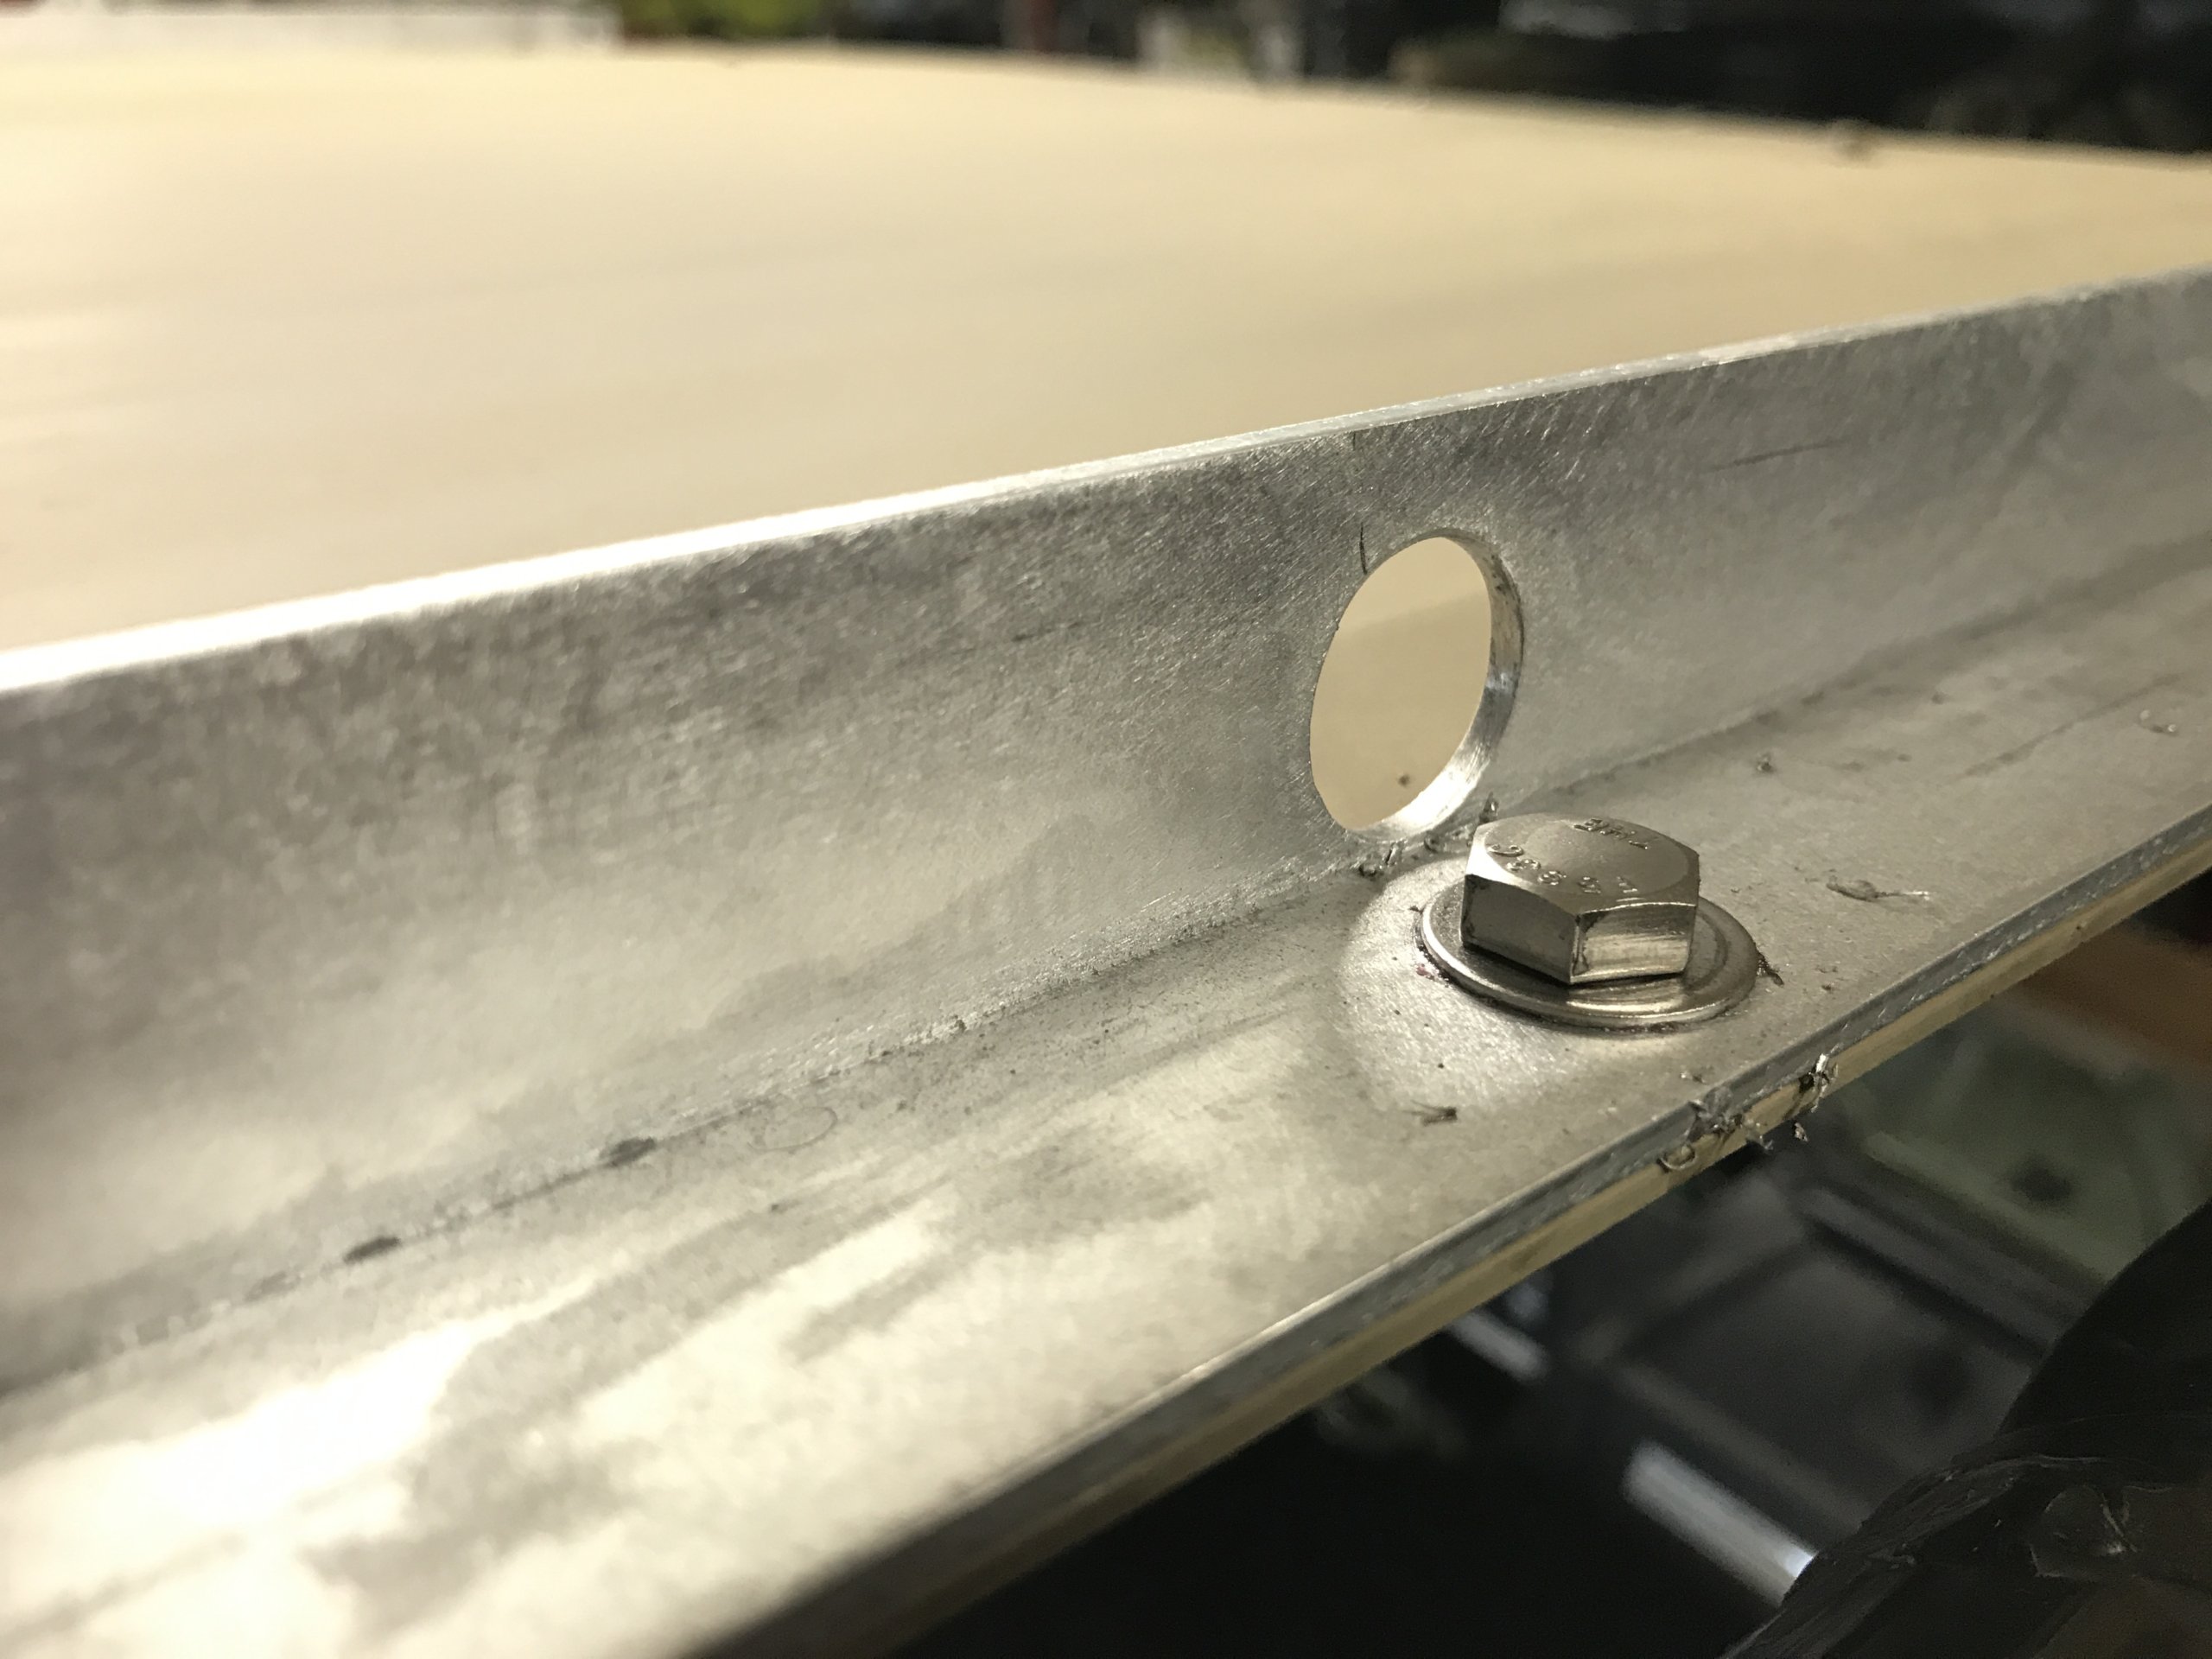
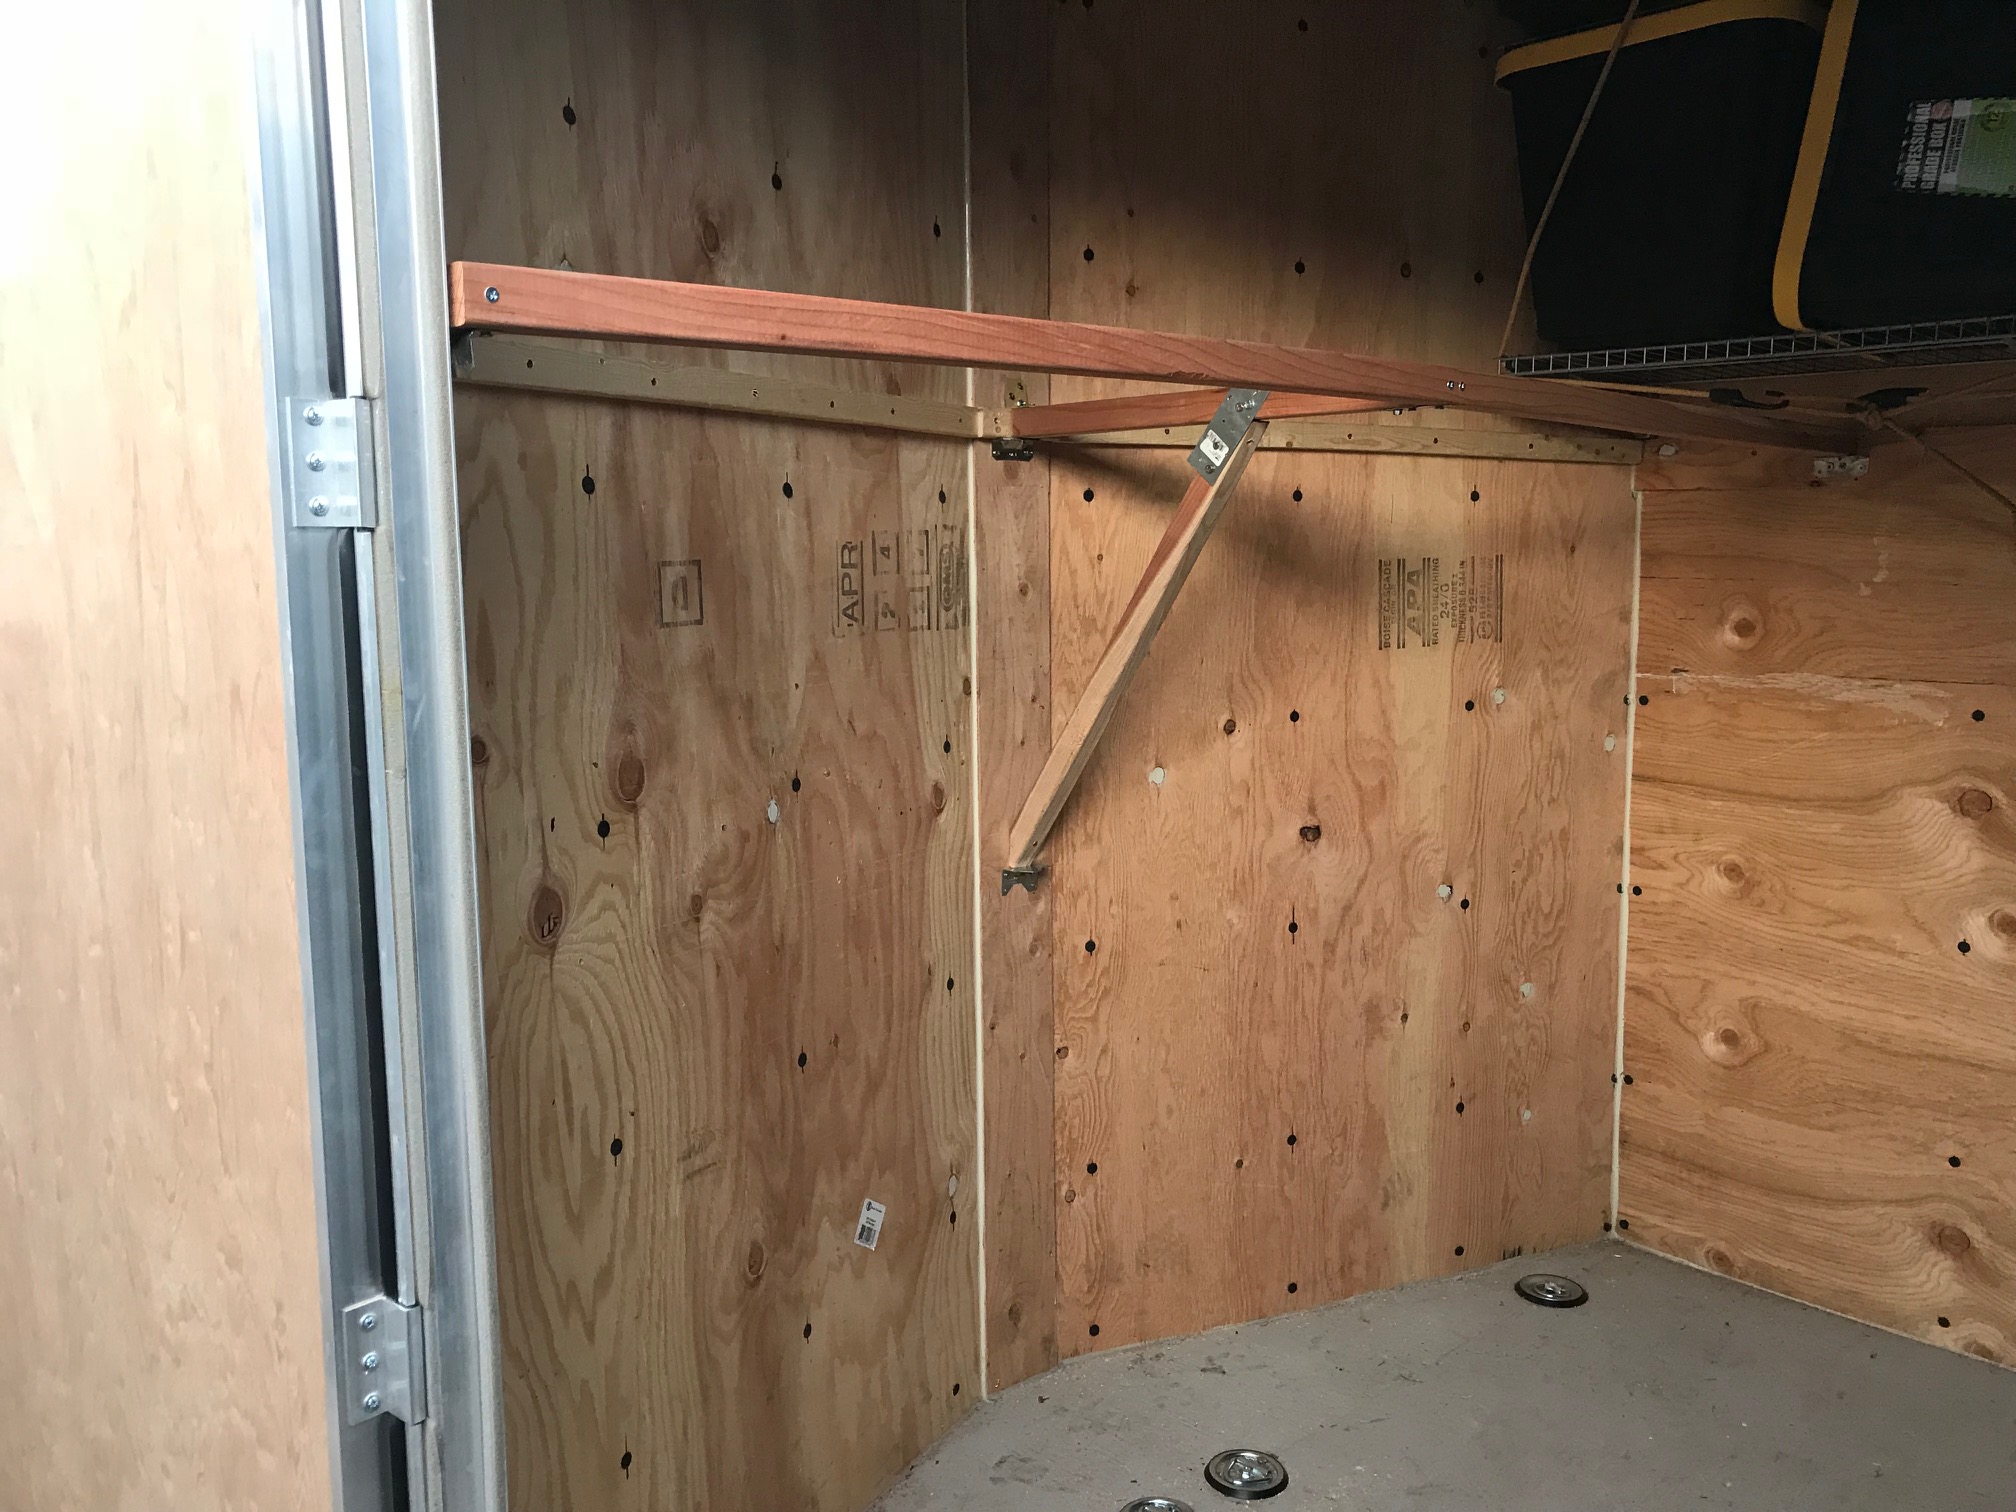
        two screws to tighten and about 3/8 hole for your bolt to poke through and snug onto sheet.
        two screws to tighten and about 3/8 hole for your bolt to poke through and snug onto sheet.
    9. $10 stainless steel bolts, nuts & washers from ace-hardware.
    10. $35 Cerakote (ceramic paint) from brownells. I’m doing desert tan for less sun-heat and more camo.


    BUILD PHOTOS:


    rain gutter
    rain gutter

    roof from cab-view
    roof from cab-view


    see the water from the hose exiting to the left?
    see the water from the hose exiting to the left?

    oil change


    GET HOME KIT

    1. gloves
    2. jackets
    3. HT ham radio
    4. strap with d-rings
    5. tire-repair kit
    6. snacks
    7. extra water bottles under the seat.

    OTHER MODS & PLANNED MODS

    Mod1 – engine fan override, so I can turn on the fan before I climb a very steep mountain, that takes about 30 minutes to climb @ about 15-25 mph.

    TWO fans are better than 1! and I can flip a switch and turn on the fan!


    Mod2 – street kit

    https://www.rockymountainatvmc.com/p/1155/46360/Tusk-UTV-Horn-%26-Signal-Kit-With-Mirrors?v=2017-HONDA-Pioneer-1000


    Mod 3 – winch

    Here is the winch and winch-mount-plate I went with and I really love them. I tested this on a 45 degree angle 100 yard up-ward mountain with snow/ice and it worked out great!


    Mod 4 – flood lights

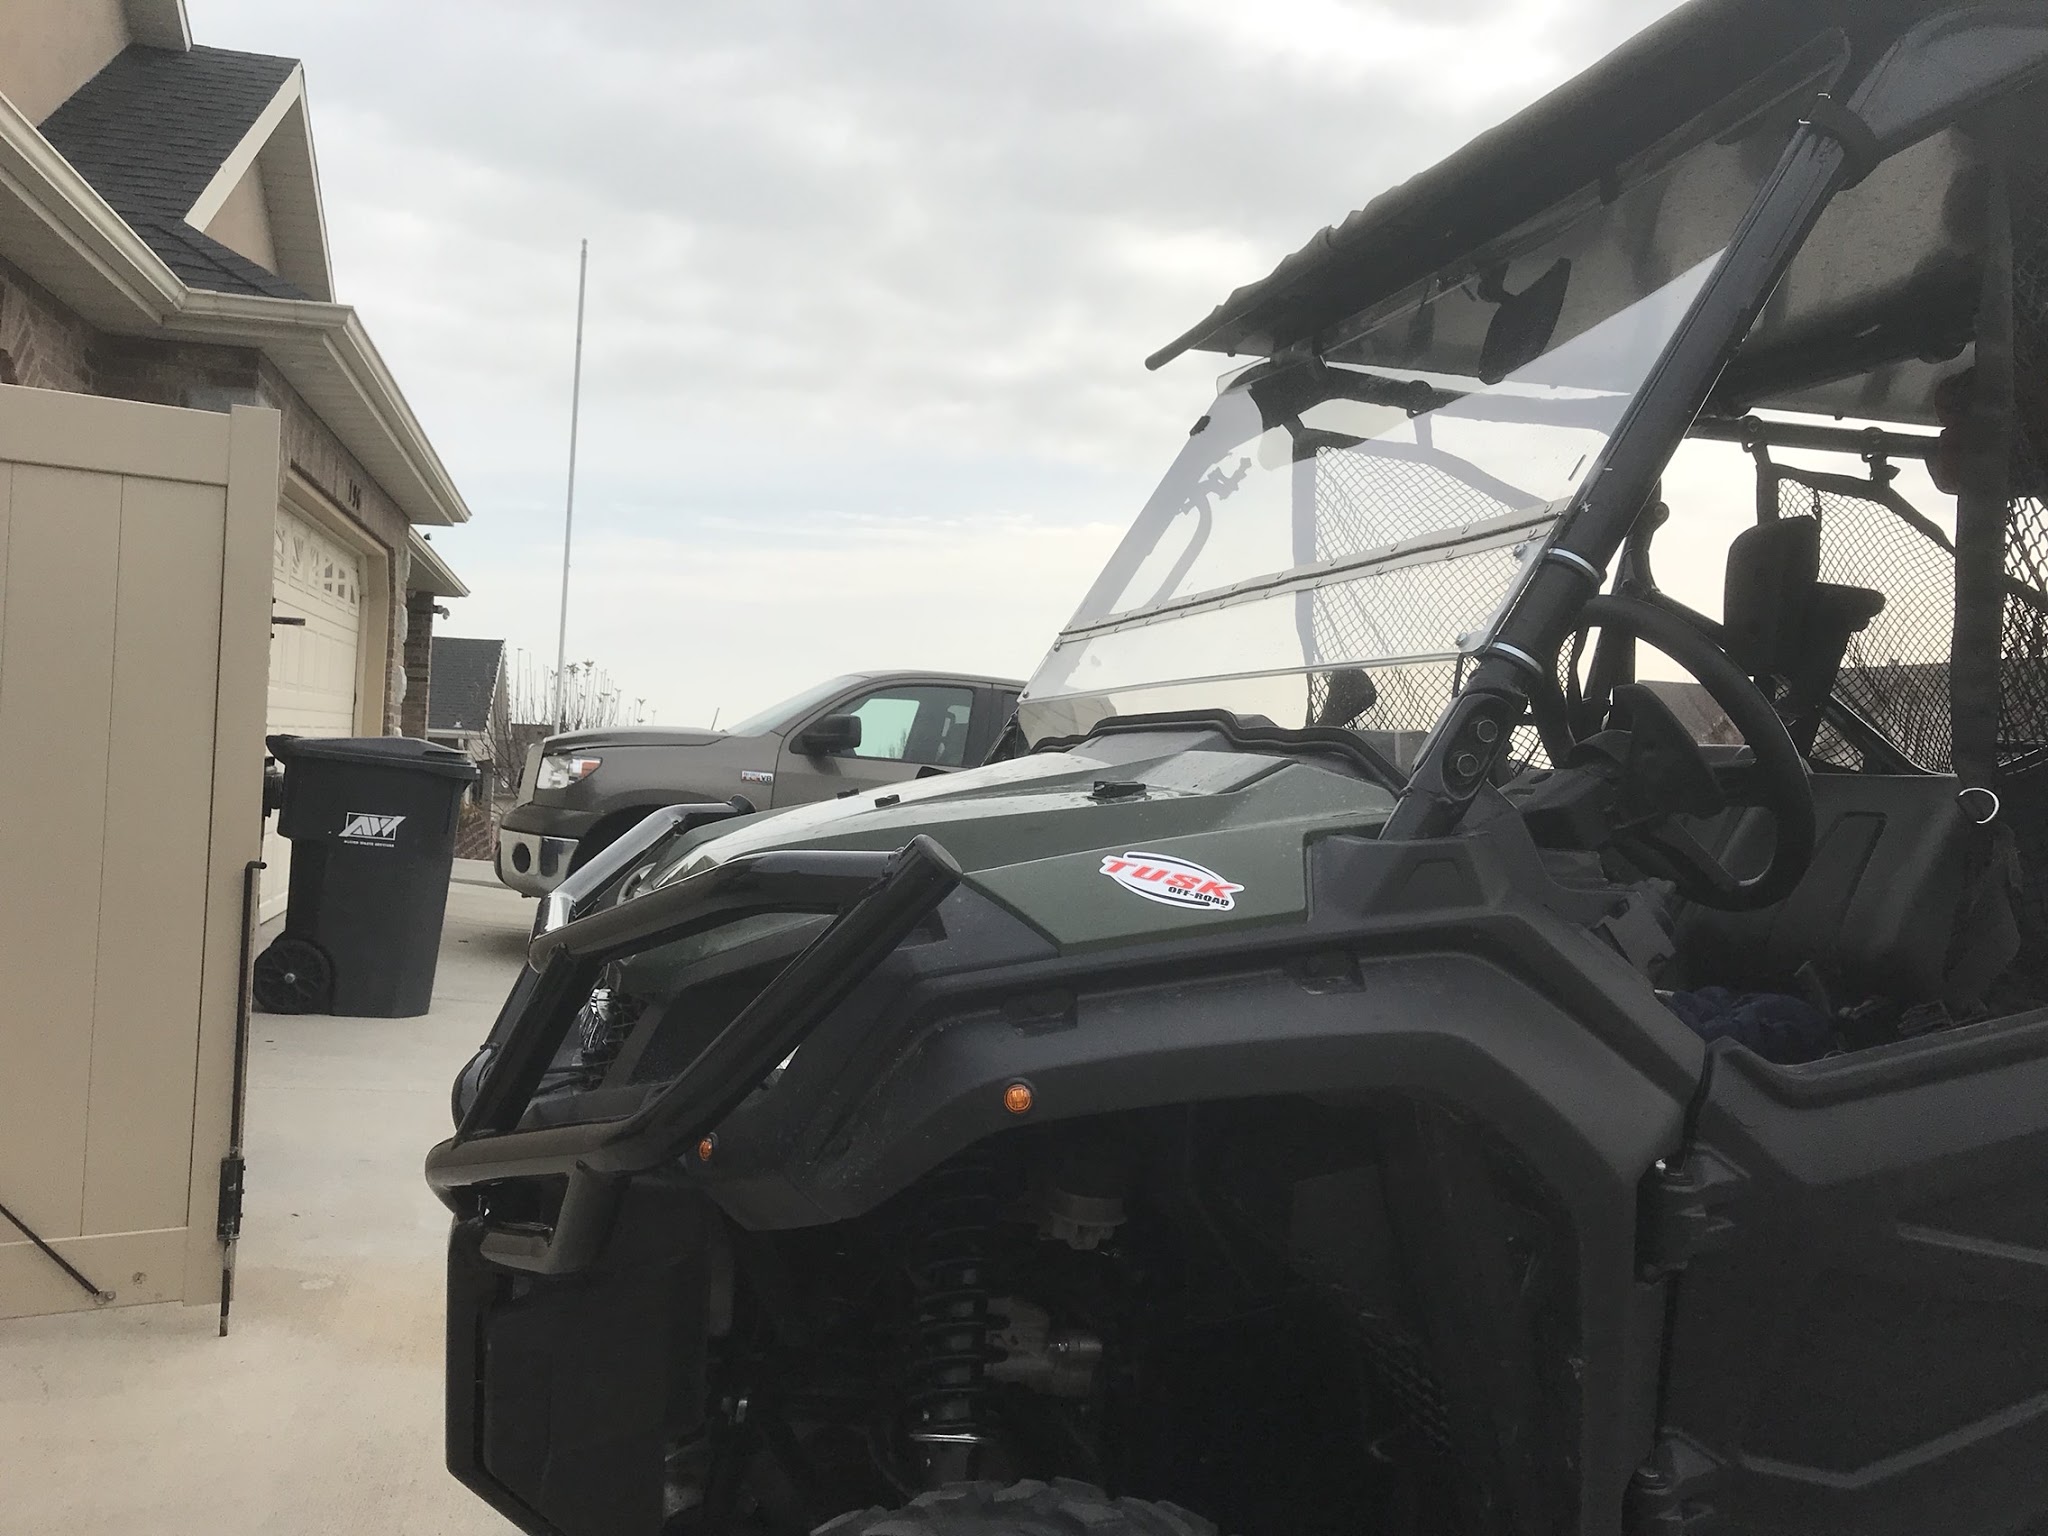
    Mod 5 – winter windshield (do NOT put a windshield on a pioneer in the summer time, you will cook and be too hot!). Because I’m only going to run a windshield in the winter time, I’m thinking I want a full windshield if there is a cost savings.

    Mod 6 – spare tire & mount

    I’m really excited about this. I finally found  a local guy to fabricate a “bed extender/spare tire mount/fuel mount.  I think he normally charges $400 ish, but I wanted the tire/fuel mount.  He needed the fuel can (rotopack) to ensure it’d all fit together. So, including the rotopack, he asked $590, I tip’d and rounded up to $600.  This was RAW, so instead of powder coating, I used brushed bedliner on it. I hung it in my enclosed trailer and did the floor of the trailer at the same time. Rolling the bedliner on, helped it go much further.

    I used this bedliner kit: https://amzn.to/2Gpb2Zu
    I did an entire floor & ramp of a 7×16 enclosed trailer with one gallon.

    Please note high lift jack/mount.


    This is the tire & wheel I went with for my spare:
    https://www.rockymountainatvmc.com/p/3355/75120/Douglas-Crusader-Wheel?77&v=13335&idd1=75120&idd2=3355

    bighorn 2.0 28x9x14
    https://www.rockymountainatvmc.com/p/723/23155/Maxxis-Bighorn-2.0-Radial-Tire?s=952684

    20mm ammo can, bought years ago for $15.

    Ammo can lock, works great on 20mm ammo can and use your step bit to drill a TIGHT hole. Please note, I added elec-tape to make the lock less rattle for the bumps.


    Mod 7 – fire extinguisher

    https://www.rockymountainatvmc.com/p/1018/45506/Tusk-UTV-Fire-Extinguisher-Kit?s=974423


    Mod 8 – roof-rack. I went with 1.5″ aluminum angle iron from Lowes. One on each side ($20 each). I’m really happy with it.


    Leave more material in the anchor hole, so water doesn’t run through the hole.  I used a step-bit to drill the hole to the size of my ratchet strap.


    Pros:

    1. Its not too tall that you couldn’t get your UTV into an enclosed trailer/shed, but you could cargo-net/strap things down and it could provide lateral support for a cooler or cargo.
    2.  I tested it with the hose and it helps a lot for preventing side-water from coming into the cab, but it needs some sealant too.  One of the mount holes I drilled is too close to the bottom, so leave some material near the bottom of the rail if you are using it as a rain-gutter too.
    3. Good for mounting ratchet straps/cargo nets etc.
    4.  Stiffens the edge for strength. Its in a couple of inches so it shouldn’t get hit…or shouldn’t get hit very hard. I’m thinking the only way to really damage this is to flip the UTV over onto the rack. Its only 1.5″ high, so even then it should be “ok”.
    5. The stainless steel bolts help make it strong. I have more, but I’m still deciding if I want to add more bolts or not.
    Cons:
    1. For the first time, I heard the roof at the perfect frequency/bumps where the roof & the rack clatter/rattle together. I think more bolts would resolve that.


    Mod 9 – flag mount. I’ve got the air-host quick disconnect ready, I just need a mount for it.

    https://www.rockymountainatvmc.com/p/1430/25099/Tusk-UTV-Vertical-Flag-Mount


    Mod 10 – expand door “water bottle”, needs 2nd half of kydex to hold a larger water bottle. The built in ones does NOT fit my contingo water bottles 🙁

    The cup-holders on the dash, get HOT from the radiator, so even if frozen…it thaws quickly.  The door bottle-holders, shouldn’t have hot air flow onto them or be too close to a heat source.

    The kydex, when purchased in a 4’x8′ sheet, is almost free for this and super easy to heat-up and self-tap screw in. Notice the red threadmate?  so the selftapping screws don’t walk out with lots of bumps.

    Please note, in the following photo. I REALLY heated up the plastic door, which is NOT kydex.  Took a long time to heat-up and a long time to cool-off. Compare to the other side where I did NOT do this.  I would try w/o remolding the door and see if you like it.  I don’t think it is worth heating the door to make a space to remove water bottle straight up (you can flex the kydex so you can get the bottle out w/o remolding the door).

    Here is the other side w/o remolding the door:


    Rear seat smaller-water-bottle holder.


    Mod 11 – Under roof shelf for gear

    WIP. http://www.ebay.com/itm/16-17-18-PIONEER-1000-3-5-GENUINE-Honda-Under-Dash-Storage-Pocket-08L71-HL4-F00-/252954201847?hash=item3ae53ecef7:g:s4sAAOSwcgNZJHNb


    Mod 12 – hood rollbar/brush guard – https://www.rockymountainatvmc.com/p/1016/58137/Honda-Front-Bumper-Brush-Guard?v=12609

    big upside is, this bumper gives me roll-forward protection of my hood.

    I would like a 2″ receiver hitch in the front, for parking trailers and such.

    Mod 13 – SWITCH PANEL for engine-fan-over-ride switch!  The aluminum “safety plate” is perfect for mounting a gang-switch. I used a router-bit on my dremel. Cut less and then cut a bit more. I’d come in from the right side a bit more if I were doing it again; because there isn’t much to mount to that far to the right.


    Mod14 – taller tires

    After 1100 miles in 7 months, my rear tires were about 50% worn out, so for more clearance and better traction, I upgraded my tires to Tusk Terrabite HD UTV Radial 8-Ply DOT Tires

    With ITP SS316 Alloy Series Wheels(make sure you get compatible lug nuts). These wheels/tires rocked moab off road trails! I’m very happy with them. Going from 27>28″ gives me more clearance and a bit faster speeds on the hwy.

    I found that with the taller rear tires I was “pushing my front gear box in 4×4″, so I felt I should upgrade the front tires sooner than later.  I’m thinking I could run 29″ w/o issue, but the 28″ are awesome and if/when I wear them out, I’ll go with 29” and try them.  Upside of these tires, I can rotate front to back…as rear tires wear out faster for me.


    Mod15 – bed extender, spare tare carrier and spare fuel carrier.

    I found a local fabricator. Raw metal for under $600, includes fuel canister.

    https://www.ksl.com/classifieds/listing/50882242

    Or call/text Jared: (801) 710-0910

    Bedliner on rack looks great and is rugged (primary feature for me).

    MOD16 Aviation Intercom with noise canceling microphone boom for UTV/Side-by-Side

    Even though the P1000 is one of the less noisy rigs, it is still loud enough to affect long term hearing and prevent conversations. This is a game changer, especially on motorcycles having communications makes an enjoyable experience 10x better.

    I took the back cover off the intercom, drilled two holes and used a chicago screws to fasten it onto a piece of .90 kydex, that extends the surface area so I can put screws in it for my dash, so I can remove it to pressure wash or remove it to replace the 9v battery. I then daisy chained to another intercom that is a 2 way, this gives me more headsets (5 in total) and extends the length of the two head sets in the back seat (otherwise their cords would not be long enough).

    I used a ram-mount to mount my ham radio (the intercom has a PTT that will go to the radio- Get with Austin and he’ll build you one and or sell you an entire kit! which is what I suggest and you’ll save a bundle buying from Austin).

    First time we used the intercom, I took my daughter and a few of their friends out. It was fun to hear them laugh/giggle and squill as we drove through rugged country.

    I bought mine for $165 off ebay.

    These have great reviews and they have lasted my abuse for almost a year (so far).

    Rugged Air RA200 Black General Aviation Pilot Headset for $85 each.

    Each headset has their own volume control.

    ORDER LIST:

    1. Intercom with radio PTT Mic from Austin. I think its $120 ish?
    2. Rugged Air RA200 General Aviation Pilot Headset with Noise Reduction Order one for each seat in your machine.
    3. Radio to talk to other vehicles.
    4. Power supply for intercom –  DC Car Charger Auto Power Supply Cable,12-24V 4FT Car Cigarette Lighter Male Plug to DC 5.5mm x 2.1mm / 4.0mm x1.7mm Connector Cord 
    5. rubber twist ties for headsets
    6. You MAY need an extension for the headsets in the back seat. Avcomm Headset Splitter – 5′ – P2010
    7. Most of us use kydex to mount the intercom to the machine, so you can remove it for deep cleaning pressure washing.
    8. ram mount for ham radio & base.


    165 intercom (Thomas paid too much, should have waited for Austin)
    425 5 headsets
    40 mic and install
    50 ram mount for radio
    25 ham radio
    705

    Mod17 – after market air intake.

    I found the parts on HTTPS://WWW.ROCKYMOUNTAINATV­MC.COM/OEM-PARTS/HONDA
    The first schematic is “Front Fender+Hood” Number 4, 6 & 15. The chat/tech assured me its the upgraded intake cover as shown in above video.

    MOD18 – A-arm armor.

    https://www.rockymountainatvmc.com/p/711/45469/Honda-Front-A-Arm-Guards?v=13335&s=1162075

    https://www.rockymountainatvmc.com/p/711/45470/Honda-Rear-A-Arm-Guards?v=13335&s=1162076

    Mod 19 Heater solutions


    heated seats is a good way to go.

    I bought the golf-cart  heater and removed a cup-holder and inserted it. I also tethered it with twistie ties.


    Mod20 Dual Battery

    Justification for running winch, lights etc w/o impacting amp/watts for eletricially controlled transmission.


     Pros/Cons of Honda Pioneer 1000-5

    Pros:

    1. rear differential unlock (turf mode) means you are not tearing up your grass. It also means you wear out less tires on pavement.
    2. Lots of “modes”.  rear-diff-unlocked, rear-diff-locked, rear-diff-locked & front 4×4 diff unlocked, rear-diff-locked & front 4×4 with diff locked.  high/low.  manual transmission or automatic transmission. Within RPM ranges, you can manually up-shift or down-shift with paddles.  6 speed in high or low. There is a sport-mode, that shifts later so you have more rpm/torque.
    3. 1000 cc, with 1000 lbs in bed load capacity & 2000 lbs pulling capacity.
    4. 3 seat bench seat, with option to fold-up two seats in the rear.
    5. quiet engine & transmission…compared to CVT rigs.
    6. Fun for sport and fun for utility.  I think this machine is unstoppable.
    7. At 1500 ish lbs, and amazing suspension, you can go fast over rough terrain and not get bounced to death like a truck/jeep.
    8. I paid another $900 for a 5 year warranty.
    9. Many UTV pros like high-flotation tires, light weight frames, skid plates cover the under belly. Its really hard to hurt these things.
    10. SEAT BELTS, this is the main reason I’m switching from ATV to UTV. One trip to the hospital you can buy a UTV! I want my family safe!
    11. The nets are handy in case you “react” and put your arm out if you roll-over, but with 63″ wide, under normal usage, I can’t see if rolling over.
    12. I paid a lot of money to rent a 2017 Honda Pioneer 1000-5 to test it out before I purchased it.  I’d say it is worth the money before you spend a shload of money buying one! My dealer rented it to me and then put 50% of my rental fee towards my new machine!  I also went SXS with friends that had a Rzr 800 & 900 and would swap between vehicles out to “forest lake”. I almost bought a RZR, but then I thought of my teenagers getting hurt going too fast, and I’m more of a explorer/utility guy.  Yard work, hunting & exploring.
    13. Two air-filters, a pre and main air filter.
    14. The bed lifts up for maintenance of tranny/engine space.


    Cons:

    1. Heat in center, because the engine is in the center…which is great for center of gravity, it gets HOT if you have a windshield and its 100 degrees outside! They have a retro-fit heat kit that is coming soon, that will be “kind of a recall” that the dealer installs free of charge. Otherwise I would not have purchased this system.
    2. price! These things are PRICY!
    3. manual says climbing requires low. Low is not that low IMO.
    4. lots of rattling from rear-seats/bed…I don’t think the rental had this issue. The dump bed rattles when you don’t have anything heavy in there! I FIXED most of my bed rattle with elec tape on the connections/quick release of bed.
    5. when both seats in the rear are deployed, you have about a 4″ “bed”, another reason to have a solid roof for cargo!
    6. Manual says, see dealer for everything. I like to hack on my own vehicles to save money, understand/learn and to “really care” about up-keep.  So, “see dealer” bugs me.
    7. not a lot of after-market accessories…yet.


    Pros/cons.

    62″ wide seems very wide for a lot of hunting trails, but that also gives you more lateral stability.  If it was just me and one other passenger, I think I could be happy with a Yahaha wolverine.


    OTHER MACHINES I considered.

    Kawi Teryx 4, 4 seater…kind of bouncy.  a bit under powered for pulling IMO.

    Yamaho Wolverine…but they don’t have a 4-5 seater(They NOW have a 4 seater). I test drove it briefly at a dealer & was impressed. If a friend buys one, I’d like to go do more testing with it. I think this is a really tough machine.

    Mule pro.

    RZR 900/1000.


  • Recap of Basic Pistol with a 1911 45 acp

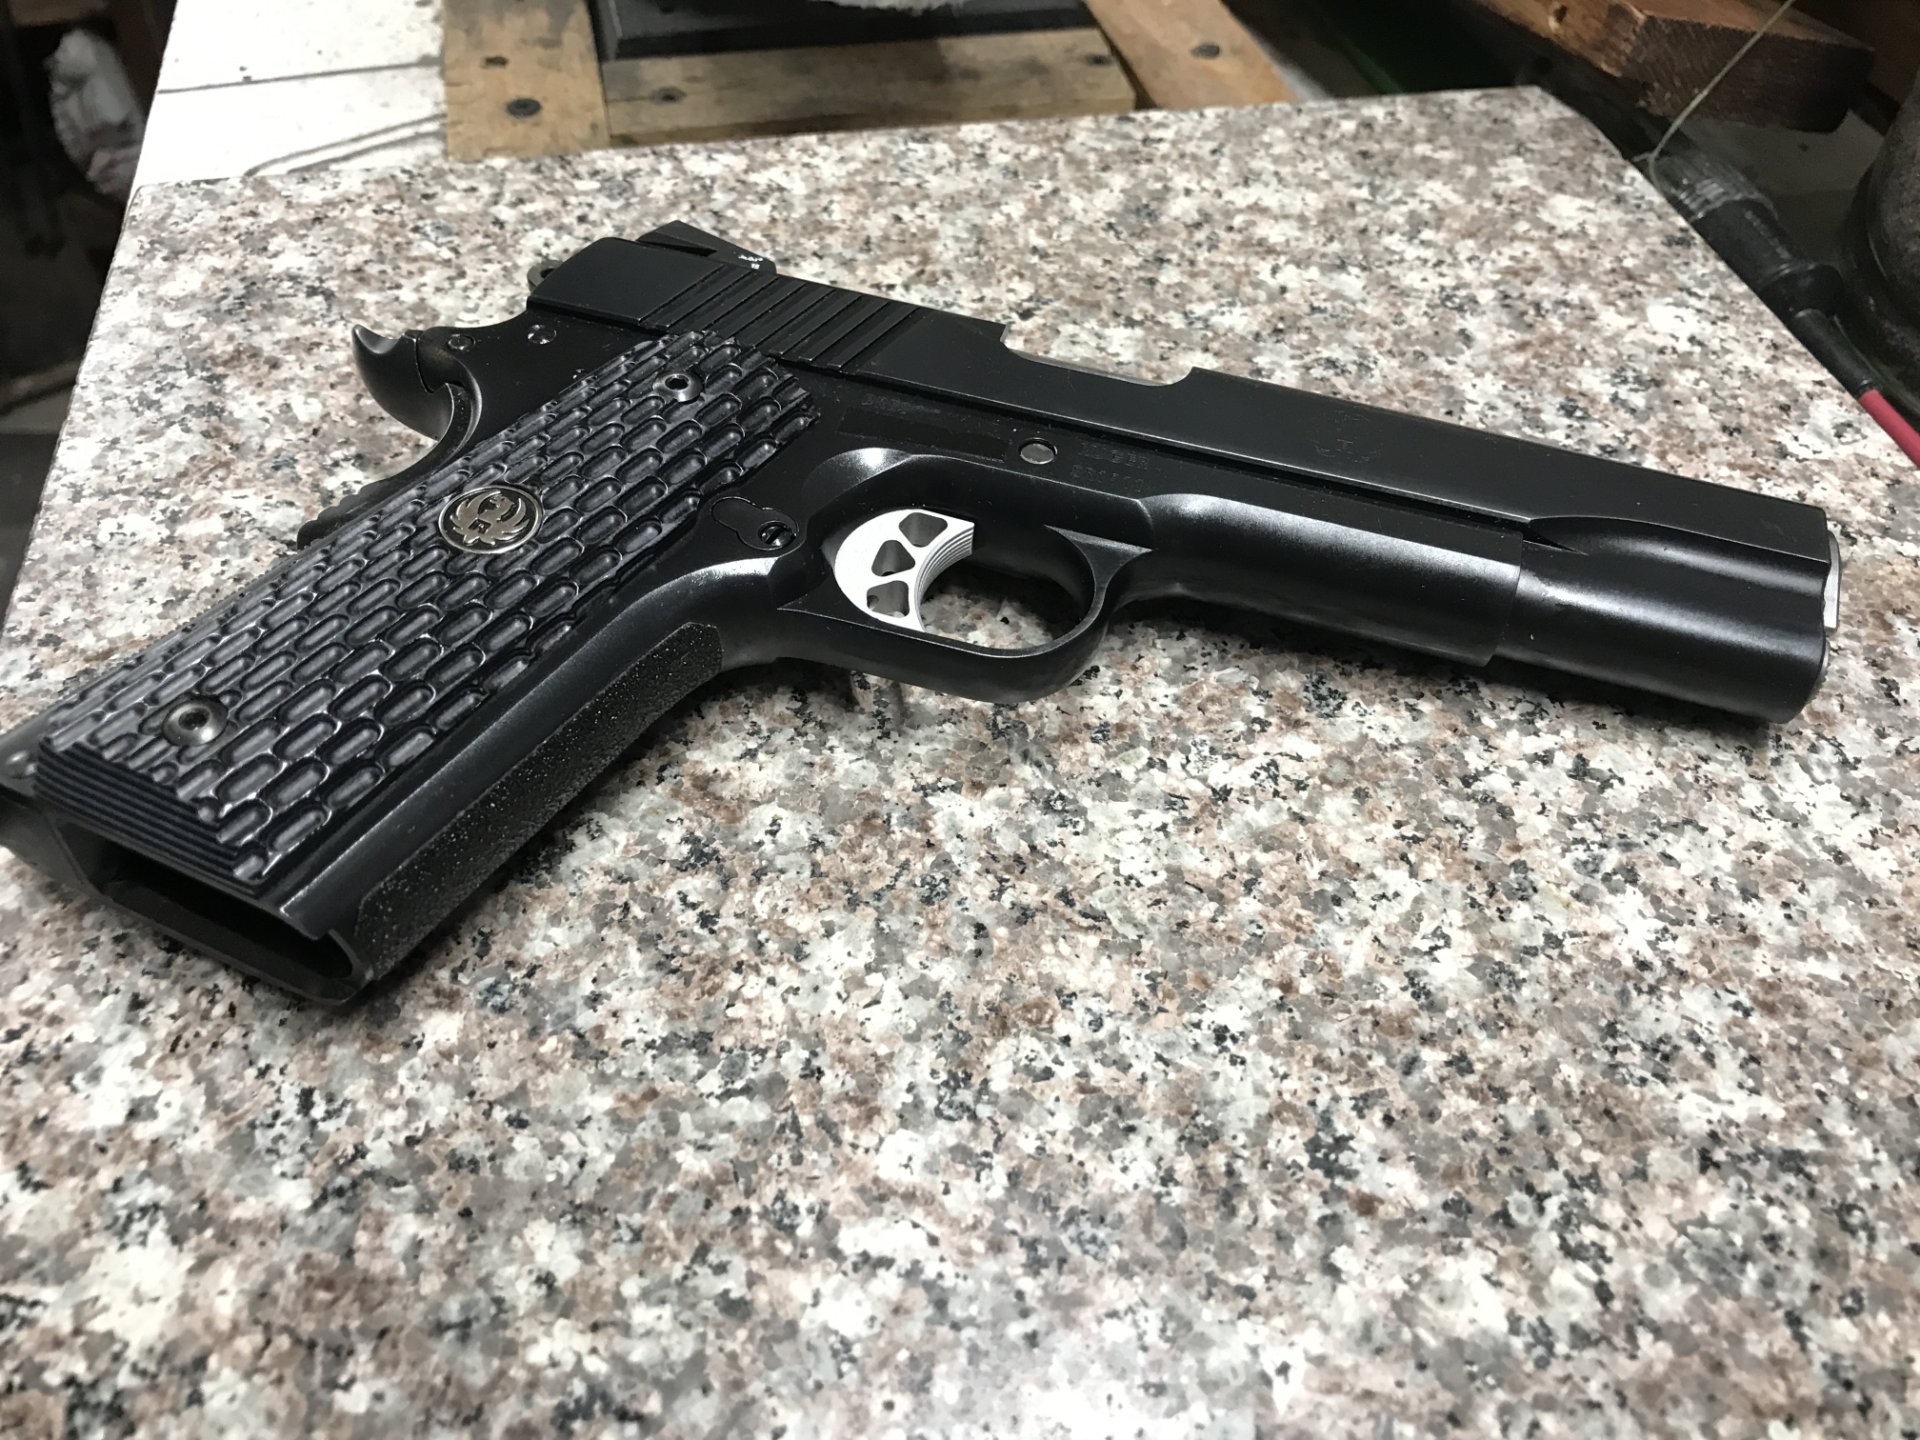
    Last weekend, I attended the basic pistol class from Marksmanship Matters with a Ruger 1911 (nightwatchman).See my other recaps on Marksmanship Matters.

    I’ve taken every class offered by Marksmanship Matters (MM) at least once, some several times since 2011.

    I wanted to take the class with a 1911 because Larry is an excellent instructor with all weapon systems, but especially the 1911 (and M9/Glocks).  New students are strongly encouraged to take the class WITHOUT a manual safety or decocker pistol (there is enough to learn and do right w/o adding complexity!).


    My Ruger 1911 Night Watchman

    I’ve been having a hard time getting good groups with my 1911. Even day 3 when we sighted in, the instructor’s sight-in groups were not especially good at 12 yards.  But by the end of the class I was rock’n the 1911!


    I did make a sight adjustment. Its SO hard to adjust if it is less than 1″ at 12yards. I tried adjusting my rear sights & later discovered there is a set-screw!

    I really enjoyed running the 1911 professionally. NO BAD PRESSES the entire course!

    Main take-aways on the 1911 for the Basic Pistol Class:

    1. My grip is slightly different, because I have to extend my thumb on GRIP (gripping stock in the holster) so I can ride on-top of the manual safety. In a poly gun I bend my primary thumb, but with a 1911 I need to extend the thumb so it gets to the top of the safety while in the holster.
    2. Placing my support thumb on top of my primary thumb was very helpful in recoil management.  I usually flagged my support thumb UP on poly-guns.
    3. Thumb on top of safety while holstering. I had been applying upward pressure on the safety in the past.  What you do in the presentation is what you’ll do in holstering…and vice versa.  PRIMARY THUMBS LIVES ON TOP OF THE SAFETY!
    4. Do NOT ride the slide-stop-pin (with finger straight), otherwise you may apply enough pressure and lock the slide so it can NOT go forward…nor to the rear.  I later found out, it was 80% the fault of Wilson Combat 10rd mags WITH plastic followers. 8 of 10 going to slide-lock, means my gun had to have backward/forward pressure while pressing the slide-stop-pin…kind of difficult. *** solution below
    5. I had ZERO bad presses the whole class.  Once you get used the the recoil, its no big deal…PROVIDED you have enough in the bank by skip loading & dry practice.
    6. I loved hitting the steel with the 230 gr 45 acp!
    7. you can NOT cheat isometric tension on  45 acp…you can “kind of cheat on the 9mm”.
    8. trigger drill 5 was awesome to driving home the isometric tension!
    9. When running the slide, primary thumb goes under manual safety for a few moments, so you can get a good grip on the rear-most portion of the slide.  As soon as you are done running the slide, primary thumb goes on top of safety.
    10. With my XD/xdms, I usually wouldn’t clean them until they started to malfunction…around 5,000 rounds. But with the 1911, it seemed to want to be cleaned everyday, so that is what I did.  Field strip, soak slide and everything in CLP (spray spray lots of CLP). Wipe off and then air compressor everything until no “running CLP” anywhere.


     Pros/Cons of the 1911
    The 1911 comes from a different era, back when we had world-class craftsman and those that demanded those products. The manufacturing was different, the materials was different and the consumer was different. The 1911 was designed & produced to have hand-fit’d parts and factory worker assembly. Now days its “some assembly required”, back then everything was custom fit’d.
    Do I carry the 1911 everyday? No, if you do, I think you are missing a lot of modern technology…or you don’t accept change very well. If you don’t love & honor the 1911, I think there is something wrong with you!  Think about how many guns our grandparents had? Rifle was king for my ancestors, but they also had shotguns for food on the table and 22s for around the ranch. Very few had pistols/handguns. If they did, they owned one handgun…and the 1911 would be an excellent choice.
    PROS
    • Hard hitting, proven go to war system!
    • There is romance in running the manual safety professionally and knowing you are shooting history.
    • Heavy all steel gun means less felt recoil, even with a major caliber like the 45 acp.
    • Awesome snake loads, best of any auto-pistol IMO.
    • If your situation is one where it would be an advantage to have a manual safety.
    • Great range gun, bigger heavier guns are easier to shoot…not so easy to carry 24x7x365!
    • Everyone needs at least one 1911, and safe queen/gun jewelry!
    • Jeff Cooper/Larry Mudgett & others can’t be wrong!
    • The perfect man-tinker-toy! You can upgrade forever and tweak and tinker for years on one frame!
    • Lets face it, in the 1911 era…your choices were a 38 special or M9 monstrosity! I’d pick the 1911 every time! As Jeff Cooper said, the M9 is a solution to a nonexistent problem (unless of course you have a bunch of military goons that can’t get the training they need to keep their finger off the trigger…then the M9 is perfect cuz that 17 lbs trigger is going to keep everyone safer!)
    • Bring back Captain America’s 1911! yeah…where the heck did the movie-star 1911 go?!?

    CONS

    • Heavy
    • Somewhat “high maintenance” compared to modern poly-guns.  1911s require more “up-keep” & cleaning…based on my experience.
    • limited capacity
    • slower follow up shots, even with aggressive recoil management.
    • Often pricy to purchase & even more pricy to have it “gun smithed”.
    • Additional training & mileage to run efficiently in a “combat/self-defense scenario”


    My favorite 1911 makers:

    1. Colt…of course. Too bad their unionist mgmt goons ruined the company. Ruger should have bought the “colt rights” and told the mgmt goons to take a hike!  I have a 100 year anniversary edition Colt…as Browning made/designed it! classic beauty!
    2. Ruger.  I DO love the 70s series 1911s.  the 80 series has extra “govt goon safeties”, which results in a worse trigger.
    3. I’ve been really impressed with the S&W 1911 (google nutfancy 1911 smith & wesson).
    4. Sig. I really like the desert tan/ambi-safety SIG 1911. I may buy one someday!
    5. Kimber…I think they are over priced and I hear they use softer metals so the pretty tooling is easier on their machines. I don’t think they are shooters, I think they are not made to be shot over 20,000 cartridges.  They are pretty, but I want mine to be a tool and I also love my Colt gun jewelry!
    I think I need more mileage on the 1911. I think I’ll take every class in 2017 with my 1911.
    I tried some different ammo before the class. Winchester white box FMJ 230 gr seemed to group better than the Federal aluminum casing (almost 8 cents a round cheaper!?!).
    cowboy hat was NICE in the hot sun…and plenty of airflow, but it did require different hearing protection.
     
    10 yards

     Failure drill:

    @ 3 yards, two the chest, traverse to the head. If the head is still there, then press. Justified because if two to the chest didn’t stop the attack, they must have body armor on or those bullets are not stopping the attack, so a headshot is justified.
    The old, two to the chest, back to guard to assess, got lots of guys killed 🙁
    In the below target, is two sets of the proper drill. Two to the chest, traverse to the head and press one shot. So, in this photo it is 4 to the chest and two to the head…even though it looks like only two holes.
    If you want to buy this type of target, its called “Federal Air Marshals Qualification Target #2”

    *** solution to “stuck mags & stuck slide”.

    I’d say 80% of the problem turned out to be the magazine. Wilson Combat 10 round mags had a plastic follower that wouldn’t properly lift the bolt-hold-open & would put the slide at the ideal spot for the pin to go to the left by 1/8″.  I also got a much tighter slide-stop pin from Ruger (free) which helped the pin not go from right to left when I placed my finger on the frame in the “finger straight position”.
    The new pin was about 5mm thick and did NOT have a flat side.
    The old pin was about 4.85mm thick and DID have a flat side (odd).
    I cut about 2mm OFF the length of the pin, so my finger wouldn’t push on it. There is “just enough pin left” to field strip the gun w/o a punch.
    I ordered Several Mec-Gar 8 rd black mags from brownells.
    http://www.brownells.com/magazines/handgun-magazines/magazines/1911-45acp-magazines-prod9223.aspxMec-gar builds many mags for many manufacturers and OEMs them. I’ve found them to be very good magazines.
    This video inspired me to cut my pin off.  I may make additional mods, but I think getting rid of the defective mags will help significantly!


    Photo of shortened slide-stop-pin & 3m friction tape.


    1911 Mods

    IMO, the ruger is about the perfect 1911.  Series 70 w/o the lawyer safety, good build…tough, craftsmanship & affordable.

    I did a few mods.

    1. I love the mec-gar magazines. Amazing fit & finish, crazy spring tension. Works great. Steel feedlips
    2. Anti-slip tape on the front of the pistol grip (see photos above).
    3. I took 2mm off the slide-stop-pin, so I don’t accidentally push it out while my finger is straight on the frame.
    4. Magpul stocks…I ordered BOTH the normal and aggressive stippling. I decided I like the aggressive! The FDE/Tan & black look amazing!
    5. nightsights! 80% of attacks are in the dark…have the tactical advantage!


    threadmate is awesome for non-permanent anti-screw-backout.
    threadmate is awesome for non-permanent anti-screw-backout.

  • How to build a fire-barrel

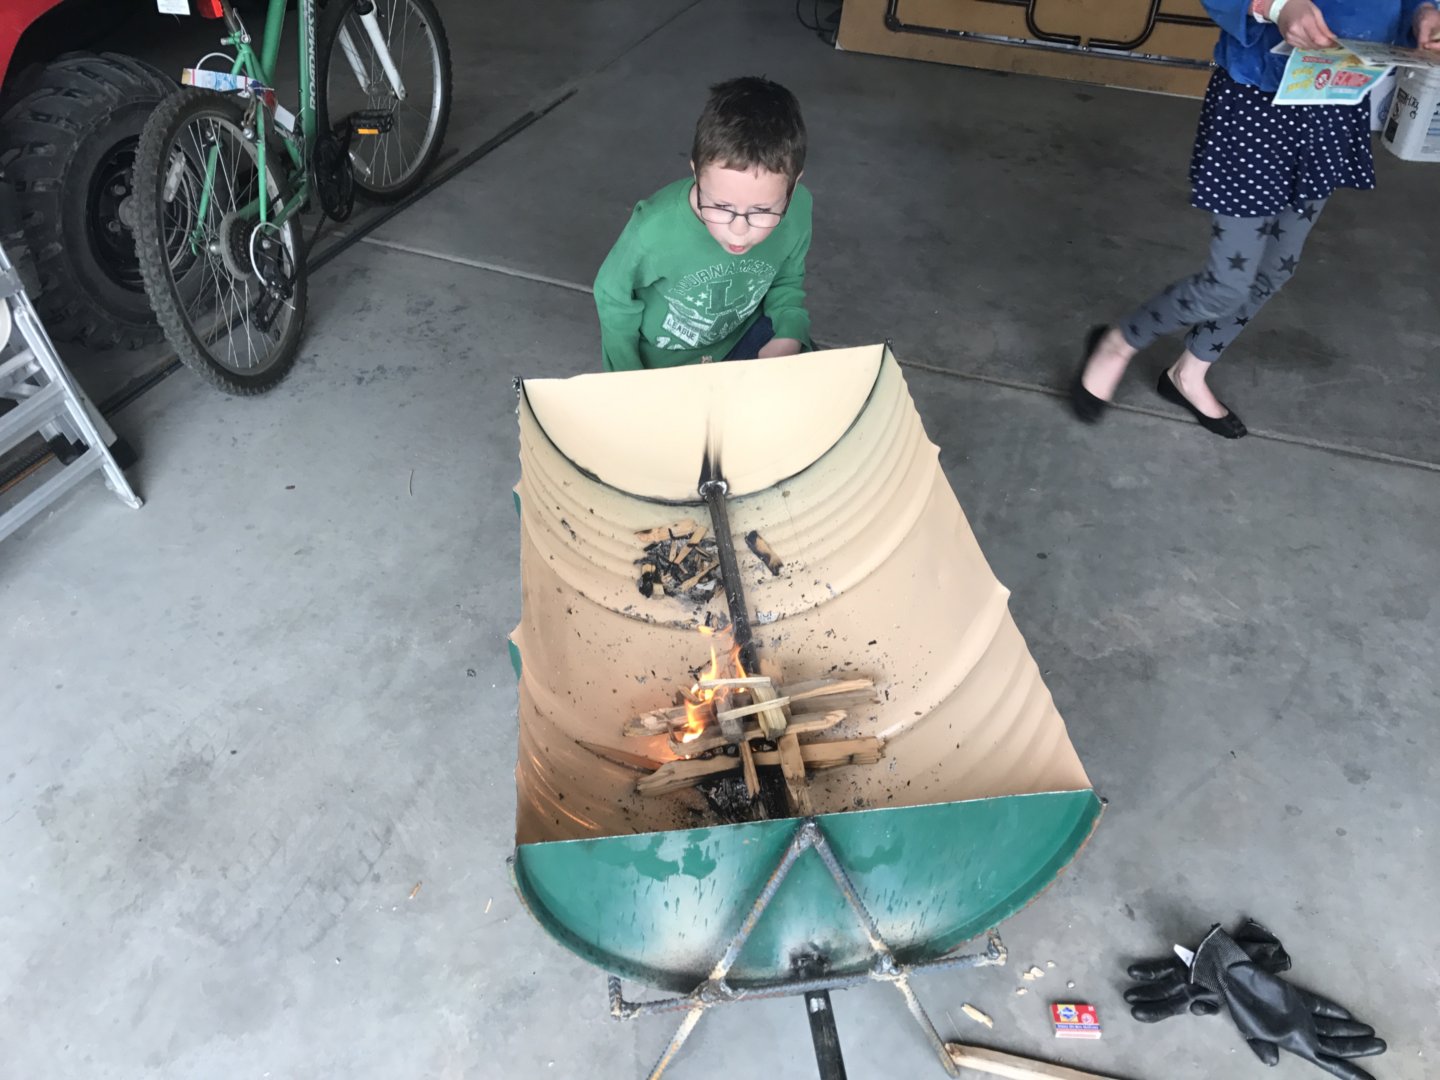
    For an upcoming “dutch oven” workshop, we hope to have 50 dutch ovens, so we need to be able to warm up that many briquettes.

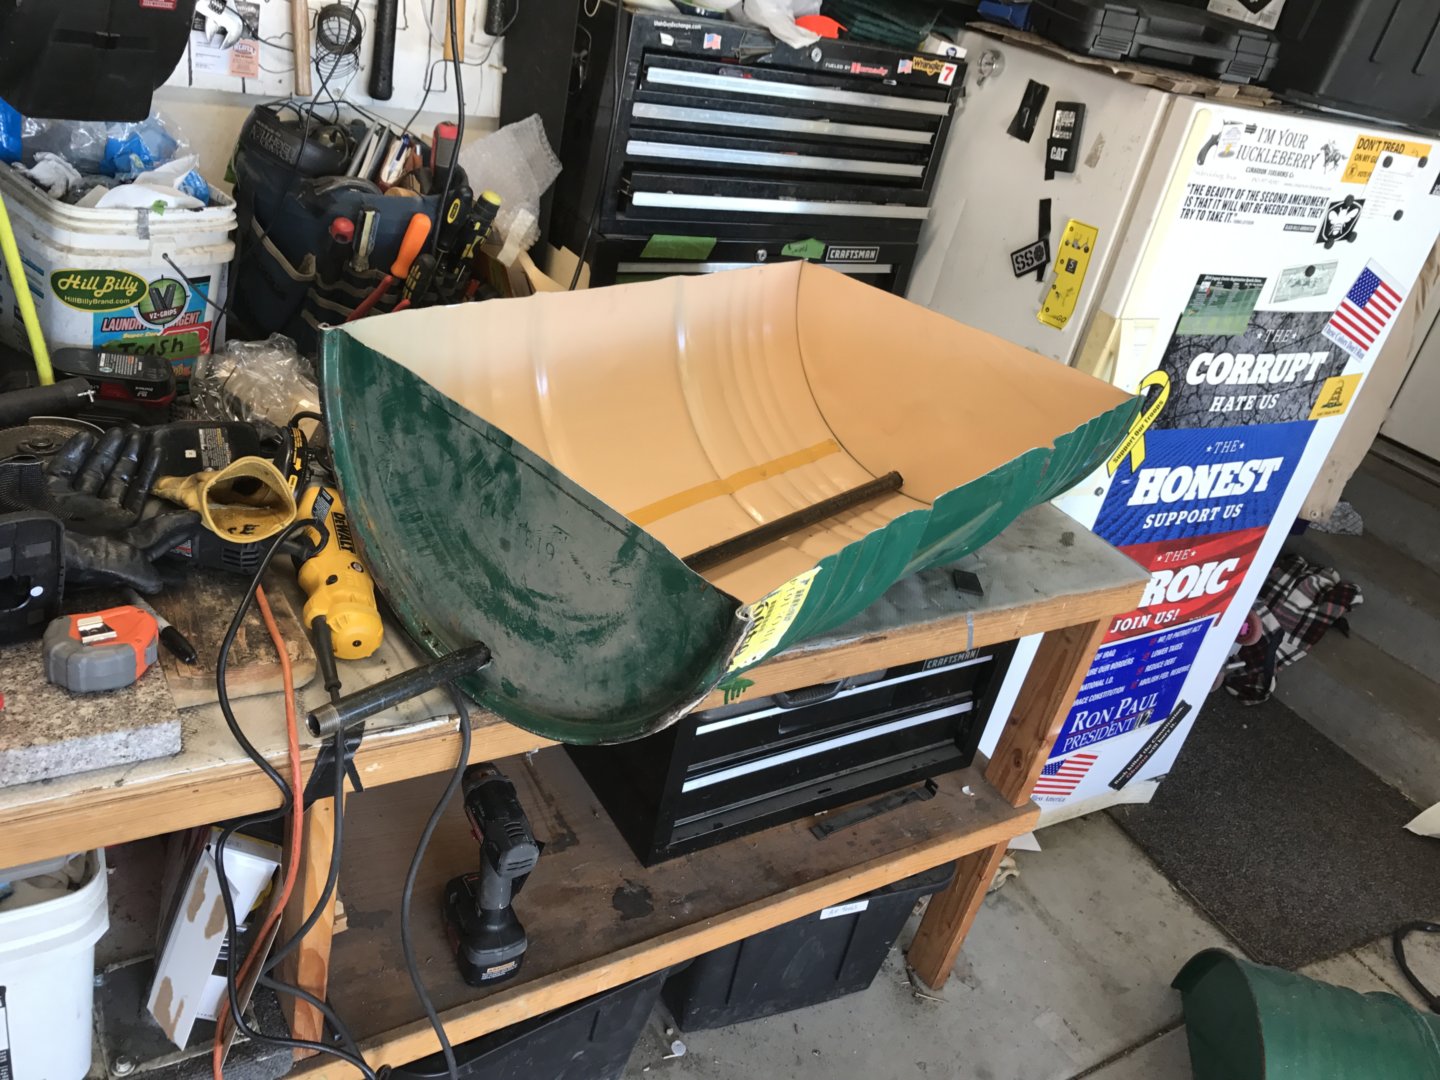
    I bought a 50 gallon metal drum ($15-20 ish? off KSL) and marked it and cut it with a cutting wheel for the corners & reciprocating saw for the long runs. I took video of us building this, but it is a pain to do the video editing.

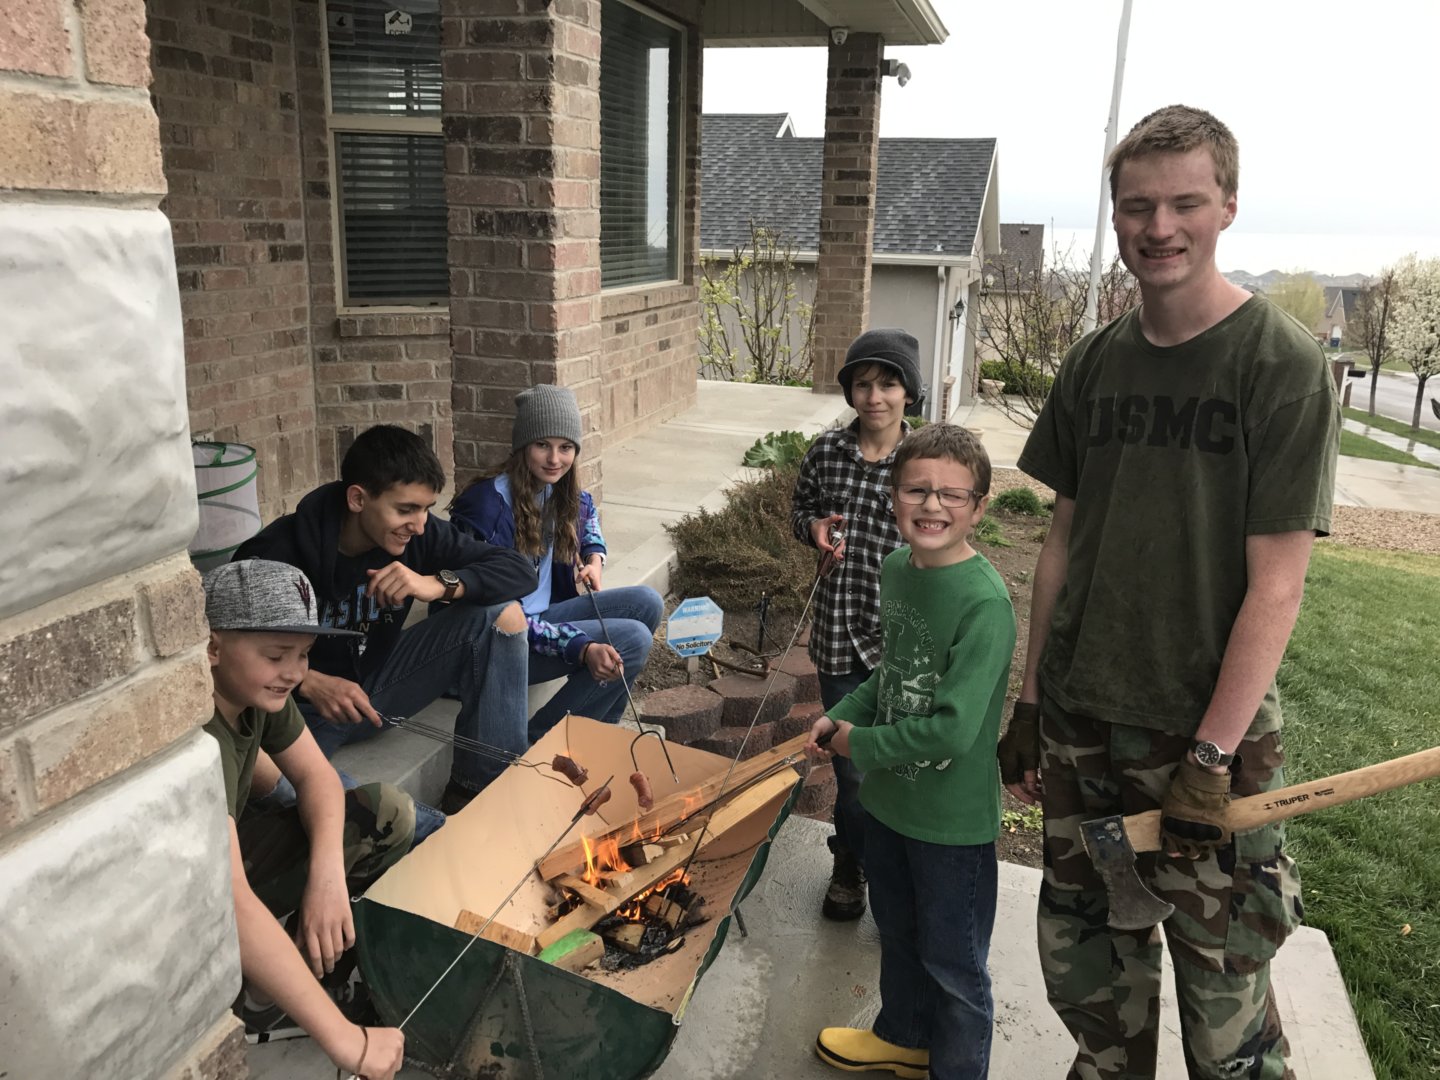
    Turned out pretty good!  I think I have less than $30 in materials. It was fun to build with my son too! My son is going to build a 2nd one and sell it (should be able to pay for both by selling one half!). I’m thinking folks might pay $80-100 for one of these barrels?

    We learned a lot building my son’s blacksmithing forge & transferred that experience to this project.

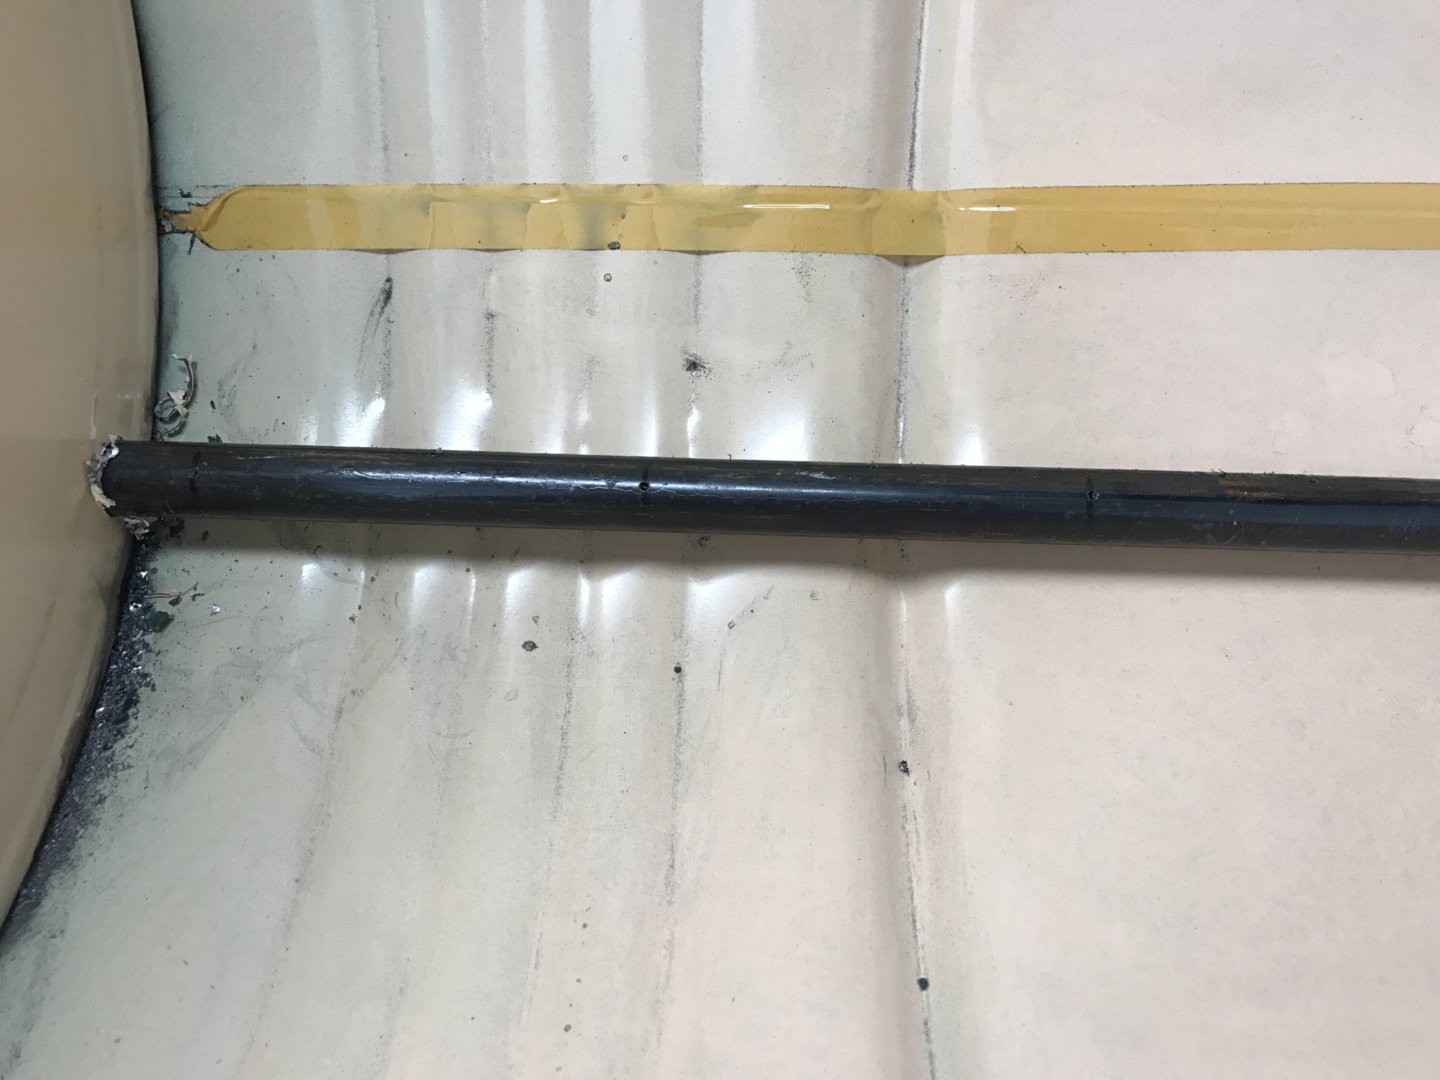
    I drilled air-holes 3″ apart, with an offset.  I think I’m going to try this blower. reverse shop-vac is too loud for a “workshop”:

    I suggest you line the bottom and most of the sides with “fire brick”. Brick especially designed for extreme heat. I got 1.5″ thick x 4×8 for $2 a piece. I got 13, but I would suggest 16 bricks.


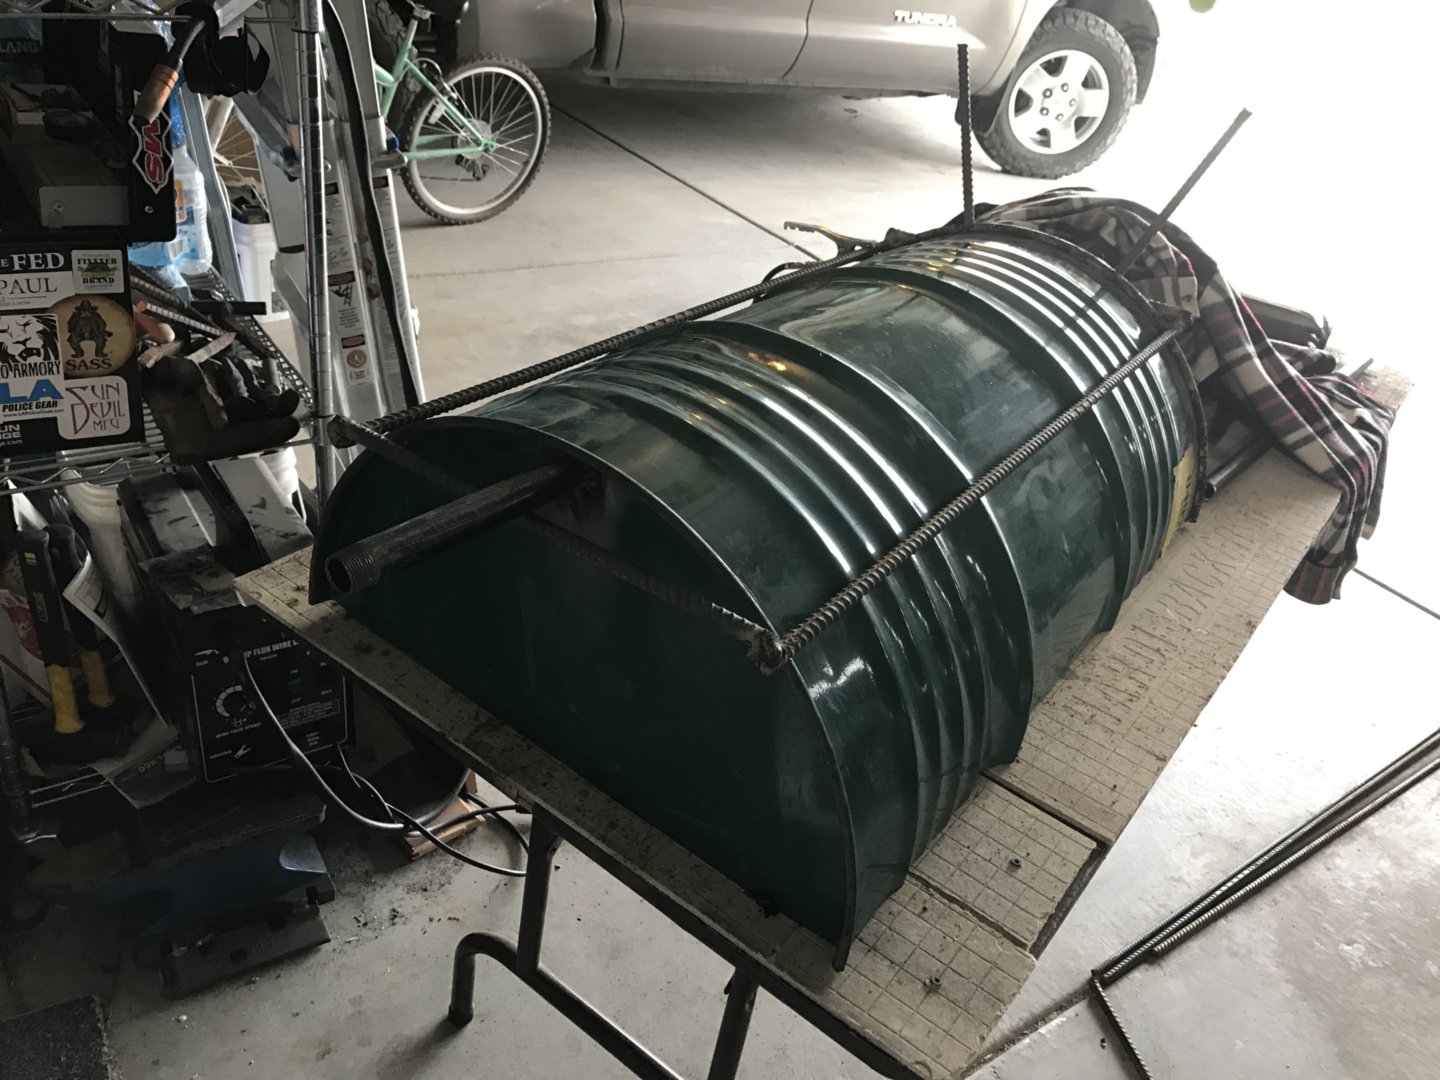
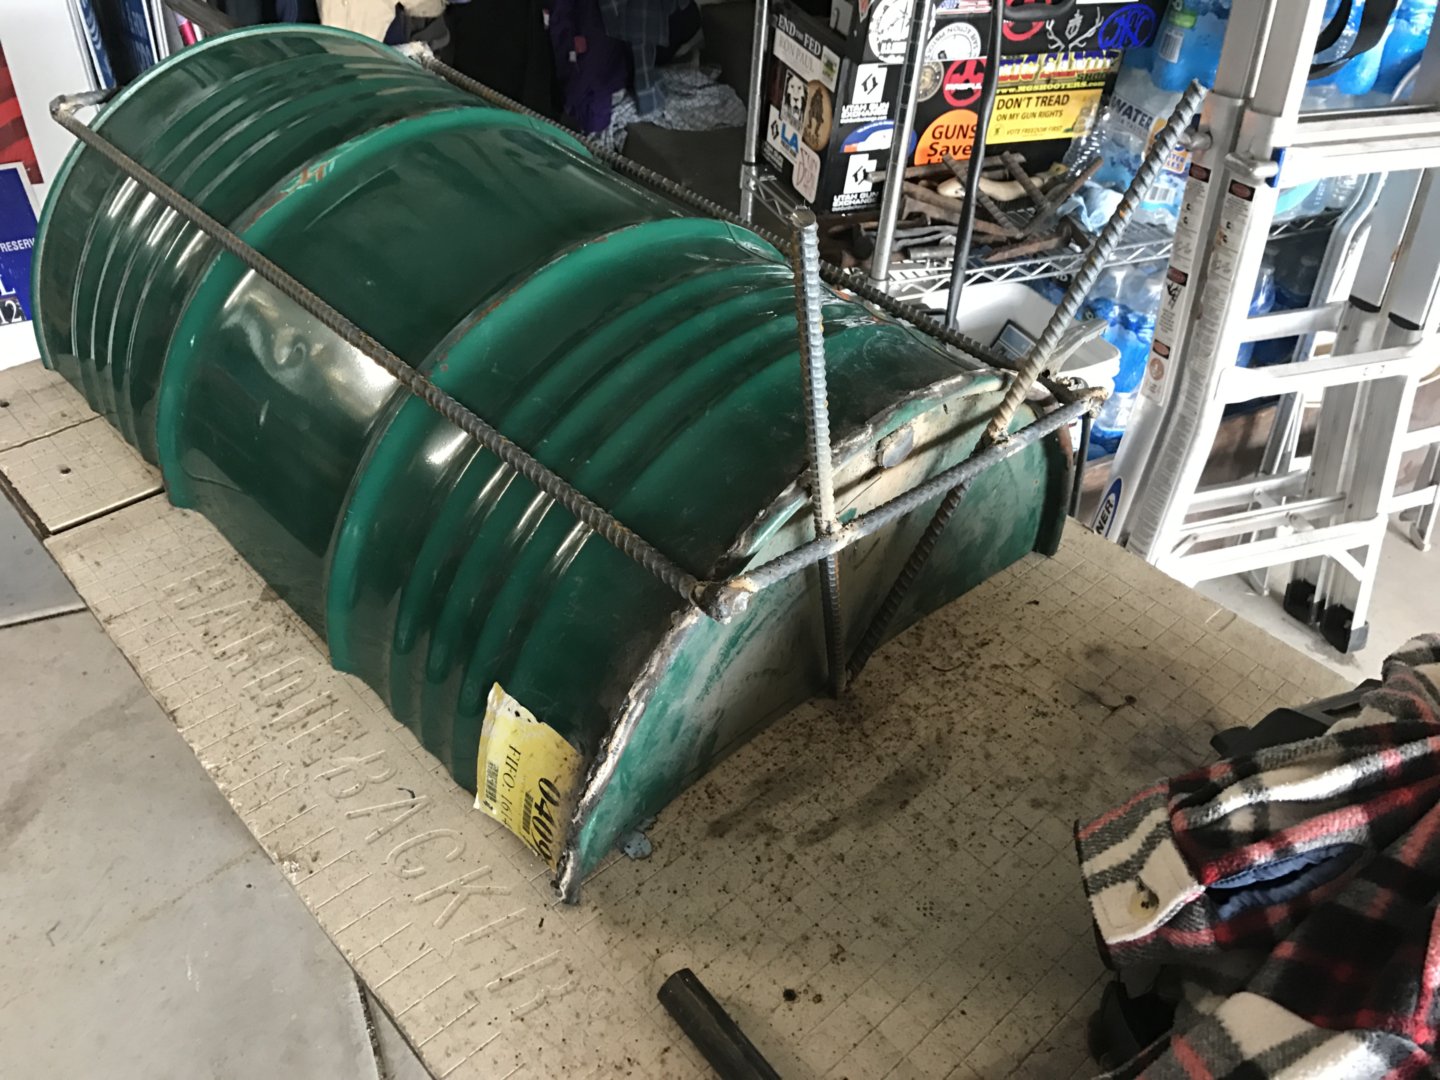
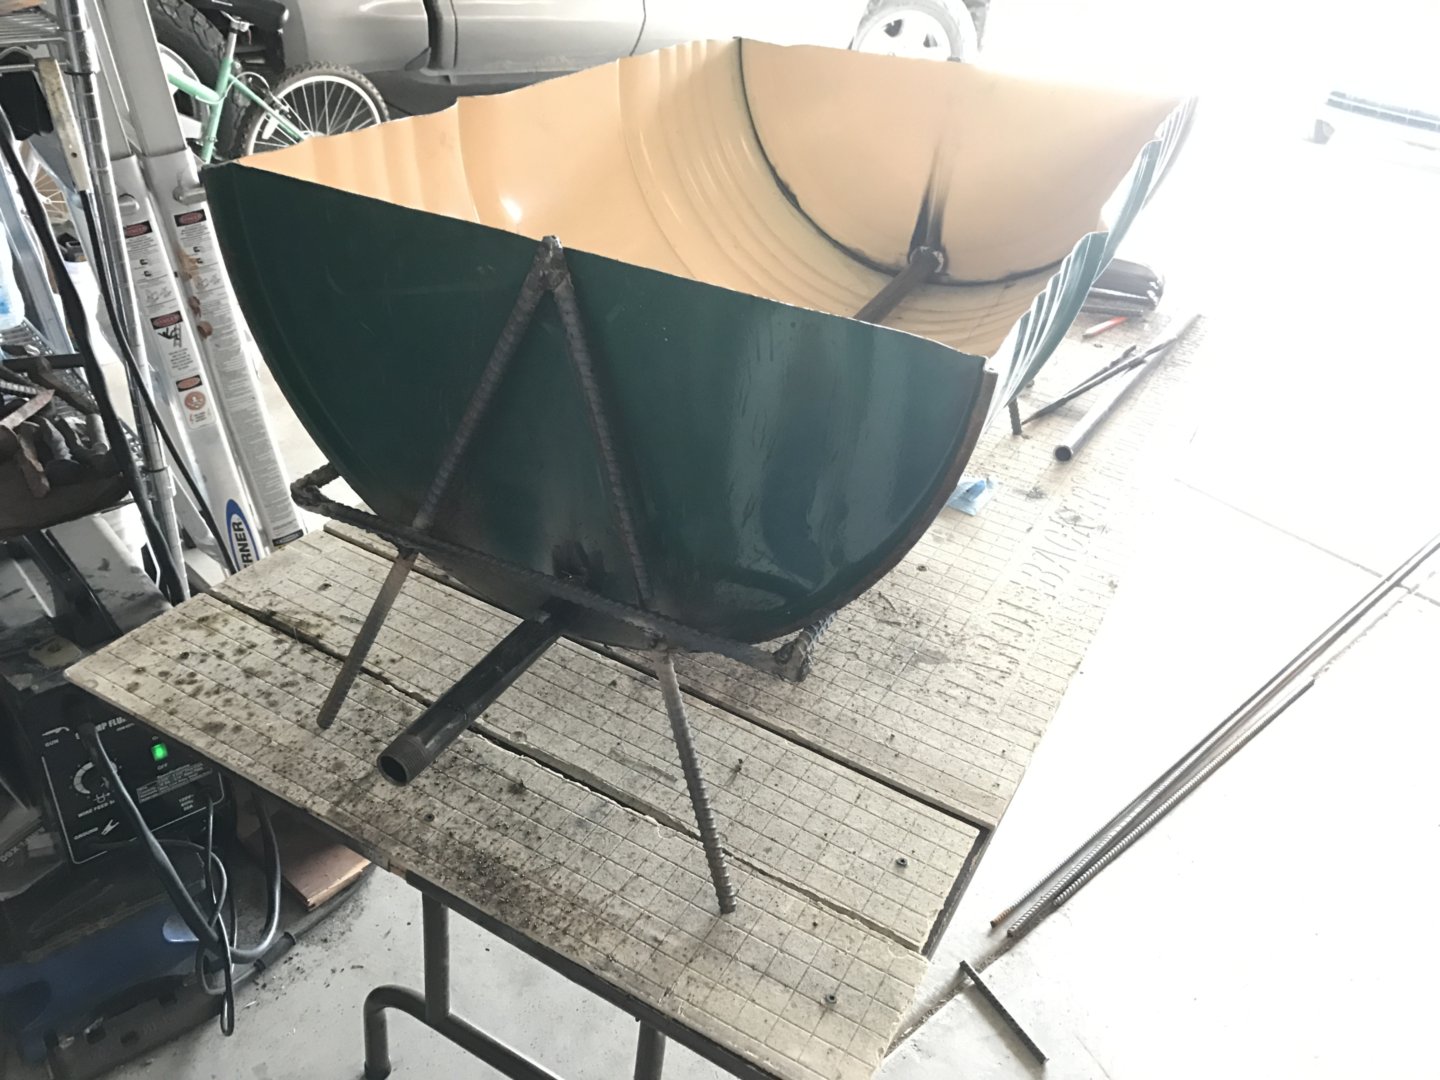
    Putting the barrel upside down, and then taping the rebar to the barrel “about” where I wanted it, then I welded the cross re-bar, and then it sits like a saddle on a sow.


    My son had the idea of 45 degree angle on the A-frame (which we welded BEFORE  we put it on the frame.

    we put the legs inside the frame, for strength & support.

    leg-rebar is 20″ long.  the wide runs is 37″ long.


    DESIGN REQUIREMENTS:

    1. airflow for starting and warming lots of charcoal.
    2. low to the ground so you can put  dutch-ovens inside if desired.
    3. Portable & durable.
    4. off the ground so you can use this without scaring the earth/pavement
    5. Something my kids can use for marshmallows on the grass or pavement.
    6. It’d be NICE if the legs/stand was removable.

    Tools that made this nice!

    Step Drill Bit, so I got the air-flow pipe really tight for the barrel. 

    Welder makes all the difference. We used the welder to weld the lid on, the legs and weld the pipe to the barrel.

    angle grinder(s). Battery angle grinder for sanding the edges(because it doesn’t turn too fast), corded for cutting …for serious torque!
    saws all/reciprocating saw – amazing, you can really get a straight line if you are following marker. YES, I carefully measured!

  • improvised 10mm snakeshot for a woods gun

    One of the downsides of the 10mm for a trail-gun or woods/predator defense gun is that there is no commercial offering for snake/shotshell loads.

    IMO, the 454 5″ Ruger Super Redhawk is hands down THE BEST Predator Defense gun. Both for large predators & venomous snakes (45 colt snake shot is amazing!).
    But, one downside to the 454 is size & weight and difficulty concealing. For that reason, I have a 10mm semi-auto when I need to go into the woods; concealed. I’m very hopeful for the XDM 10mm coming out in 2017!  But until then, I have to “hold my nose” and use a Glock 20.

    My Glock 20 has a 10mm, 40 SW & 9×25 barrel. So, I was thinking of an experiment of trying  40 SW snakeshot in a 10MM barrel.

    THE RESULTS of 40 SW in a 10mm Barrel.

    Patterns good at 8′, but may not be effective on a venomous snake at 10′.
    The TWO shotshells I tested; BOTH failed to eject (FTE).
    My impression is, the “casing” over expanded in the 10mm chamber, and thus failed to eject(gun closed on an empty casing, so it was NOT a brass high malfunction (type2)).  The gun cycled enough to reset the trigger. I could tap-slap-my-shoulder and resolve the malfunction (Type 1).

    Here are photos of the casings & pattern.
    The author aimed at the square cut-out at 10′.
    The author aimed at the orange circle at 8′.

    CCI 40 SW snakeshot in a 10mm barrel @ 8' and 10'
    CCI 40 SW snakeshot in a 10mm barrel @ 8′ and 10′

    casings after firing 40 SW snakeshot out of a 10mm barrel.

    casings after firing 40 SW snakeshot out of a 10mm barrel.


    Shooting anything but shotsell 40 S&W through a 10mm barrel is NOT recommended. For example, do NOT shoot 40 S&W FMJ nor HP in a 10mm barrel. I’ve seen people on youtube shoot FMJ 40 S&W through their 10mm chamber!  NOT RECOMMENDED. I did not follow my own advice, and tried shooting 40 SW through 10mm Barrel, I survived w/o injury…but you likely will be injured if you ignore my advice & shoot the wrong bullet in the wrong barrel. One of THE most dangerous combinations is 40SW in a 9×25 barrel!!! YIKES!!!


  • Prepper Lunch Agenda


    Many have requested we make our prepper lunches more of a “lunch & learn” vs a social hangout.


    Click here for the agenda or what you’d like to discuss at our prepper lunches.

    https://docs.google.com/document/d/13Lys-r7S87vjnq6B3UEVEzlbrNIxttjQyK-dItDCE44/edit?usp=sharing


  • Preparedness Fuel & Power

    I’m going to add to this blog over time as I learn, understand Preparedness Fuel and Power.

    Before getting into this blog, make sure all areas of preparedness are well covered.
    Why would you have 6 months of energy squared away, but not have a weeks worth of water?!?

    Do you have a weeks worth of food, water a way to protect/defend it, sanitization, energy, shelter?

    Start with a week and then a month and then 6 months on the following topics (food, water, shelter, security, energy, health & sanitization).

    We all have PET topics/areas of preparedness, but we must be systematic and holistic!

    <paste from Jack>

    Your 6 survival needs

    • Food
      • Journal your consumption
      • Eat what you store, store what you eat
      • Just get to 2 weeks, do it again, do that again = 60 days
      • Become a producer
    • Water
      • Soda bottles, Arizona Tea bottles etc
      • Frozen water serves two purposes
      • Learn to make water safe to drink (filter, boil, etc.)
      • Consider rain catchment or locate local sources
    • Shelter
      • A place to go that you can count on
      • A well thought out evacuation plan
      • Tarps, tools, etc. to stay home if possible
      • Get a good portable shelter and hope it is only for camping
    • Security
      • Develop op sec and situational awareness
      • Consider being armed
      • Avoid the three S’s – Stupid Places, Things, People
      • Accept both the good and bad realities about security
    • Energy
      • Build a black out kit include rechargeable batteries
      • Get a inverter, extension cord and splitters
      • Generator or battery bank
      • Store Fuel – 12 can rotation over time
    • Health and Sanitation
      • Have a way to dispose of or deal with waste
      • Keep a good medical kit on hand at all times
      • Develop disaster time procedures and protocols
      • Learn the most basic use of herbs and essential oils
    • You just keep going from there
    • The other basics
      • Cash – carry cash, have cash at home as well
      • Insurance – keep it updated
      • Bank Accounts – have two
      • Documentation – build “the pack”
      • Communications – weather radio/battery radio and TV antenna
      • Cell Phone – battery packs
      • 72 Hour Kit – skip the tactical shit, at first
    • Final thought, if you won’t help yourself, why would anyone else

    </paste>


    Lets dive into energy!

    BLACK OUT KIT

    A “black out kit” is in case the power goes out and you can quickly turn the a flashlight on.

    For me, I carry a flashlight everyday (EDC) & I have motion sensor lights in every room & hallway, so a blackout kit is automated for me & our family.

    GEAR:

    BTW, costco has a better deal on these from time-to-time!

    POWER INVERTER (convert DC to AC)

    With an INVERTER you can turn your car into a generator!

    This is the inverter I keep in my car.
    This is the inverter I keep in my car.

    This inverter is handy to run your laptop etc in your car:

    What about your fridge & freezer?

    Well, it should be well stocked with meat & provisions, but if it is not, you can freeze 2liter bottles of water; which helped us when we were without power for 3 days August in Memphis. ALL of our friends/neighbors LOST hundreds of dollars of food from their fridge/freezer, but we didn’t LOSE any food because our chest freezer had lots of frozen 2liter bottles!

    I figure that a full chest freezer will last 3-4 days, after that you need to add ice. I have this ice maker that I can use my generator or car with an inverter to make ice!


    Generator or battery bank

    I recommend buying a generator from costco, with the costco guarantee. Several times a year they come on sale.

    This is the generator I have:

    https://www.costco.com/Champion-7000W-Running–9000W-Peak-DUAL-FUEL-Generator-wElectric-Start.product.100220385.html

    PRACTICE USING your generator every 6 months and ENSURE several people in your family can operate the generator!

    Store Fuel – 12 can rotation over time

    I recommend you have 12 gas cans (NOT stored in your house/garage) and have each one labeled 1 through 12. 1=Jan 12=Dec, and then dump that month’s into your car 12 months later and refill it that same month. That way you have 12*5 (60 gallons of gas) and it never goes bad!

    So, I’m VERY excited about this prepper product! Anyone that has used a govt-designed gas cans in recent history will know it is nearly unusable!

    Yet another govt-scam!
    I’ve almost seriously injured myself “modifying” these pour spouts!

    Now, we don’t have to!
    No more spilling fuel on yourself or the environment!

    CHECK IT OUT!

    https://www.amazon.com/Replacement-Spout-Water-Update-Your/dp/B00CYNDNM8/ref=as_sl_pc_as_ss_li_til?tag=libertyfoxdef-20&linkCode=w00&linkId=3683deb36c3d93e9a3830c149df70907&creativeASIN=B00CYNDNM8

    As far as the govt goons go, this is for a water jug 😉

    If you want a vent hole so it pours faster, grab these too:

    https://www.amazon.com/YELLOW-Cap-Replacement-Rotopax-Septer/dp/B00ZAOJ8EA/ref=as_sl_pc_as_ss_li_til?tag=libertyfoxdef-20&linkCode=w00&linkId=e621d95f4aea9fde305387d8787ddef3&creativeASIN=B00ZAOJ8EA

    I added it to my “fav gear list/Gear recommendations list”:

    https://libertyfoxdefense.com/recommended-gear/


    UPGRADE YOUR ENERGY preps!

    Once you have your car-generator, you are ready for a better more mature solution. Look at myinpower!

    Powering your home when the grid is down


    This Wednesday at 7pm, at my house. I will be showing how I can run my furnace blower/heater without the power company/grid.
    There is this COOL device that allows me to safety cut-off the grid and switch to a generator connection.
    THIS is a lot of peace of mind, for half-day or multi-day outages. When I was very young, my family went 6 weeks without electricity.
    When we lived in Memphis TN, we were w/o power for 3 days in August. Very HOT & humid!
    Several times in Saratoga, we have been w/o power for a half-day.  Knowing that I can power my freezer/fridge & heat/cool my family for a few hours a day is a big peace-of-mind.
    Well worth $650 for the “myinpower” that allows me to switch from grid2generator!!!
     Solar is the most expensive per watt option. But if you are off-grid, its way less money than running electric lines 50 miles!
    Solar will be another topic for another day. But I believe you better have 12 months of food/water/energy/health & sanitation, Security!  BEFORE you start looking at Solar!
  • Shotshow 2017

    TUESDAY

    I got some great photos with my son, he joined us at shotshow this year…finally. I’ve  been wanting to bring my son for many years.

    A few years ago we did a group buy on an awesome gun safe, but it had defective multi-locks. I spoke with securam and they will make an exception on replacing the locks!

    TOPS knives: I’ve bought a 50% off tops knife at every shot show I’ve been to. This year, they have to ship it to you because NO “cash & carry allowed” 🙁 🙁

    I got to pet silencerco’s new integrated 9mm glock-like suppressed pistol. Its “ok”.
    https://silencerco.com/maxim/
    I’m going to pass, still near impossible to conceal.

    I DID speak with Mike P., he has moved on from silencerco to “dead air”.For me, I’m in the market for a “pistol suppressor”. Mike thinks I’d be happy with this one (the ghost).
    https://deadairsilencers.com/products/ghost-m/

    I talked to yamaha about a 4 seater side by side ATV, for hunting…with a little sport. They say, they hope they are coming out with one soon!  I really LOVE yamaha products and my 2000 kodiak just keeps going and going. I love their transmission!

    snapsafes had a cheapo vault door for a “cold storage/ food storage room”.
    about $1100: https://www.midwayusa.com/product/106307/snapsafe-vault-door-36×80-digital-lock-matte-black
    Weighs about 300lbs, which is about 1000 lbs too light IMO.

    wicked sharp has a new product of “wicked sharp GO”, a portable sharpening. I got my sypderco very very sharp. I’m considering buying one!

    secureit ultra light gun safes & storage solutions. I met the president of the company and we talked about wranglestar’s review of his safe. I’d really like to add this product to my offerings. This solution seems to fit my customers best.

    magpul has a stock for the ruger1022 take-down, where the barrel & forearm of the firearm stores in the stock!
    I’m considering ordering a walnut stock 1022 take down and then ordering the magpul backpacker stock!

    gerber skinning knife…razor blade replaceable!
    http://amzn.to/2iNGzb0

    gerber strong arm (tactical field blade):
    http://amzn.to/2iNH7Ob

    I’ve been on the edge of getting a binoc range finder for many years. I think I’ve finally found the one I want its the vortex fury.

    Blackhawk has a new kydex holster, they claim will fit 150  pistols. This is an outside the waist band solution called the Blackhawk omnivore. Sounds like if your semi-auto has a rail, it’ll work in this holster.  It has a thumb retention mechanism.  With & without a light. Left handed or right handed.
    http://amzn.to/2k7aDno


    THOMAS’ TODO:

    YHM dust cover for 300 blackouts

    Yamaha wolverine 4 seater – wait for 4 seater

    see about professional service/instructor discount for Springfield

    secureIT group buy

    wicked edge sharpener – GO

    share photos

    signup for winter driving course.

    THOMAS’ LIKE TO BUY:

    The new Magpul “backpacker” stock for the Ruger 10/22 TAKE down:

    http://www.brownells.com/rifle-parts/stock-parts/rifle-stocks/ruger-10-22-takedown-hunter-x-22-backpacker-stocks-prod98444.aspx

    Vortex Binocs/rangefinder:

    http://www.brownells.com/optics-mounting/binoculars-amp-accessories/binoculars/fury-10x42mm-laser-rangefinding-binocular-prod98301.aspx

    Holosun solar reddot:

    http://www.brownells.com/optics-mounting/electronic-sights/red-dot-sights/quick-detach-circle-dot-solar-micro-red-dot-sight-prod88131.aspx

    ESS sun/safety glasses Group Buy

    I ordered a 44mag and below “body armor” for my vertx backpack for only $150.

    I purchased my son this amazing knife for only $120: https://www.topsknives.com/knives/tactical/anaconda-7b

    COOL STUFF

    Two wheel-drive trail bike called the Rokon

    https://www.rokon.com/

    Angel armor for your vehicle, transferable from one vehicle to another! Windows and doors

    https://www.facebook.com/AngelArmorIntel/

    discrete conceal carry belt – Next Belt:

    https://www.nexbelt.com/

    <paste from John Farnam- newest on top>


    20 Jan 17
    2017 SHOT Show, Last Day:

    At this, the last day of the 2017 SHOT Show, nearly everything stopped
    during the swearing-in ceremony in Washington DC.  There were TV monitors
    everywhere.  A spontaneous cheer broke-out at the conclusion, and cheering
    continued throughout DJT’s acceptance speech.  It was as if a great plague  had
    been lifted from our Nation.  Actually, that description is pretty  close!

    I notice there was destructive rioting in DC and other metro areas, by
    leftists of course, acting like the spoiled brats they are.  When BHO won  in
    2008 and 2016, I didn’t like the results either, but I didn’t react by
    destroying property and hurting people.  That is because we consider  ourselves
    good people, far from perfect of course, but at least striving to be  good
    and decent citizens.  Leftists aren’t, and don’t!

    A South African ex-patriot, now living in the UK and also watching,
    commented:

    “While watching, I cried bitterly for my lost country…

    Best wishes Marine, my comrade and brother!”

    Today, saw the “Coyote Light.”  It’s a powerful red spotlight, used to
    hunt predators, particularly coyotes.  Red light does not “spook” the
    animals.  It’s almost invisible to them!

    A company called “Timber Creek Outdoors” makes grips and forends of
    aluminum, but both are skeletonized, to reduce weight.  An even more
    revolutionary AR forend is made by “Brigand Arms” from woven (braided) carbon  fibers.
    It is very strong, with plenty of places for heat to escape.

    Primary Arms, makers of an Aimpoint H1 knock-off, also makes a wide variety
    of other rifle optics, which I didn’t know.  I have one of my ARs equipped
    with a Primary Arms RDO, and it has always run well.  At under $200.00, it
    is very attractive!

    Overall comments:

    The first day of the SHOT Show, I noticed crowds were down from last year,
    but the second and third days, it was very crowded.  I was told that a
    number of late vendor registrations had to be turned town, for lack of space,
    much as was the case last year.  When you want to come, get your
    credentials in advance.  Otherwise, you’ll stand in long lines most of the  first day!

    Mood was upbeat, particularly after this morning’s Inauguration  Ceremony!

    Many claiming to make ARs, more than I could count!  Again, the money  is
    in high-end guns!

    More AR accessories than I could count!  One, called the “Trigger  Point”
    incorporated a laser switch in the rifle’s trigger!  For one, I  think the
    purpose of triggers should be confined to causing the gun to fire, but  maybe
    I’m just old-fashioned!

    Many ammunition manufacturers, knife-makers, range equipment makers, and
    loading/reloading equipment manufacturers.

    The SHOT Show is a coming-out party.  Vendors are here to write orders  for
    the coming year.  They want to talk with distributors and big  retailers.
    But, everyone is polite, and most even talk with lowly  trainers, like me.

    We’re used to the Sands Exposition Center now.  We know where  restrooms
    are, and most vendors end-up pretty close to the place they were last  year!

    When you come to the SHOT Show, be prepared to walk!  By the end of  the
    day, your feet and legs will feel it!

    This year’s SHOT Show was a great success, for most attendees, and for me
    personally.  I get to see all my old friends!

    Now, I’m going to find a poker game!

    /John
    19 Jan 17
    2107 SHOT Show, Third Day:

    I spent all morning at our annual meeting of the Board of Advisors of ACLDN
    (Armed Citizens’ Legal Defense Network).  Our Network is rapidly growing
    in  size and influence, and still represents your best bet for legal and
    financial  shielding, as a legal American gun-owner/carrier.

    Other Board Members include Manny Kapelsohn, Mas Ayoob, Jim Fleming, Tom
    Givens, Denny Tueller, Marty Hayes

    The excellent educational material provided with your membership is worth
    the price by itself!  With membership now over 12k, in 2106 we had no
    incidents requiring the intervention of the Network!

    I conducted several recorded interviews on the SHOT Show floor this
    afternoon, with my friends and colleagues, James Yeager, Pete Pi (CEO of
    Cor-Bon), Justin Moon (CEO of Kahr), and  Jared Wihongi, knife designer and  trainer
    for Browning.  Much good current information, and all will be made
    available shortly in our Operator Series videos.

    Browning Black Label knives (designed by Wihongi) are available on our
    Operator Series Web Page, at our Pro Shop.

    I talked with friends at Blackhawk. Contrary to what I reported yesterday,
    Blackhawk’s wonderful series of discrete rifle bags, called “Diversion
    Bags,”  has been discontinued.  I encouraged them to bring them back!  In the
    interim, “Sneaky Bags” (mentioned yesterday) will suffice and make an
    acceptable  alternative.

    I talked with friends at First Light.  Flagship product continues to  be
    the 700 lumen T-Max LE.  Customer service at Firstlight is second to  none!
    The T-Max LE is also available at our Pro Shop.

    This afternoon, we received the news that the US Army has officially
    adopted the SIG320 Pistol to replace its ageing (and never popular) fleet of
    Beretta 92s.  Friends at SIG are delirious!  They tell me that SIG’s  clever
    modularity was the major selling point.  It’s a good choice, and  will serve
    the Army well!

    Our Presidential Inauguration is at 9:00am (local time) tomorrow  morning.
    We’ve already seen several rag-tag protestors locally.   Everyone here is
    on-edge, concerned about dangerous rioting.

    Interesting that only leftists think they have the right to riot!

    More tomorrow!

    /John


    18 Jan 17
    2017 SHOT Show, Second Day:


    I saw Dick Davis of Armor Express today!  Dick, inventor of soft body

    armor and supposedly “retired,” still mans the AE booth.  Dick and I go  back a

    long way.  He is a real hero!


    Dick is reviving the Bowling Pin Shoot, where we all had such a great time

    so many years ago!  Central Lake, MI, 9-16 June 17.  I’m going to try  to

    make it!


    At Raven Holsters, I confirmed that they are still making the “V62.”

    Basically, a trigger-guard cover, with a lanyard.  Perfect for pistols kept  in

    handbags.  The trigger is protected.  When the gun is drawn, the  cover

    pulls off, and the pistol can then be fired normally.  They’re making  it for

    the G19/23, and now the S&W M&P, and the G42.


    Phalanx Defense is still making their “Stealth Operator.”  A kydex

    belt-holster (outside and IWB) that fits nearly any modern service pistol.

    Perfect for equipping students coming to Courses without holsters or with

    nonsense “holsters” that are unsuitable for serious carry.


    A company called SERT had on display their line of “Sneaky Bags.”   Soft

    rifle cases that don’t look like gun cases.  Several sizes to  accommodate

    nearly any serious rifle.  I’m getting one!


    Blackhawk makes a similar line they call “Diversion Bags”


    UTM (Ultimate Training Munitions) make a clear face-mask, suitable for

    Airsoft training.  One problem inherent to Airsoft and Sims training is  that

    most face-masks make it impossible to see facial expressions, and

    interpreting facial expressions is an important component of scenario-based  training.

    This face mask solves that problem!


    Hexmag, famous for AR magazines, is now making a G17 pistol magazine, as

    well as a 20-round 308 rifle magazine.


    Lancer is also making an excellent AR magazine, and 308 magazines.

    Semi-translucent plastic body reveals remaining round count, without making it

    obvious to everyone.  Hard to beat!


    Friends at Lehigh Defense, makers of high-performance ammunition, showed me

    their new FTM round.  The 9mm version features a solid copper, 90gr bullet

    with a “scalloped” nose. It is not a hollow-point, but the Lehigh folks

    are  convinced it has superceded conventional controlled-expansion

    projectiles, and  thus represents the next step in the evolution of serious pistol

    ammunition.


    Velocity is 1400f/s.  Penetration 12″-18″, per FBI standards.   Gelatin

    tests are impressive, and of course, there is no hollow cavity to  plug-up!


    I’ll have some to test shortly!


    Friends at Lone Wolf, makers of replacement Glock barrels, and a host of

    other Glock replacement parts, tell me that the barrel they make that

    converts a  G22/23 into 9mm (9mm Glock magazines run in 40S&W Glock pistols just

    fine)  is their most popular item.  Can’t make them fast enough!


    Owners of 40-caliber Glocks can thus “convert” their pistols to fire

    relatively inexpensive 9mm ammunition.


    Lone Wolf is now doing the same thing for the S&W M&P Pistol!


    The surging popularity of 9mm pistols is insuring prosperity for Lone  Wolf!


    Friends at Eotech tell me the “thermal drift” issue that reared its head

    last year is now history.  I editorialized at the time that the whole

    affair was mostly BS anyway, and irrelevant for the vast majority of  users.  In

    any event, it is long-since been taken care of.


    More tomorrow!


    /John


    17 Jan 17


    2017 SHOT Show, 1st Day:


    Two more major companies have now produced Glock-like pistols, both of

    which I got my hands on today:


    Century Arms CANIK (TP9) Pistol, and the CZ P10C Pistol.


    Both are striker-fired, polymer-framed, double-column, 9mm service pistols,

    with VGG (variable grip geometry), tabbed trigger, and no manual safety.

    Retail for either is $500.00-$550.00.  Both are very acceptable, and very

    new!


    I particularly like the CANIK.  Turkish manufactured, but well made,  its

    slide is ceramic coated (cerakote).  Slick and smooth.  Trigger is

    Glock-like, with crisp reset.  My friend and colleague, James Yeager, is  currently

    carrying a copy and has no compunction about recommending it.  I  may do the

    same!


    One concern of mine is the pistol’s ambidextrous, long, cantilevered

    slide-release levers.  When operating the one on the left side of the  pistol

    with your thumb (assuming you’re right-handed), there is no  problem.  We

    prefer racking the slide, but using the lever may be necessary  from time to time.


    However, when a right-hander uses his right index finger (trigger finger)

    to push down the lever on the right side of the pistol, his finger often

    slides  off, enters the trigger-guard, and hits the trigger!  On the left side

    of  the pistol, the thumb is too short to cause that problem.


    The Walther PPQ has the same issue!  On my copy of the PPQ, I had my

    gunsmith simply remove the lever on the pistol’s right side.  With it gone,  the

    potential problem goes away!


    When I get my copy of the CANIK, I’ll perform the same surgery!


    I’ve informed friends at both Walther and Century Arms about this potential

    issue, so they are aware of it.


    I asked friends at Beretta if their Glock-like APX Pistol would see the

    light of day at this year’s SHOT Show.  They answered in the negative, once

    more, and could give me no intro date.  I’ve only seen pictures of  it.


    That leaves only two, major gun companies without a modern, flagship pistol

    to sell:


    Beretta and Colt.  Both need to get with it!


    Friends at DSA, Robinson Arms, et al all tell me that there is little

    profit any more in low-priced, plain-vanilla ARs.  Much competition, and  some

    companies now using cheap, Chinese parts (which are mostly crap).   With

    retail prices flirting with $500.00, there is scant incentive to get into  that

    business.


    The money is now in high-end AR and other military rifles, with features

    like high-tech coatings, M-lock forends, high-tech optics,

    collapsible/adjustable stocks (Robinson Arms’ version is called the “Fast 3″),  etc.  DSA,

    Robinson Arms, PTR, Daniel Defense, Doublestar, et al now have  wonderful

    offerings and packages in that category.  For one, I don’t want a  “cheap” AR!


    Cor-Bon is now making practice (hardball) ammunition, in house, at

    attractive prices!  Their high-performance ammunition, like DPX, Power  Ball, Urban

    Defense all continue in high popularity.  Cor-Bon is becoming a  major

    player.  A company to watch!


    I got a chance to handle Meprolite’s “FT” sight today.  It’s a

    low-profile attachment to the rear of a pistol’s slide.  Much less bulky  than a

    typical RDO!  No holster modification required.  No  batteries.  Front sight

    becomes irrelevant!  Shooter sees a small,  illuminated dot, surrounded by a

    small circle when the pistol is at  eye-level.  I like the “sight picture,”

    but I’m concerned that you can’t  see anything until everything is precisely

    aligned.  I thus found myself  “fishing” for the sight picture as the

    pistol came up to eye-level.  Maybe  after I use it for a while, a consistent

    presentation will address that  issue.


    Kahr, who used to have the single-column, striker-fired, carry-pistol

    business to themselves, now has much competent competition, as I mentioned

    yesterday.  They’ve responded with their new TU3 series of 9mm and 380auto

    pistols, featuring three-dot sights and a cerakoted slide.  I like it and  will

    have a copy (9mm) soon!


    Friends at Comp-Tac tell me that the trend in concealment holsters now is

    in making holsters that will accommodate RDOs and laser attachments

    permanently  attached to pistols, as it seems those two “enhancements” have really

    caught-on  in the burgeoning concealed-carry market.


    Speaking of which, friends at GTM (Gun Tote’n Mammas) tell me demand for

    their purses, briefcases, and handbags continues brisk!  For many women,  and

    not a few men, “off-body carry” represents the only option for being

    continuously armed.  GTM’s line is, by far, the most current, competent,  and

    extensive, and all top quality.  We’ve trained GTM’s management team,  so

    they know how to go armed, and do!


    For those of us who still prefer “on-body” gunleather, Tom Kulwicki at

    Alessi Leather is the man to see!  Tom’s shoulder-holsters, ankle-holsters,

    and his “Talon/Tuckable” belt holster are second to none!  Expensive, but

    the best always is!


    The Show is huge.  We’ve barely started!


    More tomorrow.


    /John


    16 Jan 17


    2017 SHOT Show, Range Day


    We’re here in Las Vegas, NV for the 2017 SHOT Show, all this week.


    Today was Range/Media Day at an outdoor range in Henderson , NV, where we

    had the opportunity to shoot all the new guns that were of interest.


    Here is what caught my interest:


    Colt’s “Cobra” 38Spl, six-shot snubby revolver has been revived!   Smooth

    and slick!  The “Cobra” and “Detective Special” were discontinued  years

    ago.    Those of us who still have copies surely treasure  them!  This new

    Cobra is wonderful.  For a back-up gun, you can’t go  wrong!


    We saw and shot the new Hudson Pistol.  It is marketed as a  striker-fired

    1911, but it feels more like an all-steel Glock!  No variable

    grip-geometry, and it features a “jointed trigger,” with the hinge at the  bottom. Short

    pull and shallow reset.  Feel of the trigger is different  than most, but I’

    m sure I could get used to it.  Recoil is mild, but the  gun is heavy.


    We shot the Springfield Armory EMP in 9mm.  Short and flat.  Nice  for

    carrying.  Grip is bobbed at the rear, much like the Walther PPQ, which  I

    really like!


    The Kimber K6S six-shot, snubby revolver was smoother, even than the Colt

    Cobra!  Once again, excellent back-up gun.


    Honor Defense has been in business for a few year now.  They make a  nice,

    single-column, 9mm, Glock-like carry pistol.  Trigger-group is  modular,

    much like the SIG 320.  Designed to compete with the Kahr PM9,  S&W Shield,

    Walther PPS/M2, and G43.  I like them!


    We had a chance to shoot S&W’s “Gen-2″ M&P, and they’ve make some  genuine

    improvements.  “Cat’s tongue” stippling is just right!   Trigger is much

    improved, now with a snappy reset.  Since its introduction,  the M&P Pistol

    has established an excellent reputation for reliability and  durability, and

    I have no compunction recommending it.


    Angel Armor from Colorado makes the lightest “stiff” armor I’ve ever

    seen!  They won’t tell me what it’s made of, but a panel that lines an  entire

    car door, rated for all pistol rounds, weighs less than eight  pounds.

    Chest plates that stop rifle rounds are a half-inch think and  weigh ounces.

    Amazing stuff!


    Inland’s M1 Carbine is wonderful!  This little rifle is still a  favorite

    of so many.


    Urban Carry makes a clever update of the old “Pager Pal” holster.  The

    pistol is hidden beneath the trousers in the “appendix” position.  Pulling

    up on a leather tab exposes the butt of the pistol, so it can be quickly

    drawn.  Of course, reholstering requires both hands.  Vicki, and my  daughters,

    will be testing it!


    Doublestar, makers of wonderful ARs and 1911s, had on display and

    interesting AR accessory, called the “Mortar Plate.”  It’s a butt-plate  (with

    rubber pad) that attaches to the end of the buffer-tube.  It makes a  short AR

    stock, about as short as a telescoping stock when fully  collapsed.  However,

    it is far less bulky.  Too short for me, but  Vicki really liked it for its

    lightness and lack of bulk!


    I admire all manufacturers who are not afraid to come out on Range Day and

    invite all of us to actually shoot their wares, with live ammunition.  My

    favorites were all there, even ones I didn’t mention.  They deserve much

    credit!


    The Show starts tomorrow morning.


    More to come!


    /John