Blog

  • Marksmanship Matters Pistol1-5 Recap

    August 2011

    By Thomas E.


    skip loading at 7 yards, 6 rounds in one “splat” 🙂


    SUMMARY of Pistol 1-5 from Marksmanshipmatters.com


    In a word, Marksmanship Matters class is “QUALITY”!!!
    QUALITY instruction, methods, experience of instructors and depth of knowledge. In short, if I was going to do it over again, I would take the $4,500 I spent on my Frontsight’s diamond membership and go to all of Larry’s courses. WHY you ask? Because he takes the time to build a proper foundation, BEFORE trying to do too much or too fast. Learn to shoot ragged holes BEFORE you learn to speed shoot!!! I was continually astonished at the time, care and quality of instruction they gave each student. Larry can not violate his integrity by going too fast, or ignoring an important principle, method or skill. This seems to drive him to excellence!!!
    Marksmanship matters is excellent in training ladies. Stacey has the perfect balance of directness and a lady’s touch that helps female students feel comfortable and confident.

    An email I sent Larry:
    “Larry, you have such an amazing class! I was continually astonished at the one on one and personal attention given to each student. QUALITY, EXCELLENCE in everything I experienced in your class.  I can tell you I’ve takem 4+ basic handgun classes at Frontsight, and I’m MAJORLY bored in those classes and can’t hardly stand to take the class. I flat will NOT take the 4 day basic handgun class at Frontsight anymore.
    However, with your class, even the basic class I was excited to learn extensions and additions AND I was not ignored. I was taught how to be better in everything and at whatever level I was at. One small example, mid-June at Combat Tactical, the instructor had us shoot 3-4 rounds at a HUGE target at 50 yards. I was lucky to have ANY hits. I was frustrated with myself. At the end of your class I was hitting the 12″ popper at 45 yards very consistently. In fact, I hit it 6 of 7 shots at 45 yards…in wind/rain during a stressful man-on-man competition.  Another example, I was able to get all 6 of my rounds in a 1″ square at 7 yards doing the ragged hole drill at another training class I took early August. ALL because of your skip loading drill and quality of instruction. SO, THANK YOU!!!!” I would be very comfortable, confident and pleased to refer my wife, mother/father, daughters/sons to you and your courses. I KNOW they would be safe and get EXCELLENT/QUALITY instruction. I’m still astonished at the cost/benefit ratio of your courses!!!

    NOTE to frontsight students/supporters:
    If you feel you are plateauing and not really improving by going over-and-over to frontsight, take a serious look at marksmanshipmatters.com
    For all you frontsight trained folks out there, Larry will take you to a level you have been desiring and hoping to get after three or four 4-day classes. Have you felt ignored, even in skill builder classes? Have you felt; how can they possibly help me improve when there are 30 students…40+ students? I got the basics down, now I’m ready to really improve! Hate to break it to you, but you have thousands of repetitions doing it wrong…or at least not doing it right.
    Even after 3-4 skill-builders, you won’t be anywhere as good a shooter as after Larry’s class. Build your foundation properly by training with Larry and Stacey and not a too-fast, too-soon, too-hasty class.

    READ LARRY’S ARTICLES AT:
    http://www.marksmanshipmatters.com/
    Especially: Why Surrender Is Never an Option
    http://www.marksmanshipmatters.com/index.php?option=com_content&view=article&id=50&Itemid=63

    I feel I have a good background to evaluate the common body of knowledge (methods) and defense school services.
    Here is the list of defense related classes I’ve taken. OVER 35 DEFENSE CLASSES!
    https://libertyfoxdefense.com/aboutinstructor/


    ABOUT LARRY:

    Larry was an Infantry Light Weapons Sergeant in the First Air Cavalry in Viet Nam in 1967/8 where he participated in numerous fights including the battle of Tam Quan.  He was decorated for these actions.

    Larry joined the LAPD in 1969 where he served for nearly 35 years.  He was a member of the well known LAPD SWAT team for 14 years where his duties included Chief Firearms and Tactics Instructor.  In 1991 Larry transferred to the Police Academy where he served as the Training Division Chief Firearms Instructor for 13 years until his retirement.
    39,000 Men and Women have worn the badge of the LAPD.  Larry was one of 11 Officers in the history of LAPD to be awarded the medal of valor twice and one of only 39 Officers to ever shoot a perfect score on the LAPD “Advanced Course.”  Larry is a six time Gunsite Graduate.
    During his 42 years of teaching firearms he has trained USMC Recon, Department of Energy (SWAT) Special Response Teams, the California Highway Patrol Special Response Team and SWAT Officers from numerous agencies.  He has taught for the U.S. State Department and trained SWAT teams from several foreign countries.  He is an accomplished competitive shooter, a Gunsite Range Master and a NRA instructor.
    http://www.marksmanshipmatters.com/contact-instructors/


    I have seen Larry’s full resume and I assure you that this short bio does not begin to list his background.
    It seems that many of the big name schools use techniques which came by way of Larry but none really understand the WHY behind what they teach.  In my opinion, it is common for schools to mimic the Methods without understanding the why.

    Beside, you get near 1:1 instruction from him.
    His methods/drills will help you be a master marksman. Once you have completed his course you can continue onto tactics.

    I HIGHLY recommend Larry!!! schools I’ve evaluated:
    1) Frontsight (27+ classes)
    2)  Suarez international (SI) — Combat Handgun Instructor School and over 7 SI DVDs
    3) combat tactical – 2 classes
    4) Warrior SOS
    5) Silly/worthless NRA instructor classes.

    Of these schools, none have come close to the depth of knowledge and understanding Larry has. He is an expert instructor who will take the time to teach you properly. He tailors his instruction to his current student’s skill, experience and knowledge level.

    His training schedule seems ideal! Instead of trying to cram everything in a weekend (non-ideal learning and unsafe), he spreads it out and thus allows your normal life to continue and you can absorb the material. If you live in Utah, the costs of traveling to Frontsight and taking off work are expensive. Why not spread your training over several weekends and sleep in your own bed and have your life continue uninterrupted.

    Imagine you are a new student, you show up at Front Site for 8 hours, 4 days inin a row and have volumes of information thrown at you.  You bake in the sun and on  the last day you eat lunch and then take a very stressful test. Several times a year your school experiences negligent discharges.  Students shooting their own leg while holstering or presenting TOO QUICKLY for their skill level. You WILL NOT experience that at Marksmanship Matters!!!

    DAY1:
    SAFETY, to the level I’ve never seen. I reverence and FOLLOW safety rules like no-one I’ve ever met, yet Larry managed to take it to a higher level.
    1 out of 8 Utahans are conceal carry permit holders!!!! Lets get those 1 of 8 carrying 24x7x365 and TRAINED and then make it 1 out of 4!!!
    We also covered combat mindset better then I’ve ever seen it. I’ve seen Frontsight’s presentation several times, and it is awesome, but not near as good as Larry’s presentation. Also, I have Suarez Internationale’s Combat Mindset DVD and feel Larry’s presentation is much better than SI’s Combat Mindset DVD.

    We covered many terms and had an in-depth discussion on “elements of Marksmanship”.
    One small example: In combat, shoot as fast and only as fast as you can make good hits.

    TRIGGER DRILLS
    Larry and Stacey uses a set of 6 diagnostic trigger control drills which forms one of the corner stones of their marksmanship instruction.  When combined with their very structured method of conducting skip loading they are able to take new and experience shooters to high level of marksmanship in a very short time.
    Lots of awesome statistics about accidents, shootings, crime, criminals, etc. I really like the statistic that your kid is more likely to die from falling out of a shopping cart, then to be accidentally shot by a gun. So do NOT be a victim!!! and take on “victimization mindset” by not owning and knowing how to run your gun!!!!

    ***Principles of self-defense. Awesome book by Jeff Cooper! Very small, but insightful. EVERYONE SHOULD READ THIS!!!
    http://www.amazon.com/Principles-Personal-Defense-Jeff-Cooper/dp/1581604955/ref=sr_1_1?ie=UTF8&qid=1313965146&sr=8-1

    DAY2
    Learning to present from the holster with SNAP caps (a-zoom dummy rounds). Learning to do malfunctions with SNAP caps. All manipulations are taught with snap caps. and no live firing done on day 2…GREAT concept because they can ensure everyone is SAFE and confirm every student is squared away with finger straight, muzzle control and general safe gun-handling.  Occasionally a student will be told that they are not ready for the live fire range and must repeat Pistol 2 before going on.  This did occur in my class.

    DAY3: (range day)
    Review of terms, safety and marksmanship.
    Those that had shot prior; shoot at 15 yards at an 8” plate. I managed to get all 6 of my shots on the plate. I had a pretty good group, but dropped one.
    Then Stacy shot all the lower plates(Bench rest Stacy, I swear she had 2” groups at 15 yards….off hand!). Larry shot all the upper plates. This way we could see if the sights and the shooters were consistent.
    Some adjustments were made to some student’s handgun sights.
    Then we did trigger drill 1,2,3,4, followed by several hours of skip loading..
    THESE DRILLS are amazing for teaching proper trigger control, sight alignment and sight picture and follow through!!!

    Larry and Stacey took the time to really teach marksmanship and started building the foundation gradually and not too quickly (In my experience, most schools go too quickly).
    Even as an advanced student, with hundreds of hours of professional training, I was excited to do these drills and improve my shooting. Before the end of the day, hitting a 4” plate 6 of 6 shots at 15 yards was no problem.


    DAY4 (range day)
    Started with skip loading.
    Then we participated in trigger drill 5 which is a “Compressed surprise break” drill. A shot timer was used to record the time for each shot.. We focused on the  sights and NOT looking at the target.  I mentioned if you have isometric tension that your gun should snap back down where it was and you barely have to do anything with your sights, depending on the distance. I had major isometric tension and focused on watching the sights through recoil and then allowed my isometric tension to snap the sights back down onto the target. I was doing a really good job controlling recoil and running the sights during rapid fire.  If the student was mashing, the drill was OVER for them because the instructors would not allow people to practice mistakes,  I was able to get all my hits in one “splat” at 7 yards and most of my trigger presses were around 3/10 of a second. These drills helped BRIDGE from precision/SLOW fire, to combat firing.
    It was good to go back to “skip loading” after the drill to make a few deposits in the “correct trigger press” bank account.
    Next we practiced DRY reactionary drills. Like we are pointed SOUTH and the target is WEST and how to LOOK, GRIP, STEP, PIVOT, PRESENT, FIRE. We did this facing SOUTH, NORTH and will soon have our back to the target.
    NEXT, we shot one handed.

    We also talked and practiced shooting on the move. Forward and back.
    At the end of the day, we did skip loading one more time. Amazingly enough, at 7 yards I had all my rounds touching, except two that were ½ higher than the other “touching group”.

    For those that are believers in DRY PRACTICE, and as much as you improve your trigger press, malfunctions and presentations, SKIP LOADING will help you improve EVEN MORE than dry practice will.  Well, you NEED BOTH! Until you take the class from Marksmanship Matters you do not really know how to skip load an auto pistol effectively.  The system created by Larry and Stacey is very detailed and in fact requires 6 pages in their instructor manual to fully explain.  Other instructors have tried to copy their skip loading system but the success is in the details which others do not have.

    DAY5: (range day)
    Started out the day with skip loading 🙂 My FAVORITE DRILL!!! 1) because it is challenging 2) because I need it 3) because its fun to improve.

    Next we did close contact. Larry and Stacey teach the close contact firing position somewhat differently from what have been taught elsewhere.  Part of the close contact is,two to the center body, increase distance and use the sights to make a brain shot. IF TARGET is still  available, THAT is the assessment and press the trigger. NONE of this 2 to the thoracic cavity | pause | assess | then 1 to the head. Its straight to the head after 2 and if the target is still in your sights “PRESS”. On the close contact, it was TWO instructors for each student. One to watch the support hand  and one to ENSURE the handgun at position 2 was the correct level, so rounds did NOT go into the target holder.
    We did shooting on the move. Left to right with 9 steel targets. Then right to left, it was suggested doing 1 handed when shooting targets at 90 degrees on your primary side.
    Next we did “unknown multiple targets”. We started off facing AWAY from the targets. Got the “THREAT” to the rear command and properly turned and engaged based on priority. Some were no-shoot targets. Others were pointed in, others had machine-pistols, knifes etc. Several hostage taker targets.  Each shooter was carefully critiqued on his decision making an well as his marksmanship.

    We had a thorough explanation and demonstration of “defensive vehicle” methods. A traditionally holstered gun may not be easily accessible in a car jacking or other car-crimes situation. We were taught several options to deal with this problem.  I may have been taught the proper seat belt release in the past, but have forgotten it and NEED to get in the habit of unbelting so you are not caught inside it if you need to quickly exit the car. Having glasses on, while rounds are incoming or outgoing with glass shards going everywhere is CRITICAL! Also, any passengers should be coached on what IF scenarios. We were taught several different tactics to be used if trying to extricate ourselves from something like the Rodney King Riots in LA.  ALSO, a 3,000 lb weapon (AKA vehicle) can be much more effective than a 400 ft.lbs handgun round.
    .

    Next we shot from our OWN cars several threats. 9 o’clock, 8 o’clock 11:30 and a 7 o’clock target.

    Next we had “man-on-man” competitions on pepper-poppers at 45 yards. These are 12” targets with a 6” head and torso. Hitting these off-hand, UNDER competition PRESSURE is challenging. Within minutes of learning about the competition, my heart rate started to climb.
    Something I had done 5,000 times, I had to think about. Amazing I know!!! We started out with 3 mags, with ONE round in each mag., Holstered on an EMPTY chamber. ONE perfect dry press to get your trigger control working right. Then tap and slap your shoulder (AKA tap, rack (you hit your shoulder)). Next round was SIGHTS and PRESSURE, NOT making the gun go off…NOW! If you missed you were at slide lock and had to conduct a speed reload before shooting again. We made two lines and everyone got to go head-to-head with every other student. Each time you successfully won a “face-off” you got a point. I had 6 points and another lady had 5 points. A couple students had 3-4 points, and several at 1-2 points. I was able to hit 6 of 7 shots at 45 yards…in wind/rain.  The one shot I missed, I was able to reload quickly enough to still win that match.

    Believe me, that is a LONG ways away and I was a bit shocked every time I heard it go; “ding”.
    It was FUN, stressful and challenging.  Are we going to do what is “natural” under stress or revert to our training and do the better thing. There were a couple of top shooters all class. Best groups, consistently good shooters. One of these totally tanked during the competition and just couldn’t make his hits. The other person was me, and I continued to perform very well during the competition. I won the competition. I also learned that a sweet little house-wife really gave me a run for my money. She was VERY good under pressure and performed amazingly well.
    We got rained out (too much lightning) and did not get to do the dueling tree 🙁 I was looking forward to 4 mags of 16 rounds 🙂

    IMPRESSIONS:
    Very safe every day. Larry and Stacy took the TIME to teach each student proper gun handling with dummy rounds!!! Usually I get very nervous around beginners. I was comfortable and confident through all the training.
    I did not see anyone rushing too fast to present, nor too fast to holster.  At every turn, there were 4-6 “control mechanisms” to ensure everyone was safe. Not so at other schools. I try to stand at the other end of the line away from these “not-squared away” students. In Larry’s class I was comfortable standing by anyone.
    I have said it before, but I am saying it again. You will NOT find a higher quality training out there at any cost!!! As one who is addicted to defense training, I feel I am qualified to review, evaluate and recommend defense schools, principles, instructors and methods.
    EVERY one of his students is able to hit a 6” plate at 15 yards. Even old/shaky students were DRILLING targets consistently. Man, Larry and Stacey will TEACH you how to shoot! Their bridges from slow/precision fire really helped me. His precision drills like skip-loading are amazing! I’ve talked to several instructors and they have never even heard of skip loading.
    I would be very comfortable, confident and pleased to refer my wife, mother/father, daughters/sons to www.marksmanshipmatters.com.
    I KNOW they would be safe and get EXCELLENT/QUALITY instruction. I’m still astonished at the cost/benefit ratio of Larry’s courses!!!

    Thanks Larry!!! May God Bless you on your mission to train good citizens to defend themselves and their loved ones from attack!

    Thomas E.

    <paste comments and insight from Ty>
    In addition to being a part (not just an observer) of the development of the modern pistol technique, the fact that Larry has been in shootouts (he’s taken the big shot successfully), investigated so many shootouts and taught shooting skills to so many (with demonstrable positive results) makes him really rare. Any bravado he has is based on real experience – not just in the military but on American streets. That is special and if not absolutely unique then very, very close to it.  It makes him a “source of truth” on what works.

    Other schools can’t use the same techniques and don’t get the same results because they don’t have the same quality of instructors.  Maybe they could if Larry was running the school but he’s not.  Stacy would easily be one of the top – if not the top – instructor at Front Sight or any other school open to civilians.  It’s a much different instructional mindset than I’ve experienced in the firearms sphere.

    We examined the targets after every exercise.  The ability to actually read the targets (not just guess) and then to diagnose and correct errors was invaluable.  Even more so, that emphasis on accuracy (along with Larry’s stories) has given me, I think, a great deal of confidence and a much clearer idea of what will actually be required should my gun ever have to make an appearance some place other than the range.

    Finally, and perhaps most importantly, I feel like I have a way – a set of training techniques and philosophies – to escape the plateau I’d reached with Front Sight.  I have become a true believer in skip loading and really like the bank account analogy as it relates to dry practiceand and skip loading  vs. live fire.  It’s good stuff.
    </paste>
  • Marksmanship Matters Rifle Recap

    Brief Recap of May 2015, Marksmanship Matters 5 day Rifle class

    by Thomas E.

    Being a HITS (Handgun Instructor Training School) graduate and Rifle Graduate, I coached/assisted all 5 days. I always learn more coaching than as a student. I HIGHLY recommend if you are qualified to offer to assist in a class.

    My 16 year old son took this course. I have been dry-practicing with him over the past several months. I taught him the sling work, PortArms, transitioning to handgun & loading, unloading, tactical reload, speed reload.

    Sling work

    • Primary side muzzle up. How to get into it, and how to present to the guard/target.
      • Primary side muzzle up – climbing carry
    • support-side muzzle down. How to get into it, and how to present to the guard/target.
      • support -side muzzle down–climbing carry.
    • transitioning – under what conditions is it safe…and only under one condition is it safe. dead trigger/type3 malfunction.

    I did NOT train my son on malfunctions, as I wasn’t 100% sure of the proper methods due to my failing memory.


    Todd is a natural at learning professional gun handling methods.  He executed everything excellently.  During the failure drills and transition drills, about half-the class had difficulty, but he was a cool customer. Unless you own the proper methods, it is easy to get off the rails with stress levels, complexity & hundreds of things to do correctly. Because Todd owned most of the methods already, he was able to add a few new steps and not get bogged down because he “owned” the material/methods.

    Todd has been working hard in school, so he could take a week off for the rifle class. I made a deal with him if he was caught up on his school work and successfully completed the rifle class, he would EARN an ar15 (the one he built!).

    Day 5 during the man on man competition, Todd earned Top shot!  Meaning, he was the best shooter in the class! Yeah, proud papa! He really went head to head with some of the best shooters I’ve ever seen. Most people got stressed and didn’t follow the fundamentals, not Todd; he kept a cool head and applied what has been taught and came off conquer!

    Larry’s students are the best shooters I’ve ever seen, and to out perform them is an incredible achievement for my son.

    Larry Mudgett & I signed Todd’s Ar15 (the one he earned). It says, Todd, always be a straight shooter. Love Dad.

    Todd, Top Shot. Larry Mudgett.

    In my closing remarks as an assistant instructor, I said, “I ponder about what I want to teach my children/posterity.”

    1st, Trust in Christ and be a follower of Him

    2nd, be a Rifleman (see my Freedom Rifle Article). This is the most important skill you can teach your children!

    It was an honor training with the good men/women in this class. My dear wife came to Rifle 1 & Rifle2. The only Lady in Rifle2. She is still sore 3 days later.  It was cold & rainy, but she did not surrender and kept going with her training.

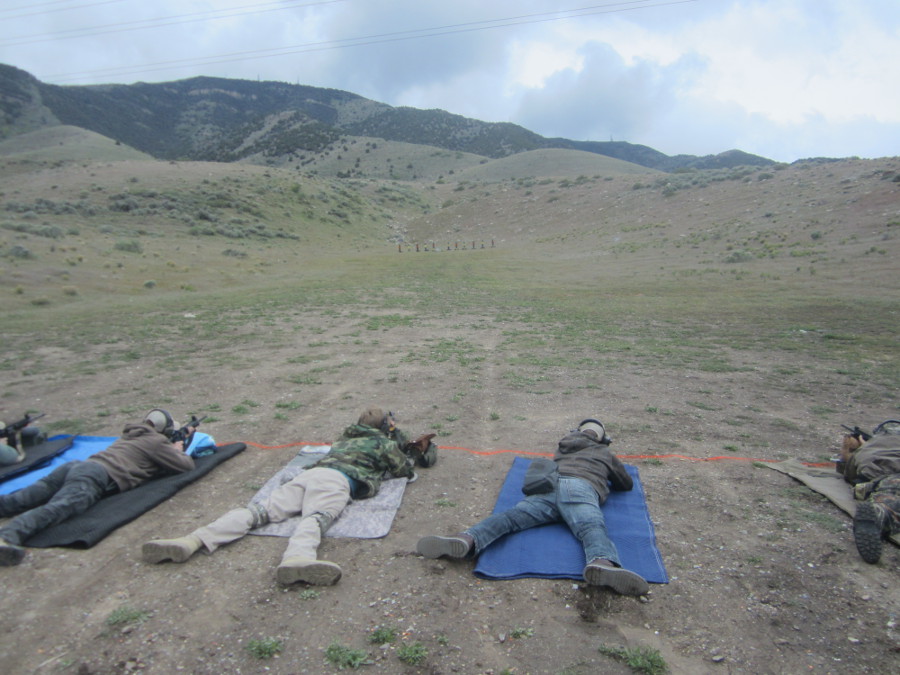
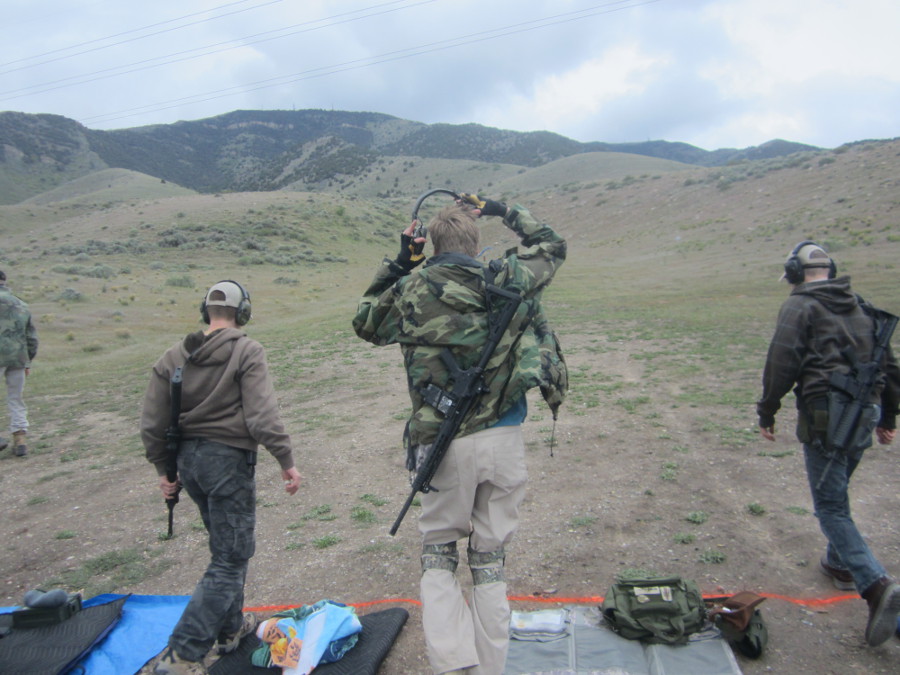
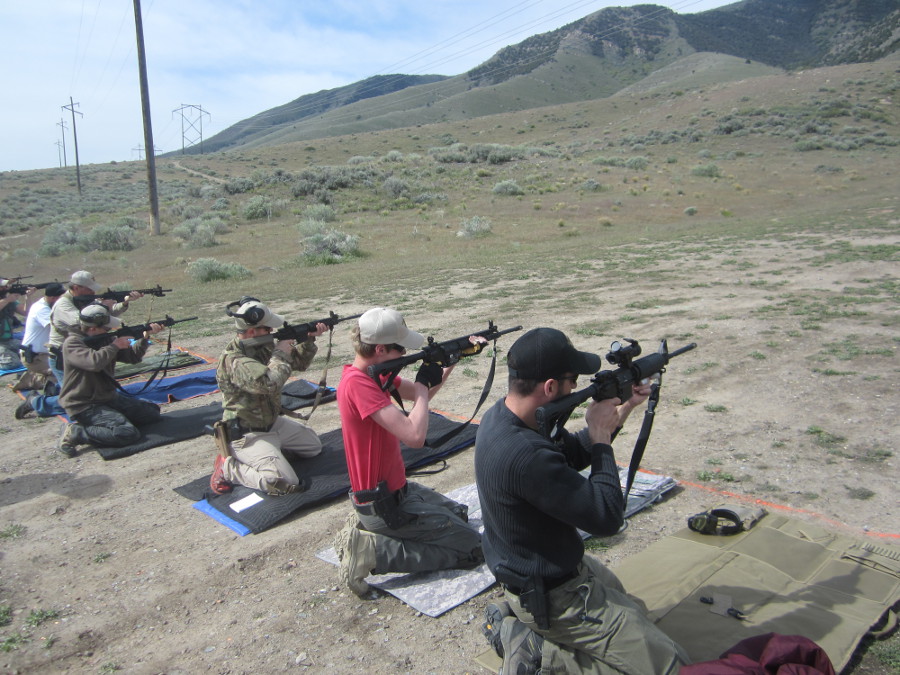
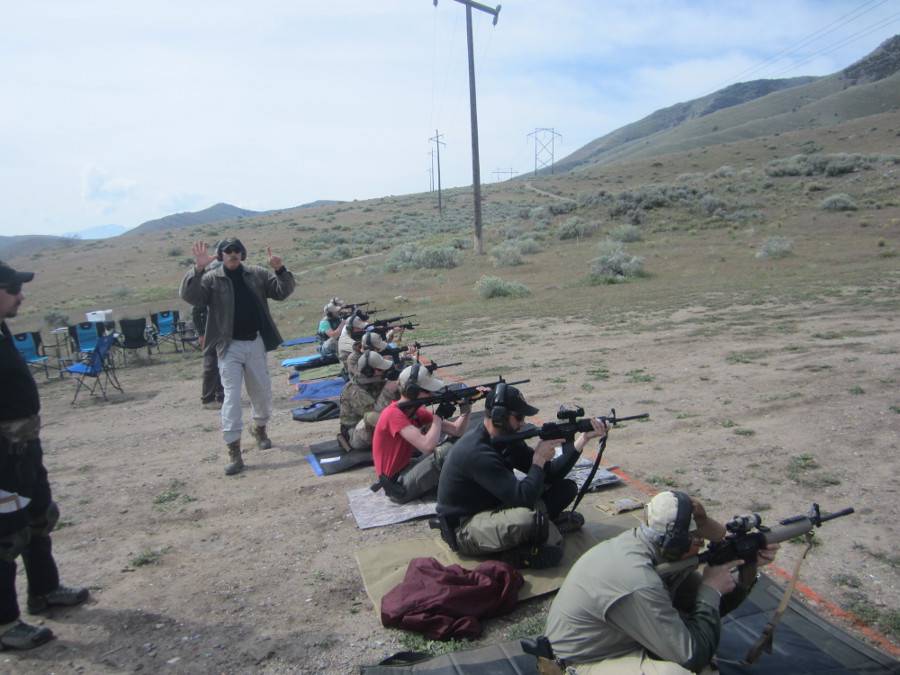
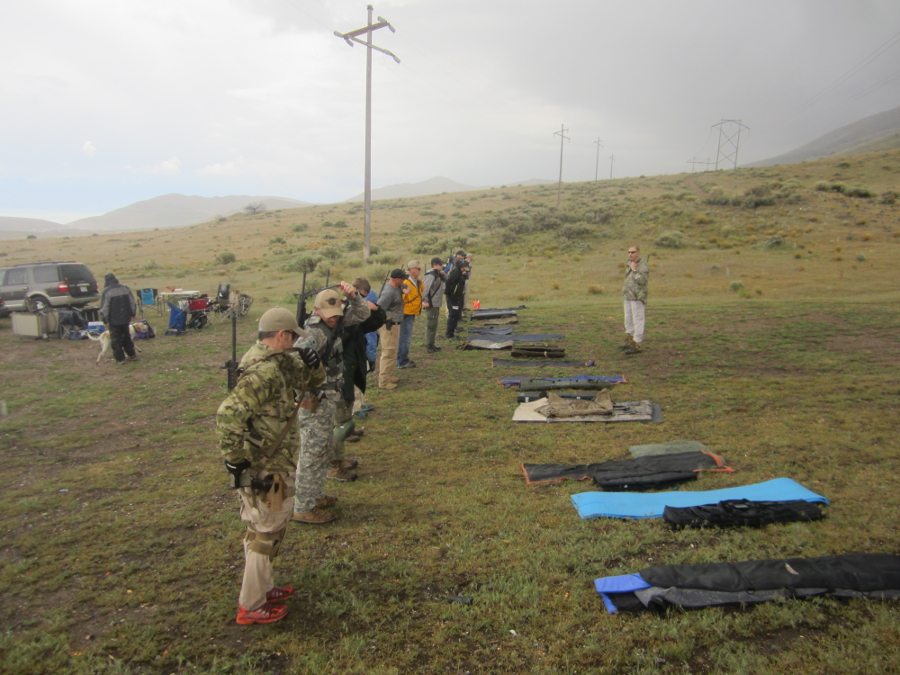
    Photos of May Rifle class…and some of my favorite Marksmanship Matters photos over the years. Including my 8 shots while moving that are all touching between 10-15 yards.

    I love being the “go to guy” for armorer things. Every time a student needed help with their gun or gear, Larry would have them work with me. Many sight adjustments, many sling adjustments and several rifle-fixes.  I heard Larry say, talk to my armorer… Thomas… Which made me feel great!

    Training this week with my son, wife and my life-long friends was the highlight of my year!  (yeah, even above Disneyland last Feb 😉


    support-side Muzzle Down – climbing carry
    Failure Drill(s), “compensated head shots”


    Proud Papa


    Day 2 (note, all these vertical grips will be removed shortly)
    Thomas shooting 5 shots at 25 yards (3″ target) with Iron Sights. Its going to be about 2″ low at 25y, but about right on at 100y


    My summary of Marksmanship Matter’s Defensive Rifle 1-5

    June 2012 by Thomas E.


    Here is my recap/summary of Defensive Rifle 1-5 from Larry and Stacey of Marksmanship Matters


    See also my Defensive Pistol 1-5 recap:  http://emergencypreparedness.pbworks.com/w/page/44752938/marksmanshipmattersrecap1


    Please visit MarksmanshipMatters.com and read; “Why I need a rifle”


    Summary: I have taken several rifle classes from Frontsight. Including four day rifle, rifle skill builder (2 or 3 times), 3 precision rifle classes and Frontsight’s tactical rifle (SWAT rifle). Frontsight has a solid rifle offering, but it is no where near as good as Marksmanship Matter’s rifle class. I use my experience with frontsight to compare and contrast the skills and knowledge taught by Larry and Stacey. For further details, read further. I have also taken rifle classes from other schools, including “Patrol Rifle” and AK classes.


    Rifle 5 video (3 minutes).


    Rifle 4 (11 minutes)


    PROMO VIDEO OF PISTOL AND RIFLE CLASS (COMBINED VIDEO):


    MY GEAR:

    DPMS M4 AR15, IRON SIGHTS. I decided not to bring my sig 556 swat with the pricy optics, and learn MORE with iron sights.

    XD 9mm 5″

    Demooner sniper’s shooting mat


    (LA Rifle Qualification Target)


    DAY1

    Day 1 we met in the class room and discussed the “mission of the rifle” reviewed safety rules, sight picture, ballistics and the pros/cons of sight-in distance. Only students that have successfully completed pistol1-5 may take rifle 1-5.  I love this because the students showing up for the rifle class are squared  away with safety, marksmanship and how to run a pistol. Also, this prerequisite allows us to “transition to the pistol”. Larry and Stacey showed us all types of rifles, demonstrated proper use of each.  This included lever action, scout-rifle bolt action, m1a semi auto, and of course the ar15.  Larry’s sling work is magical. I had learned muzzle-down-support-side at frontsight, but how to present to the target was never explained in the detail and efficiency of Marksmanship Matters methodology.  You’ll have to take his class to understand this principle properly (I can’t do justice in text, video etc). Also, what I was taught at frontsight about muzzle up presenting to the target was extended and clarified by Larry and Stacey. These make a huge difference in my ability to execute and present more efficiently. Each student, understood completely all classroom related aspects of the rifle by the end of the day. Rifle1 prepares the student for the up-coming 4 days. I have not met too many people that understand ballistics as well as I do, but Larry helped extend my understanding further. I was impressed that he would take over 60 minutes to help students understand the ballistics of the .223/5.56. This drove home the pros/cons of sighting the ar15 in at 100 vs 200 meters. For me, my experience is sighting in at 100 and then using adjustments from there. Doing the moa in my head is much easier and more repetitions, so I always leaned towards sightin at 100. But, I learned that for a 55 gr 223. The POI from 0-300 is within 3-4 inches. If you sight in elsewhere, you have to know POI at 50, 100, 150, 200, 250 and 300. Marksmanship Matters (MM) provides a binder with perfect sight-picture, ballistics charts and discussion on barrel twists.  After Larry’s demo of running a lever-action cowboy rifle, everyone in the class wanted a lever-action rifle! Glad to see I’m not the only addict of lever guns (thanks to Larry!).


    To say gaps were filled in for me during Day1 would be an understatement.


    DAY2:

    Day2 we showed up at an air conditioned aircraft building and performed all of our manipulations of the rifle/pistol in a nice cool classroom. Each student brought their complete load-out, except no LIVE AMMO.  We had our azoom dummy rounds and learned the proper loading, unloading, port-arms (NEW to me), sling work (muzzle-down support side, muzzle up (with climber variations), positions (pros/cons), malfunctions. very important ar15 related manipulations (hard to explain in text ((take the class!).  We learned the over-the-head transition to pistol (think of combing your hair with the rifle and throwing it over your back and the sling catches it).


    I was thrilled with the new information I learned, especially the advantages of 20 round magazines for reloading, shooting positions, sling work etc). Also, the extensions to my sling understanding was profound.


    DAY3:

    On the range and ready to apply what we had learned in day1 and day2.  Similar to pistol3, we shot 3″ plates from 25 yards to see where students were. Each target was analyzed by the whole group so each could learn from the successes and mistakes. To me, this is key to helping others diagnose their issues. Shooting well is not as difficult as resolving other’s issues. Iron sights, I had the best group and Larry was impressed (that always feels good). But, here on this range is 12 amazing students, better trained then any other group I’ve ever seen.

    It didn’t take long for others to start having awesome groups.  Next students ran the sights and instructors (Larry & Stacey) ran the triggers. Targets were again analyzed one at a time.


    Here Instructors are monitoring students breathing and working the trigger while the students work the sights:


    We got most of the students 1.5″ low of aiming at 25 meters, then went to 50m. Some were in need of more adjustments. This is very challenging and difficult to help 12 students dial-in. I recall the 35 students at frontsight taking ALL DAY to sight in. But, once you are dialed-in, its like after a long hike to the top of a mountain and you are rewarded with an amazing view.


    Breath control, sight-picture, trigger control, sight-in, compensated shooting while closer than 25m (due to the height of the sight and the barrel). at 3 yards, it was like 4 inches low! This was a BIG wake-up call for most students. They did NOT realize fully how much of a difference POA and POI can be with a rifle at close distances.  Next we practiced at 100 yards without our support aids. I was surprised how well I could do on a 12″ plate with iron sights. Not uncommon to get 4″ groups at 100 with irons. One time Larry commented to me, excellent shooting, especially with Iron sights. That made me feel good!  Then we practiced squatting position (military squat). I did kneeling because of my previous injury on my knee (day2, I tried squatting and my knee hurt for several days).   It was a VERY hot day. I drank 3 liters before 11:30am, and 1.5 gallons in the afternoon.  I love being around Larry and Stacey and their students. High-quality people.


    DAY4

    We worked on the “LA Rifle Qualification” test, but without the time pressure.   Each position and each distance has a limit of 6 seconds. Which is appropriate for a not too hurried shot or too long, based on the position and distance; a good tempo.   Think of a combat shot at 100 yards, behind cover. Finding the target, sighting in, breath control and a good combat trigger press; I figure that’d be about 6 seconds.

    As an example of, student’s marksmanship comes first (well, after safety of course), part way through the qualification skills assessment, at least half the students started mashing the trigger and having poor trigger control. Likely because of the “stress” of wanting to do well on the test. We STOPPED taking the test and did skip loading to “de-program” our bad trigger-control. To me, this shows the integrity of the instructors. Most would want to stay on schedule, but the Mudgett’s couldn’t bear to allow the bad trigger presses to continue and solidify bad trigger-control! SKIP LOADING WAS THE MAGIC, in short order everyone was back on track! I’ve talked to dozens of instructors from many different firearms training schools, and NONE have even heard of SKIP LOADING, let alone be able to instruct students in its proper usage. Again, this is just one example of how caring Marksmanship Matters is of their students.


    SOMEONE…HAD TO SHOW UP with a F’n Rifle and a F’n Pistol (AKA FN 5.7) 😉


    POSITIONS:

    speed kneeling

    military squat

    braced/supported kneeling

    qualification drill – run 200 meters and do 4 body shots at 50 yards.

    15 yards head shot, off hand


    We also did fun drills like “simu-shooting (everyone shooting at the same time).  Domino shooting (shooters, left to right, at the distance of 100 yards, we don’t advance if someone misses).   To me, the qualification test was a good measure of a rifleman’s skill inside a combat situation. Though it was difficult and tiring, it was really a lot of fun.  It was NICE not to have to get into position on the clock; at frontsight you have 5 seconds to get into prone and take a shot at 100 yards. 7 seconds at 200 yards. This measured YOUTH and willingness to get into prone in 1 second; which is painful. I have seen much better rifleman than me, FAIL at frontsight’s “game” because they are too old to abuse their bodies by getting into prone in one second. Rocking back as you land on the ground with your knees, so your kneecap doesn’t hit first is KEY! With Marksmanship Matters, you start out in prone and have 6 seconds to PRESSSSSSS the shot. One key difference is the target. With frontsight if you hit the thorasic cavity, which is BIG you are good to go. With Marksmanship Matters, there is a 3-4″ ring and if you are out of that, you are down points.

    I believe the LA qualifications is a better evaluation of a rifleman’s skill, because it covers all the common shooting positions, have a good mix of close-up headshots and distances body shots. Scores off-hand, sitting, speed kneeling, military squatting, braced kneeling.


    After day 4, it was NICE to have a break and not have to come out for another day. 4 days straight of getting into prone in less than a second at frontsight, in 105 degrees for 4 days straight…can be challenging on the body.


    DAY5; Hard work rewarded.

    Day 5 was awesome! We worked, but it was very fulfilling to apply all the things we learned to different scenarios and drills that helped us learn. For example, our first drill was hostage taker at 7 yards, with an ar15. I almost said, don’t forget to compensate for the close distance (2.5 inches), but didn’t because if they messed the “compensated headshots” up, they would remember it longer (growth opportunity).  We got to do this COLD, many of us not firing our ar15s for several weeks. Many of us had been dry practicing, but I didn’t dry practice “compensated headshots”, but I did remember to compensate and had a very nice group, even out to the 40 yards.


    We started with a prayer, which is awesome! We talked about even as experts, we must continually improve our safety posture. Many so called experts start flirting with the edge of safety and even some say, an acceptable number of injuries is ok! (NOT!!!) that is NOT what we are about, we ALWAYS take safety very seriously. In my mind, ANYONE that ignores safety loses significant credibility. The Mudgett’s exemplify continuous vigilance with safety; which adds to their credibility.  Here we are, on our 10th day of training with them, and they are STILL mentoring us on safety. AWESOME! AMEN, I couldn’t agree more!


    Hostage taker drill at 7, 15, 25 and 40. At 25 yards we were asked what shooting position we would take. Due to my bad knee and inexperience with kneeling positions; and knowing I can shoot better off-hand, than kneeling (I know… its weird).  Most took a knee at 25 and 40. Even at 40 yards, we are still compensating for a head shot; even if it is only 1/2 an inch. For me, 2.5 inches at 7 yards, 1.5 at 15. it seemed; with a rifle, it is better to error on the HIGH side, then the low side….for points anyway. A rifle round in the jaw/neck MAY do the job, but we want 100% “lights out” MEDICINE.


    We next did close contact drills. Going from low ready to “close contact”, which is the rifle butt is in your armpit, HIGH in the armpit. You would be surprised how effective this is without sights and close ranges. Good solid hits.


    Shooting on the move, forward and back. We didn’t do left to right and right to left. Some tips to remember is lower stance for shock absorbing. Roll your foot heel toe, toe to heel.  None of this silly, shoot when your left foot is on the ground, shoot whenever, just follow the fundamentals and you will have good hits, even though you don’t have perfect sight picture due to the bouncing.  Doing this drill COULD be dangerous, be with coaches and an instructor for each coach/student team, we felt safe.  It only takes 1 second to go from safe, to unsafe. Ensuring everyone moves at the same pace, and if they have a malfunction or any distraction we MUST keep moving with the group. If not, the guy stopped becomes an easy target AND  depending on direction he may be putting his teammates at risk, or vice versa!


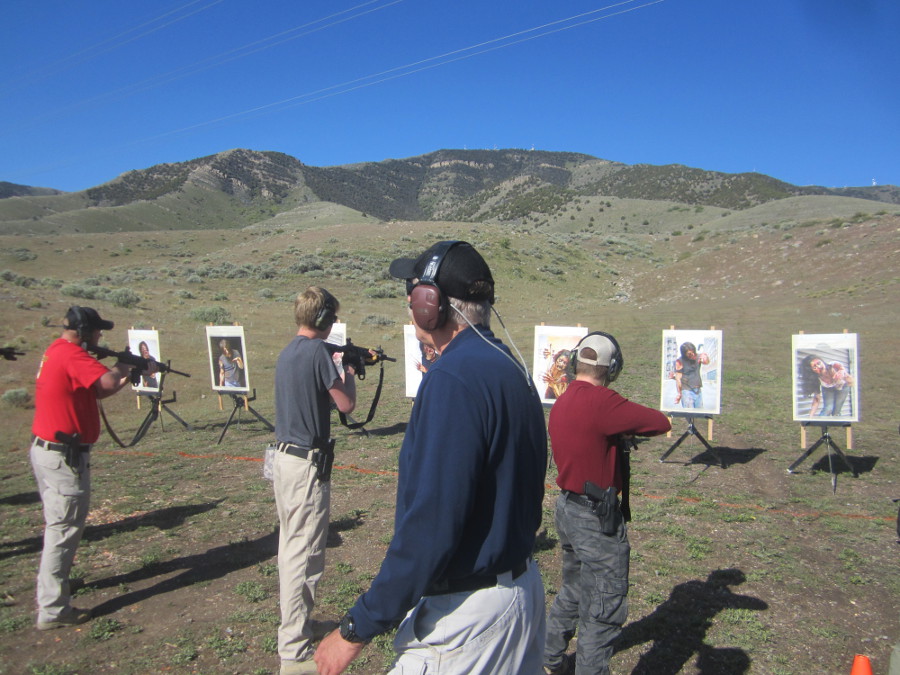
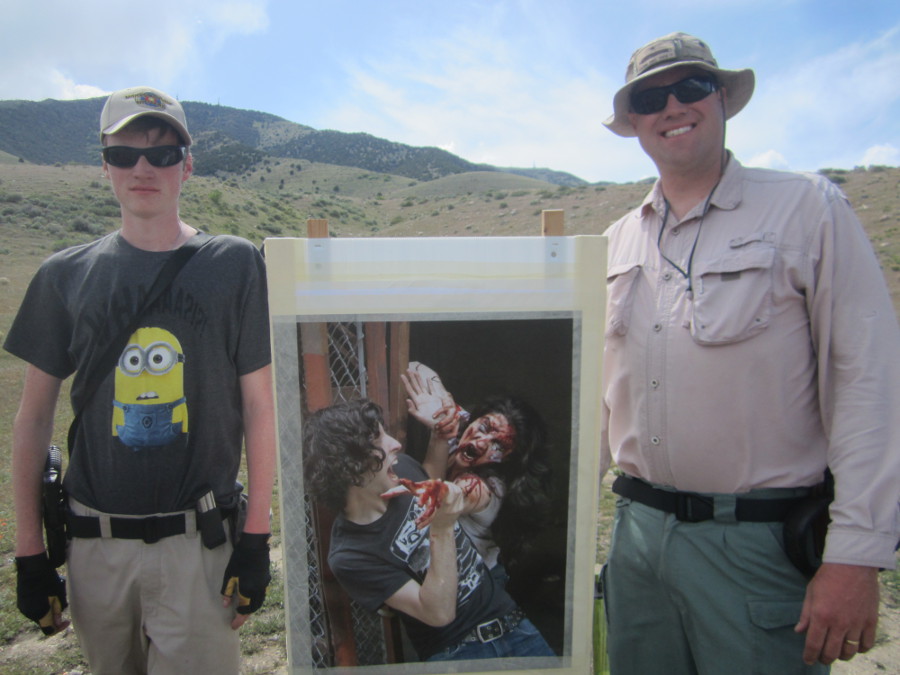
    We did a couple of fun zombie drills. One with a vehicle, figuring out the best way to fire a rifle from the back of a vehicle at multiple adversaries.


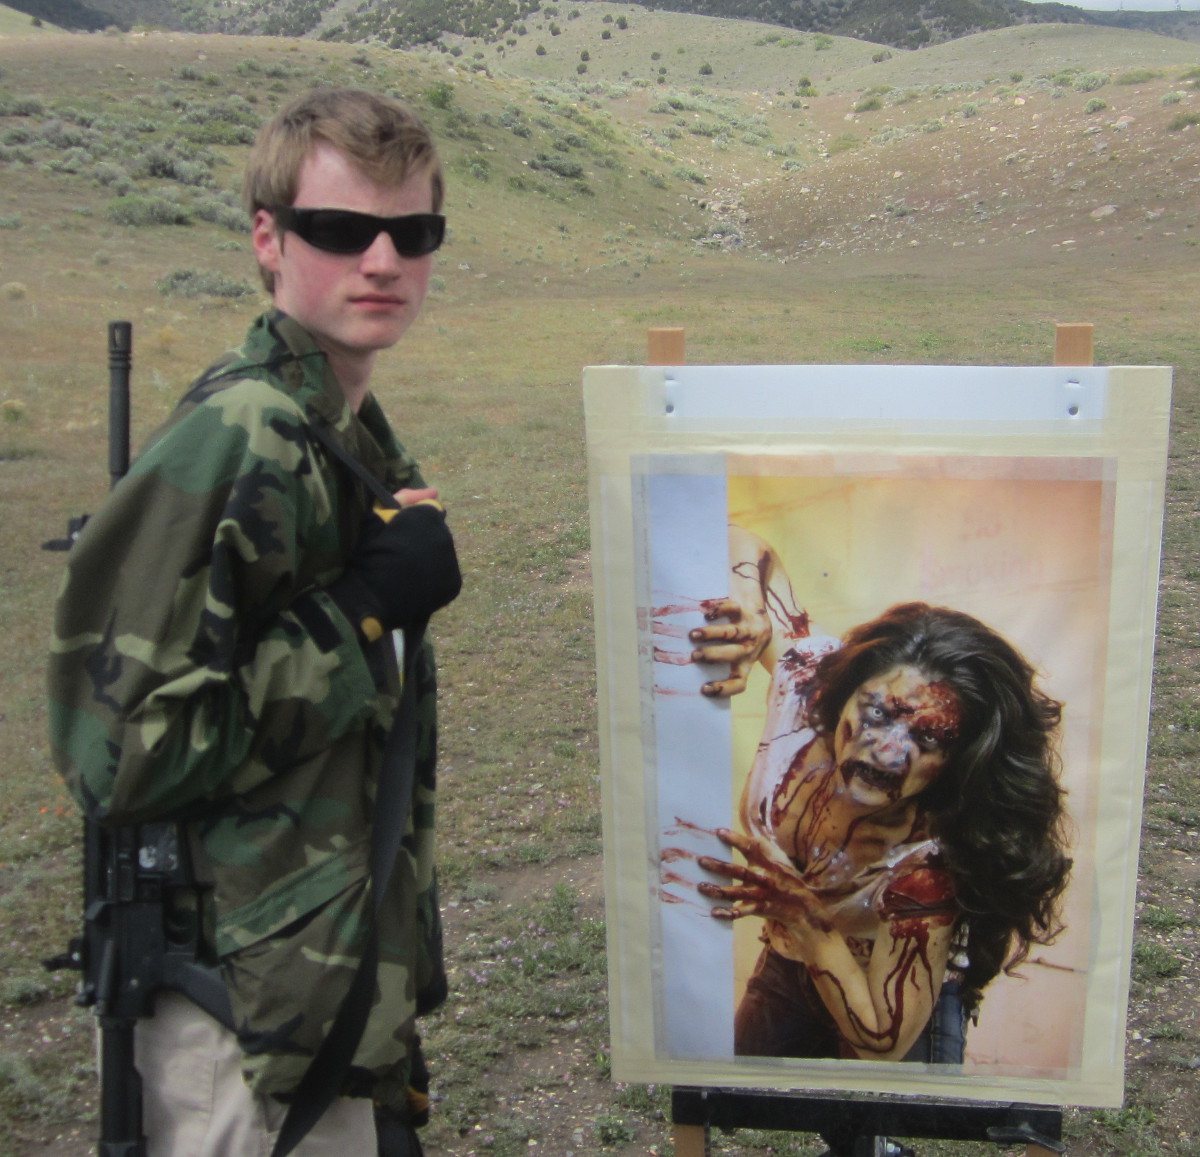
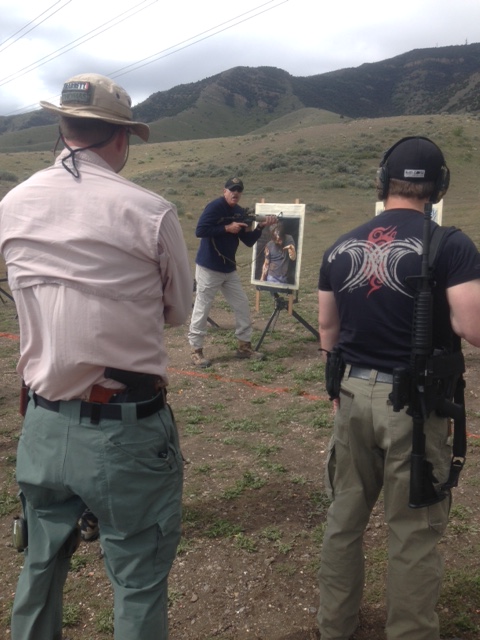
    The other zombie drill was a competition. We had 10 zombie photo targets, all must be head shots. Timed and misses subtracted. miss the brainshot, +5 seconds.  miss the zombie completely, +10 seconds. Hit the hostage, add 20 seconds!  My first run, I was going a bit slower than I thought I needed to. I had 24.24 ZERO misses! Then I watched everyone do low 20s and then have added 40+ seconds to their score because of misses. There were a few that got in the high 20s with ZERO misses. So, my 2nd run I was pushing my edge a bit. I did it in 16 seconds; and it felt really good. Good presses, good sight pictures, but I was sad to see I had several close calls and several +5s (BECAUSE the bullet was lower than the nose, better to hit high, than low). So, with all my penalties I was in the 40 seconds range. BUT, my first run held and no one beat it, so I won the competition, which surprised me, there were many capable students.


    Another competition, was shooting small balloons on paper targets. With rifles, shooting at steel this close is dangerous and damaging to the steel. So, an inexpensive “reactionary target”, is a balloon! I can’t wait to go out and have my kids have fun blasting balloons! I think this is a great way for new shooters to have fun. Previously, we use the 2″ steel spinners with the 22 rifles to get folks hooked on shooting/guns, including my kids, but I think the balloons will be fun too! I was doing the vehicle zombie drill, so I didn’t get to do the balloons, but I know the concept now.


    Larry and Stacey did an excellent job managing everyone’s break needs. Hydration, get out of the sun, bio-breaks etc. It was a hot day and they were very caring of their students and had a great balance of “growth opportunities” and encouragement.  It was nice not to be ignored. Any time I didn’t do something right, they respectfully reminded me to do it correctly. I have a lot of bad habits and thousands of repetitions and its often challenging to switch.

    5 of 5 for fun.

    5 of 5 for learning.

    5 of 5 for fellow students (you want to meet the best people on the planet, take a course from Larry and Stacey and be astonished at the quality of the students, likely they’ll be life-long friends in a very short time-period).

    10 of 5 for quality of instructors.


    SUMMARY:
    I’m continually astonished at the care, level of instruction, generosity and QUALITY Larry and Stacey provide at every event I’m privileged to be at with them.

    You may find cheaper, quicker, “funner” classes/courses out there, but you will NOT find a higher-quality, fight-stopping skills than when you train with Larry and Stacey!


  • Gearing up for a shotgun class

    Having the proper gun & gear for a shotgun class can be the difference between success & failure.

    Spending another $100 to ensure proper learning is well worth the cost.

    I don’t have a lot of mileage with shotguns, but I took a two day shotgun class once with the wrong shotgun and I will forever remember the frustrations of not having the right gear.

    See, in a lot of these classes, they try to make the shotgun into a rifle doing a “select slug drill”. I showed up to class with a “saiga 12” (magazine fed semi-auto).  I was totally bored; while everyone else was having a great time doing all these cool “drills”.

    So, here I’m faced with the same dilemma, come to class with the non-ideal system?

    No, I don’t think so!

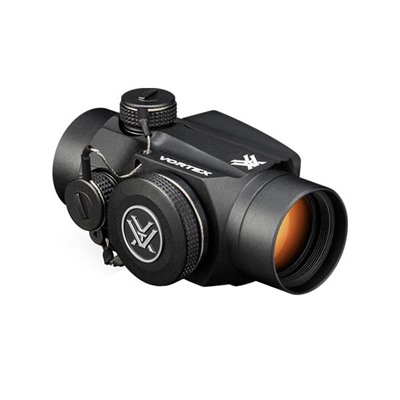
    So, I have a Mossberg 590, that is pretty darn good, except it doesn’t have a ghost ring rear-sight. I had hoped to get by with a reddot optic, but after testing several slugs in prone. I discovered I have to raise my cheek too far off the stock to see the optic properly.

    PROS of 590s

    • 8+1 capacity
    • reputation of being robust and rugged. (Military selected system).
    • tang safety is in the right place, easy to put on/off and fire quickly.

    CONs of 590s

    • My 590 is very difficult to add a frontsight. It requires brazing, soldering or welding onto the barrel.
    • Instructor much prefers the 870.

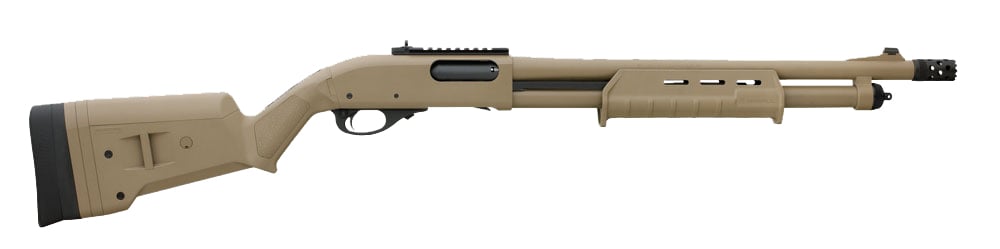
    Here is the instructors shotgun(less the pistol grip).


    Being tall and wanting to do a reddot, I need a higher-cheek.  Taller people need a longer length-of-pull.

    So, this is the system I’m going to buy (once I sell my 590).

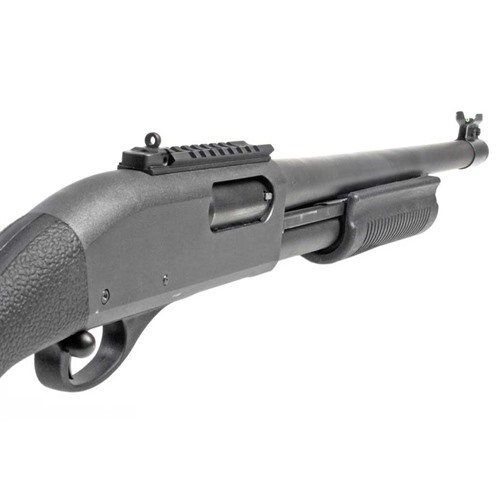
    870 5+1


    PROs of this 870

    • good price point
    • adjustable length of pull (without a wobble/cheapo telescoping stock – ok for 556, but not for full recoil 12 ga).
    • non-black
    • ghost ring & rail…from factory
    • light mount “slide”.
    • removable “choke”
    • trunk of tree – standardization, common “operating system” for learning in a class.

    CONs of the 870

    • only 5+1 capacity
    Mossberg 590 8+1

    PROs of 590

    CONs of 590

    • In pistol grip configuration, getting to the safety is very time consuming.

    GEARING UP FOR A SHOTGUN CLASS

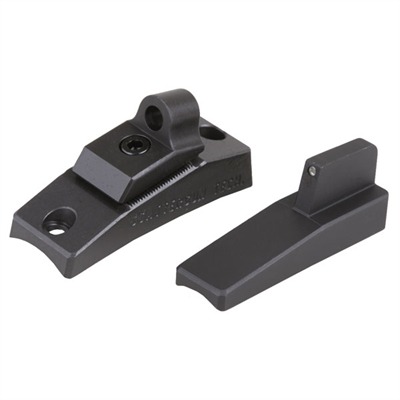
    to launch slugs, you MUST have rifle sights, like “ghost ring sights”(you’ll want ADJUSTABLE height & windage)

    Here is AN OPTION:

    “tac-on frontsight”

    Personally, I’m not too much into shotguns, thus I’m going with a reddot. If I want to launch slugs, I’ll launch a 308 🙂

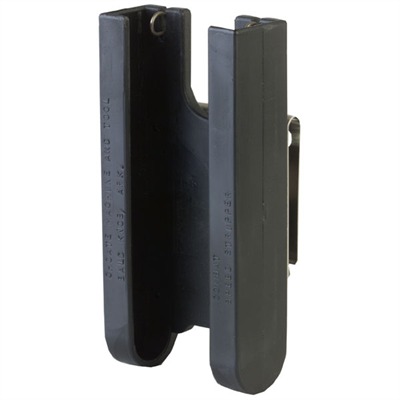
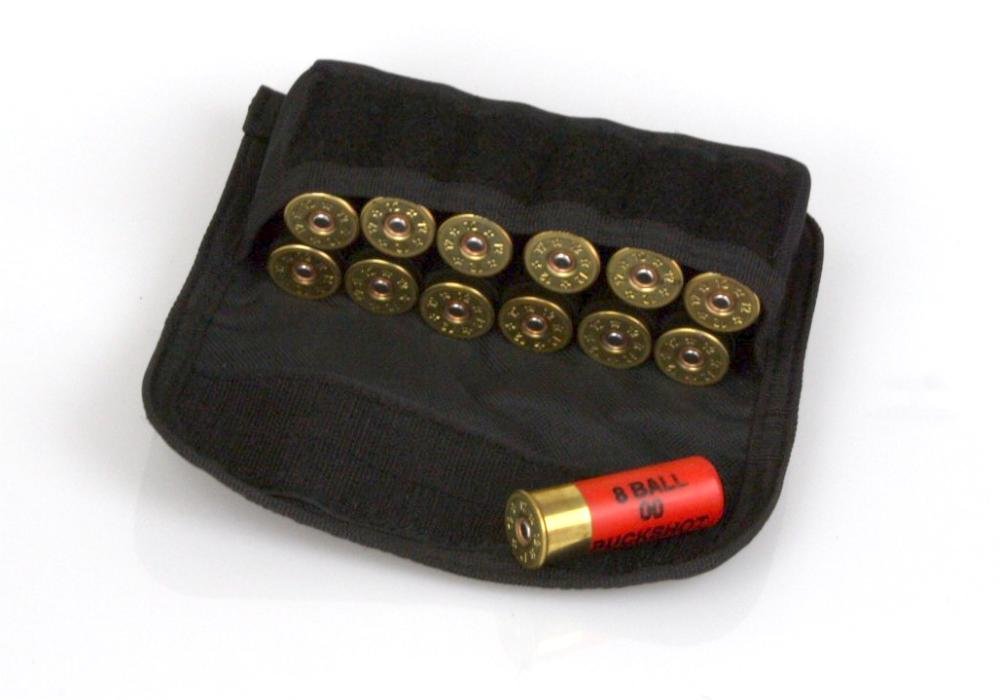
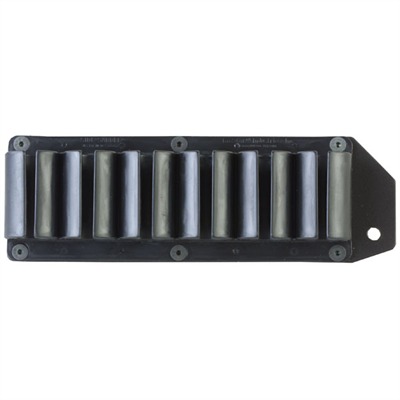
    Shell Caddy


    12 GAUGE SPEED STRIPPER (good for competition…has some cons for combat)


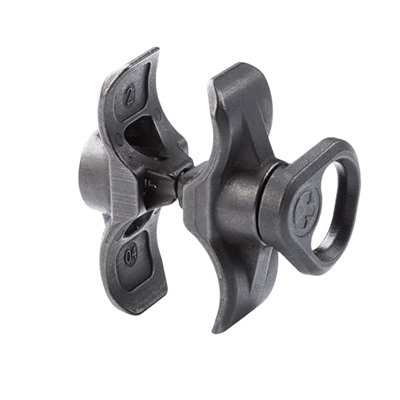
    forward sling mount

    Side Saddle


    great for “select slug” drill


    ensure your magazine spring is healthy before taking a class


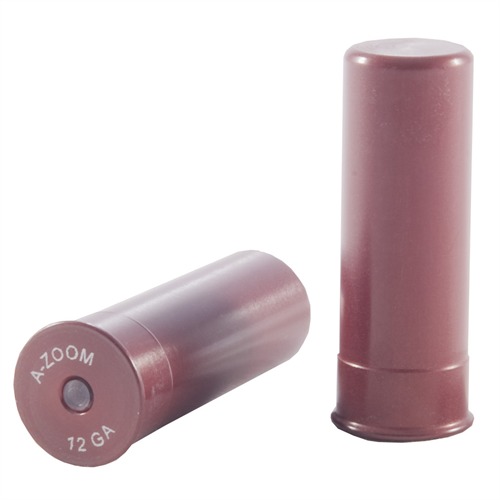
    a-zoom 12 gauge


    Knee Pads


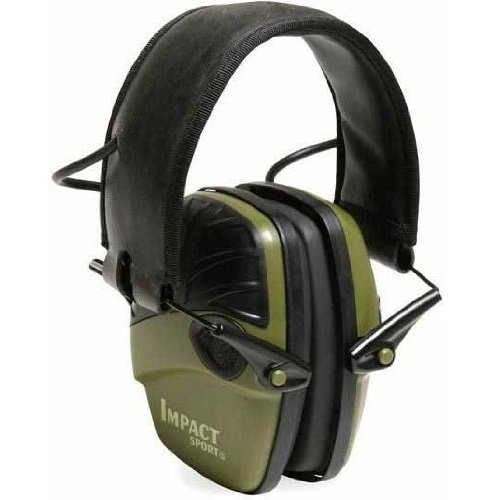
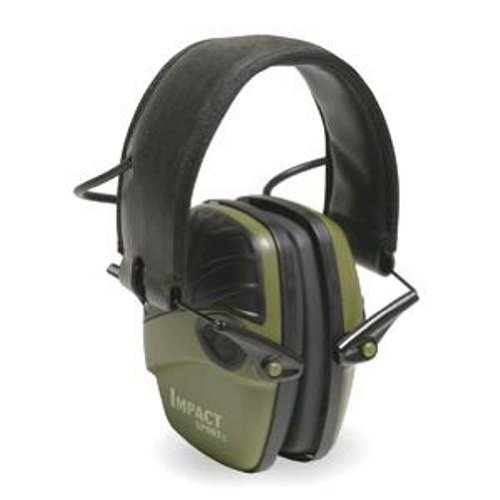
    electronic hearing protection


    this is one of my favs, function & price point.


    Buttstock shell holder


    LOW RECOIL

    * 00 buck

    * slugs

    * bird-shot


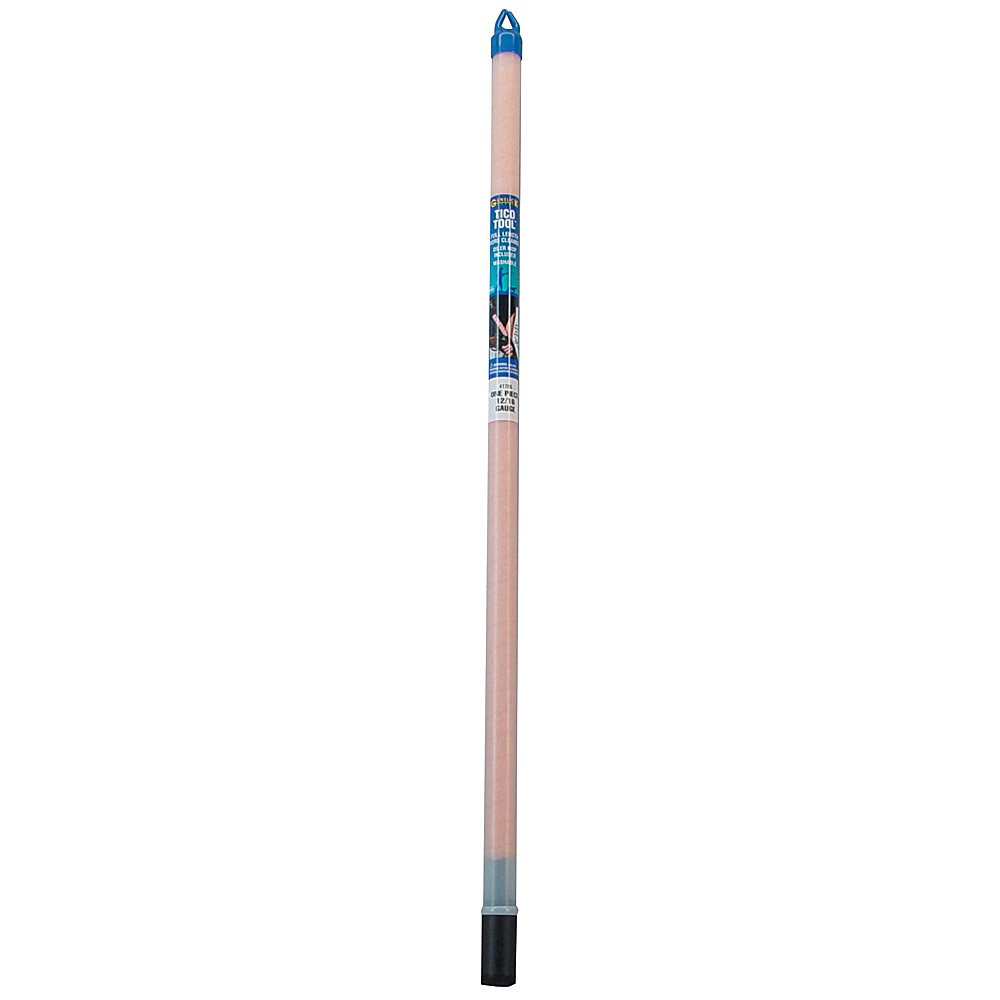
    Cleaning Rod

    Cleaning Rod


    adjustable length of pull and cheek height options (magpul) – READ THE REVIEWS. I LIKE this option


    Defense Shotgun Recommendations

    By Doc Gunn

    The following is a combination of several emails from Doc Gunn.

    Subject: [DTI-PGH] Remington 870 Defensive Shotgun Recommentations.
    Recommended Characteristics are:1/. 18-20″ fixed IC (improved cylinder) smooth-bore barrel, rifle sights preferred.2/. +2 magazine extension. (Allows for 5 plus space for 1 more in mag tube.)

    3/. Hi-viz, anti-bind magazine follower.

    4/. Police forend.

    5/. Swivel stud on rear stock.

    6/. 1-1.25″ nylon carrying strap, attachable via a Scattergun Technologies side
    front swivel mount that is held between the magazine tube and the extended
    magazine cap.

    7/. Short Stock: lop between 12.5 and 13.0″

    8/. #36 Weaver base attached to right forearm at 2-3 O’Clockposition for
    mounting a Streamlight or ITI M3 LED weaponlight.

    Select Slug Ammunition (1-ounce, full-power in a shell casing of a different
    color and texture than our carry Buckshot) attached to the rear stock via a
    simple elastic shell holder.

    Weapons in Cruiser/Patrol Ready with 5 rounds of Federal H132 00 in the magazine tube.
    This allows for insertion of any additional round (Buckshot or Slug) into the
    magazine tube and simply racking to “Select Slug” via the LAPD method. (H132
    00 patterns ideally, tighter than F132 00, but more open than LE132 00,
    optimizing the shotgun’s Zone B range.)

    From the Doc Archives, circa 2002:

    The Shotgun:

    The shotgun is a unique weapon as it can shoot multiple or single projectiles.  Firing birdshot, it may take game birds at ranges to 40 yards, depending upon choke and shot, and is therefore an indispensable survival weapon.  For defensive purposes, only larger buckshot and slugs are useful.  These are best fired from a shotgun with a smooth bore (rifled bores cause rotation of the shot column and unusable patterns) with rifle sights.  With slugs and rifle sights, the smooth bore shotgun may be used as a substitute rifle out to ranges of 80-85 yards.  The optimal operating range of the defensive shotgun with buckshot is from muzzle to 15-20 yards using a tightly patterning load of  00 or 000 buckshot.

    Improving Buckshot Patterns:

    There are three ways to improve (tighten) buckshot patterns:
    1/. Ammunition Selection.  Hardened, buffered shot at slower (“Tactical”) velocities tend to pattern tighter due to less deformity of the shot.  Federal Tactical is a good example of this, although Louis Awerbuck states that their performance diminished after Blout bought Federal in 1997.  Alliant Techsystems bought the company in 2001 and is trying to improve the quality once again.  Louis currently only recommends Hornady Tactical or Estate.  Low recoil 8-pellet loads (Remington Tactical) are not reliable in autoloaders.
    2/.  Vang Comp Barrels.  Alterations to the factory barrel consist of lengthening the forcing cone, back-boring the barrel, and adding compensating ports. Stock Benelli & Beretta barrels are too thin and overbored. They will not accept the Vang Comp System. A completely new and specially built barrel is custom made for these autoloaders.   Complete barrel assemblies (with or without compensating ports) are also available for most shotguns, including the Benelli.  Cost of the Van Comp process (without ports) on Remington barrels is $165.00.  A complete Van Comp Remington barrel assembly with tritium ghost rings and porting costs $475.00
    3/.  Wad Wizard.  Formerly known as “Patternmaster” this choke tube momentarily retards the wad resulting in tighter patterns similar to the Vang Comp.  It may be used on any shotgun for which it is made and includes the Benelli.  It only works for buckshot or birdshot using a plastic wad.  It has no effect upon loads that use fiber wads such as those made by S&B.   It has no effect upon slugs and only Foster slugs are recommended.  Retail cost is $105.00.
    Wad Wizard also offers a shorter tube that allows for a pattern that is not as tight as with their original.  It is called their SWAT (Supreme Wide Area Tube) and allows for a more normal dispersion but still retards the wad resulting in more uniform patterns with fewer flyers.  I have come to appreciate some distribution of pattern in a fighting shotgun and so prefer this tube to the tighter one or the Vang Comp process.

    Reliability of Benelli Autoloader with Low Recoil (Tactical) Ammunition.

    John Farnam does not like low recoil buckshot or slugs in autoloaders such as the Benelli Super 90 or the Remington 11-87.  It is known that low recoil buckshot tends to pattern tighter but provide less penetration of objects such as automobile sheetmetal when compared to full power loads.  They may also compromise reliability in autoloaders.  It is also known that 8-pellet 00 loads (Remington) are not reliable while 9-pellet are more reliable.  Some individual guns may prove reliable while other examples of the same model will not.  It is necessary to thoroughly test your individual gun with the particular ammunition before depending upon it for a defensive weapon.
    Personal observations using my Benelli and reloaded birdshot shells are as follows: It will not function using 1-ounce loads at 1150 fps (2 ¾ Dram Equivalent.)  It is reliable using 1 1/8-ounce loads at 1200 fps (20.6 grains of 700X or 3-Dram Equivalent.)  It is reliable with Federal Tactical 00 Buckshot (LE132 00.)
    Louis Awerbuck’s comments upon the reliability of the Benelli with low-recoil loads are as follows:
    “Your gun should be able to cycle light birdshot, though as you are aware, that ability differs from gun to gun with quality control and company ownership. A few things that we have found which impact the ability to cycle light birdshot are: a dry gun (use auto transmission fluid as a lubricant); a barrel out of line because of the magazine tube/barrel clamp; use of a SureFire foreend (these are great lights, but on some Benellis the specs are out a little); an over-tight trigger group screw; and a fully loaded SideSaddle (upsets the balance).”

    Short Stocks:

    The stocks on defensive shotguns are too long for most people.  These weapons are aimed like rifles, not pointed as when wing-shooting.  They should have a 12.5 – 13” length-of-pull for the average shooter.
    Often the length-of-pull is limited by the recoil mechanism of autoloaders as it is in the stock.  Pump-operated shotguns may be as short as 12”.
    The length-of-pull of the following instructor’s personal shotguns is as follows:
    Jim Crews: 12.5” on his Remington 11-87.
    Louis Awerbuck: 12.5”.
    Vicki Farnam: As short as they were able based upon the recoil mechanism of her 11-87.
    Choate makes a synthetic replacement stock for Remingtons and Benellis.  It has a recoil pad and spacers in different widths from .25-.75” that can be used singly or in combination. It is said to measure a length-of-pull of 13” with only the recoilpad in place, but actually measures 13.25”.  I purchased one for my Benelli M1 Tactical Super 90 and had a gunsmith reduce the length as much as possible but still maintain the ability to use the spacers and recoilpad.  It now gives a true 13” length-of-pull.  We also rounded the top of the recoilpad to make it less likely to snag.
    I also shortened the rear stock of a Remington 870 Wingmaster to yield a lop of 12.5”.  It is excellent.

    Testing Data:

    Benelli with IC (improved cylinder) choke with Federal Tactical 00 (1997 manufacture.)
    07 yards: 9/9 in 2.75″ (Wad struck target.)
    10 yards: 9/9 in 7″ (Wad struck target.)
    15 yards: 9/9 in 8.125″
    20 yards: 9/9 in 13.25″
    25 yards: 8/9 in 18″ (One pellet off silhouette.)

    Full power Federal 1-ounce slugs (F127 RS):
    Sighted from sitting position at 50 yards: 3-shot group of 4.5″, point-of-aim.
    Confirmed Zero from Off-Hand at 25 yards: One round, dead-center hit. (Wad also struck target less than an inch from the slug!)

    Trajectory of 1-ounce slug @ 1600fps:
    025-yards: +0.5″
    050-yards: Zero
    075-yards: -2″
    100-yards: -6″
    125-yards: -12″

    http://www.ar15. com/forums/ topic.html? b=6&f=1&t= 289450Doc Comment:Works for “Weaver” and “Modified Isosceles,” as blading the feet / torso has nothing to do with the definition of Weaver Stance, which in its purest form is defined as exerting isometric tension with the support arm pulling backwards and the shooting arm pushing forward when shooting an handgun.  Feet and torso position do not define Weaver Stance, and photos of Jeff Cooper show him shooting Weaver Stance with his hips and torso squared-off to the target.

    Often not having the luxury of taking time to set up in a formal stance, we shoot all our weapons from any and all positions.  The short longarm stock permits this, whereas a longer stock may not.  (Try laying on your back then turning to engage in various directions.)

    A short stock allows the shooter to get squarely behind the gun so recoil is directed straight back into the “shooting pocket” of the shoulder.  This coupled with an exaggerated forward-leaning stance while pulling the shotgun into the shoulder to maintain contact all but absorbs recoil into a shove rather than a strike.  A serendipitous advantage of pulling the pump-shotgun into the shoulder with both hands [LM may disagree, according to SG1 lecture] is that the slide will release as the shot is fired and begin you on your racking the action for the follow-up shot!

    With nearly non-existent recoil shooting a .223, we’ve gotten away from the necessity of using this shooting pocket, even to the extent that we shoot with only the toe of the stock high on our chest!  Do NOT do that with a 12 gauge 1 ounce slug!

    How short a stock may be is usually influenced by the mechanisms in the stock itself.  A gas-operated 1100/1187 has a recoil spring in the stock whereas the pump–action 870 does not.  The LOP of my Benelli and 1187 is 13.0″, while my 870 is 12.5″.  I use them with or without body armor or a thin FIELD GRADE PAST recoil pad (this last trick taught to me by Friend Larry Mudgett during an early shotgun course when shooting slugs.)

    Another caution: (870 feed issues)

    Be sure there are no “dimples” in your 870 (1100, 1187) magazine tube, or they’ll hang-up and cause a miss-feed.  The dimples were added (in the 80’s?) to allow a plastic retaining cap to contain the spring in lieu of the previous slit steel plug that so often flew out and across the room (or into your face) when one tried to pry it out.  These dimples MUST be removed to allow the shell follower and spring unrestricted movement.  I use a Dremel tool to make it completely smooth, then polish it with felt or a fine emery cloth.  Blue the area when you’re done.

    ************ ********* ********* ********* *******

    We’ve just added our first GG&G Forend Tactical Light Mount.  It’s easy to install and a bit of light from a TLR-1 illuminates your front sight as an extra bonus.  It is much easier than to mount a #36 Weaver base at this same 3 O’clock position, and much more durable.  The only draw-back is that it costs between $75.00 and $90.00, rather than $3.00.
    http://www.gggaz. com/index. php?id=234& parents=60, 152

    I just found out Midway has them on clearance for $61.35!  RECOMMENDED!
    http://midwayarms. com/viewproduct/ ?productnumber= 866614

    Most “old police guns” did not have the anti-jam bolt, identified by the three-sided rectangular cut-out on the shell lifter (“carrier.”)  This is an expensive replacement part, around $80, but well worth it to prevent a shell prematurely releasing from the magazine and wedging itself between the bolt and the lifter.  This either occurs due to a weakened shell latch or the operator failing to fully insert a shell past the shell latch into the magazine.  I’ve seen this “jam” occur twice, during two different courses.  Simply forcefully racking the action, while depressing the slide release lever (“action bar lock”,) cleared the malfunction without needing to disassemble and remove the barrel.  (One required the butt to be slammed on the ground.)The fiber-optic rifle sights we used are a b!tch to put on, requiring three hands and a lot of patience.  They require a vent rib, and are “solid enough” once installed.  We also use blue locktight on the bolts.  Brownells sells a fiber-optic replacement bead that I’m waiting to try on a gun when the opportunity presents.Midway had the GG&G forearm on sale, and Brownells stocks them.

    There are two bad words in Shotgunning: “Three-inch” and “Magnum”.  I avoid them both.

    I’m convinced that the secret to recoil reduction is a short stock, pulled firmly into the operator’s shoulder pocket, his mass squarely behind the gun and his body leaning forward.

    Very short stock use; requires the shooting thumb placed on the same side of the stock, NOT crossed over the top, or you WILL hit your nose!  Think of a right-hander shooting with his right thumb on top of where a Rem 700 safety would be.  I’ve outlined this area on my 12″ LOP gun to remind another shooter of this should he pick-up and shoot my gun, which I’ll name “Straight Thumb.”  (Like “Tom Thumb” or “Jo-Jo”: a shotgun with this much character needs to have a name.)  Pistol-gripped stocks prevent use of the stright thumb.

    I’m coming to the conclusion that 13″ is probably the optimal LOP for a defensive shotgun, fitting almost all individuals well when dressed in normal clothing, and still serviceable for wing-shooting, as if that was important!  My old 870 has a 12.5″ LOP and works great.  The new 12″ LOP 870 is a pure fighting shotgun, well-suited to body armor and a variety of unusual shooting positions.  It requires a Straight Shooting Thumb, hence it’s name.

    870 Express ($289 -30 rebate -20 rebate – another 20 rebate = )   $219 (these prices MAY be outdated) GG&G forearm  (Picatinny rail at 3 O’clock)                                    $74Choate 12″ LOP stock                                                                    $45

    TacStar +2 with QD sling swivel                                                      $35

    Fiber optic rifle sights                                                                       $28

    1.25″ Black nylon sling                                                                    $10

    Two 1.25″ QD sling swivels                                                              $8

    Shortening barrel and removing mag tube dimples                              $0

    Rebluing muzzle and ground areas of mag tube (Cost of Gun Blue)     $5

    —
    Strength and Honor, always Alert, always Prepared.Doc Gunn

    “Si vis pacem, para bellum.” ^

    Doc Gunn, Inc. / DTI-RNK
    P. O. Box 73
    Daleville, VA 24083

    “Willingness is a state of mind. READINESS is a statement of fact!”

  • Leatherworking Therapy


    I spend my life in a “logical/virtual” world, so when I get to build/develop actual physical things, its like therapy for me.

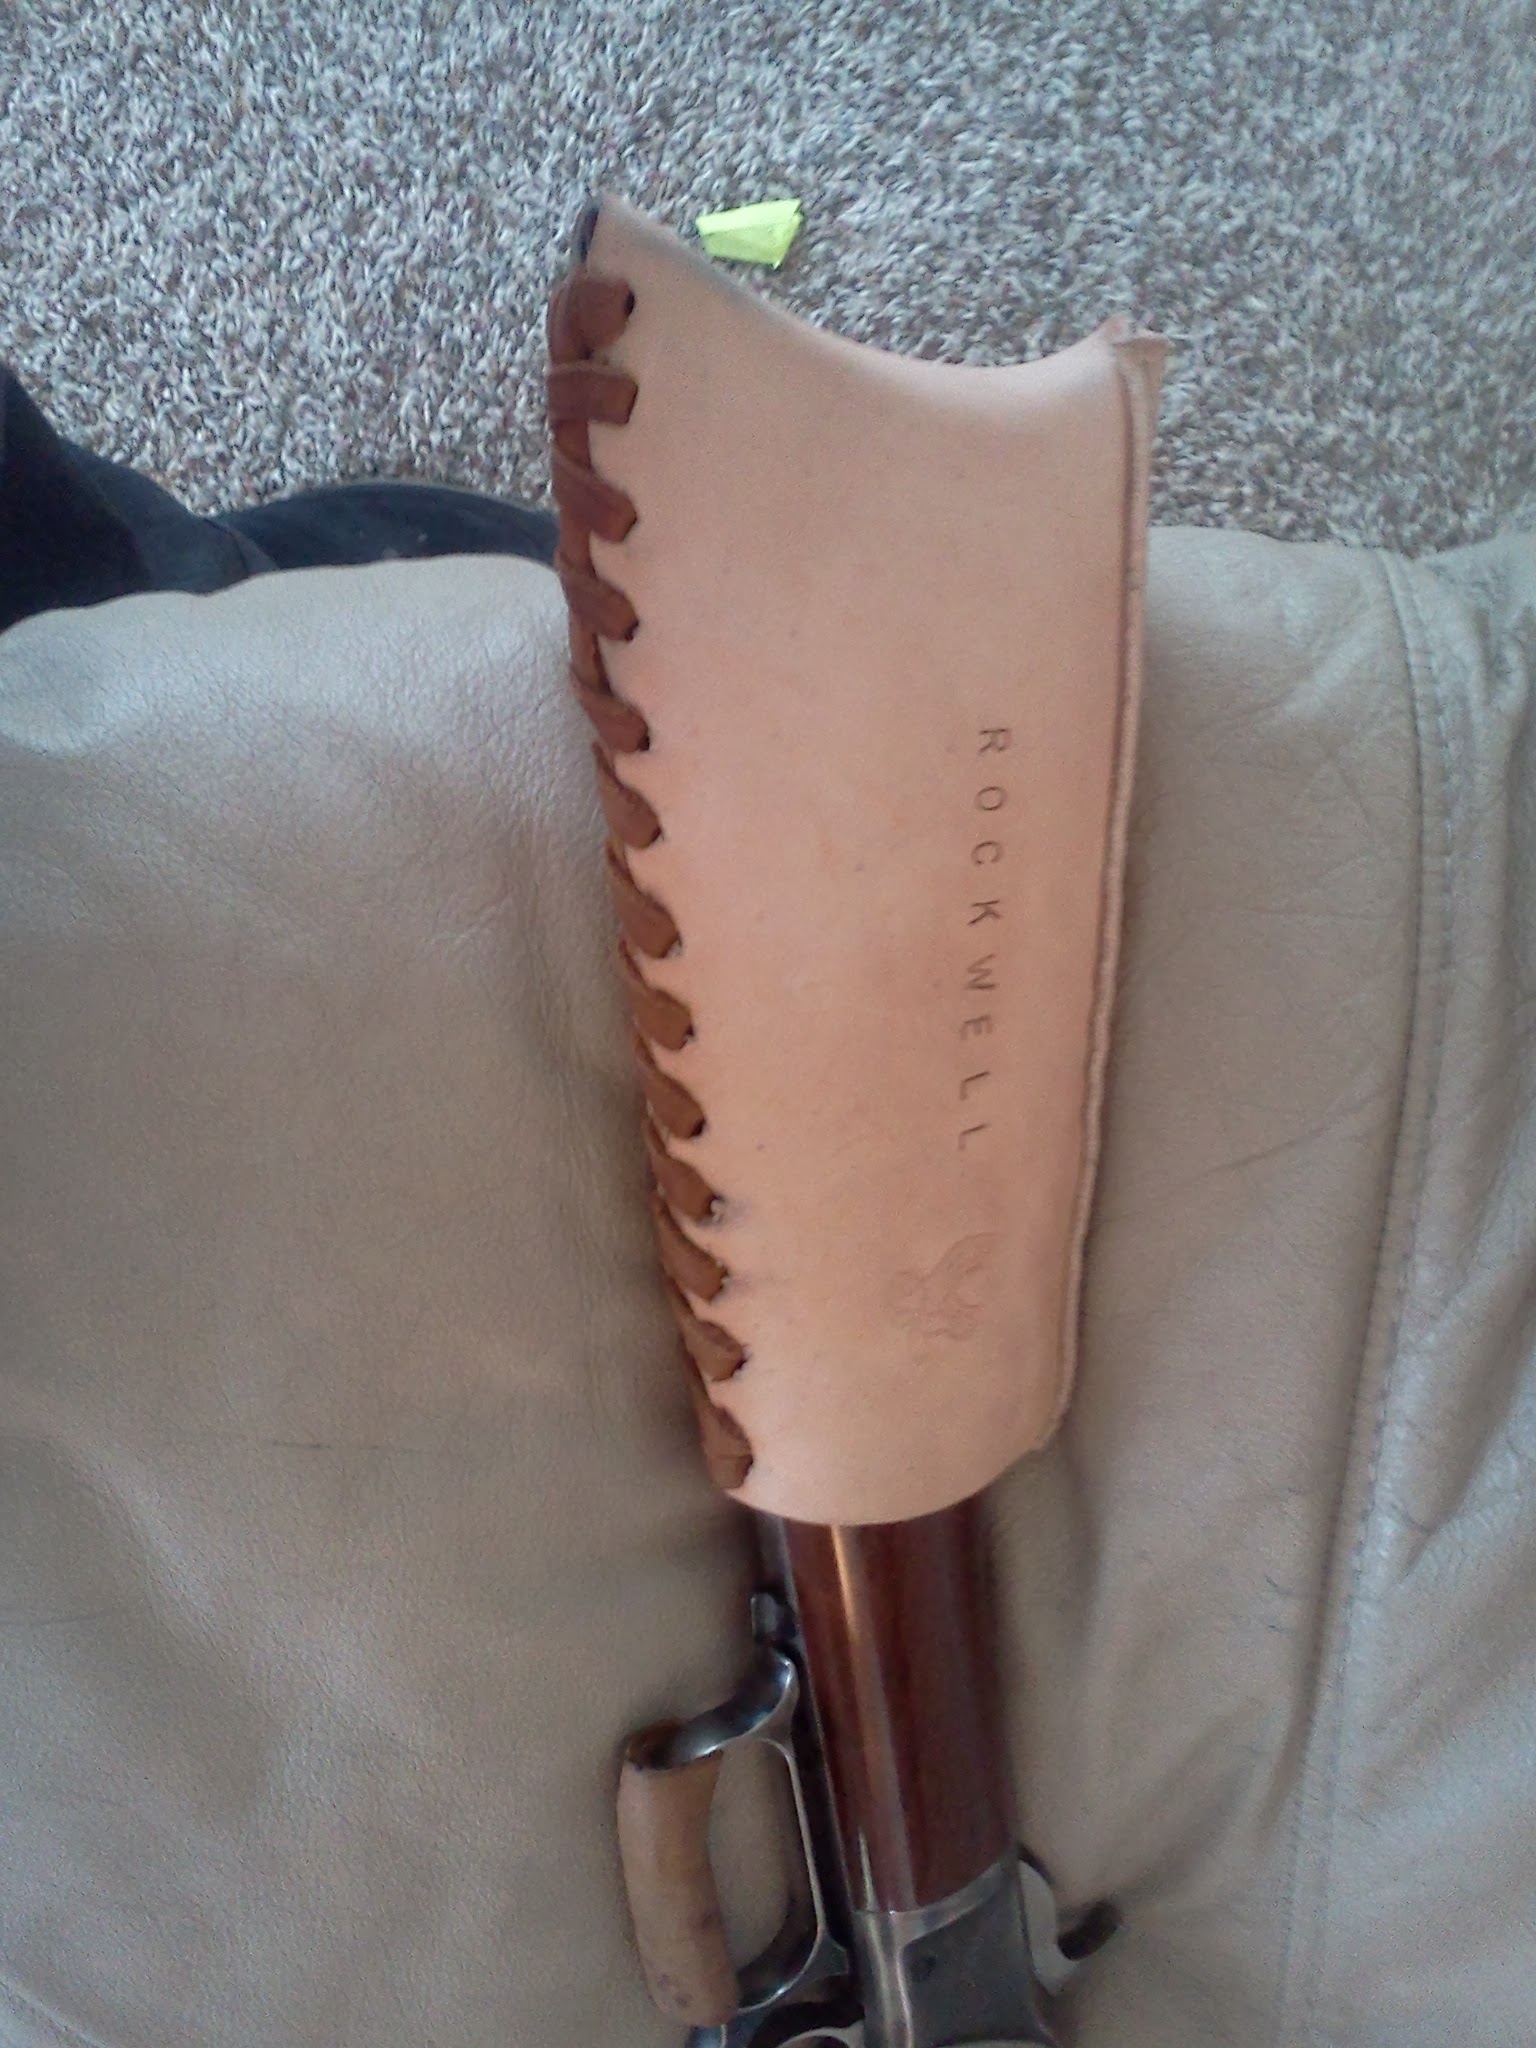
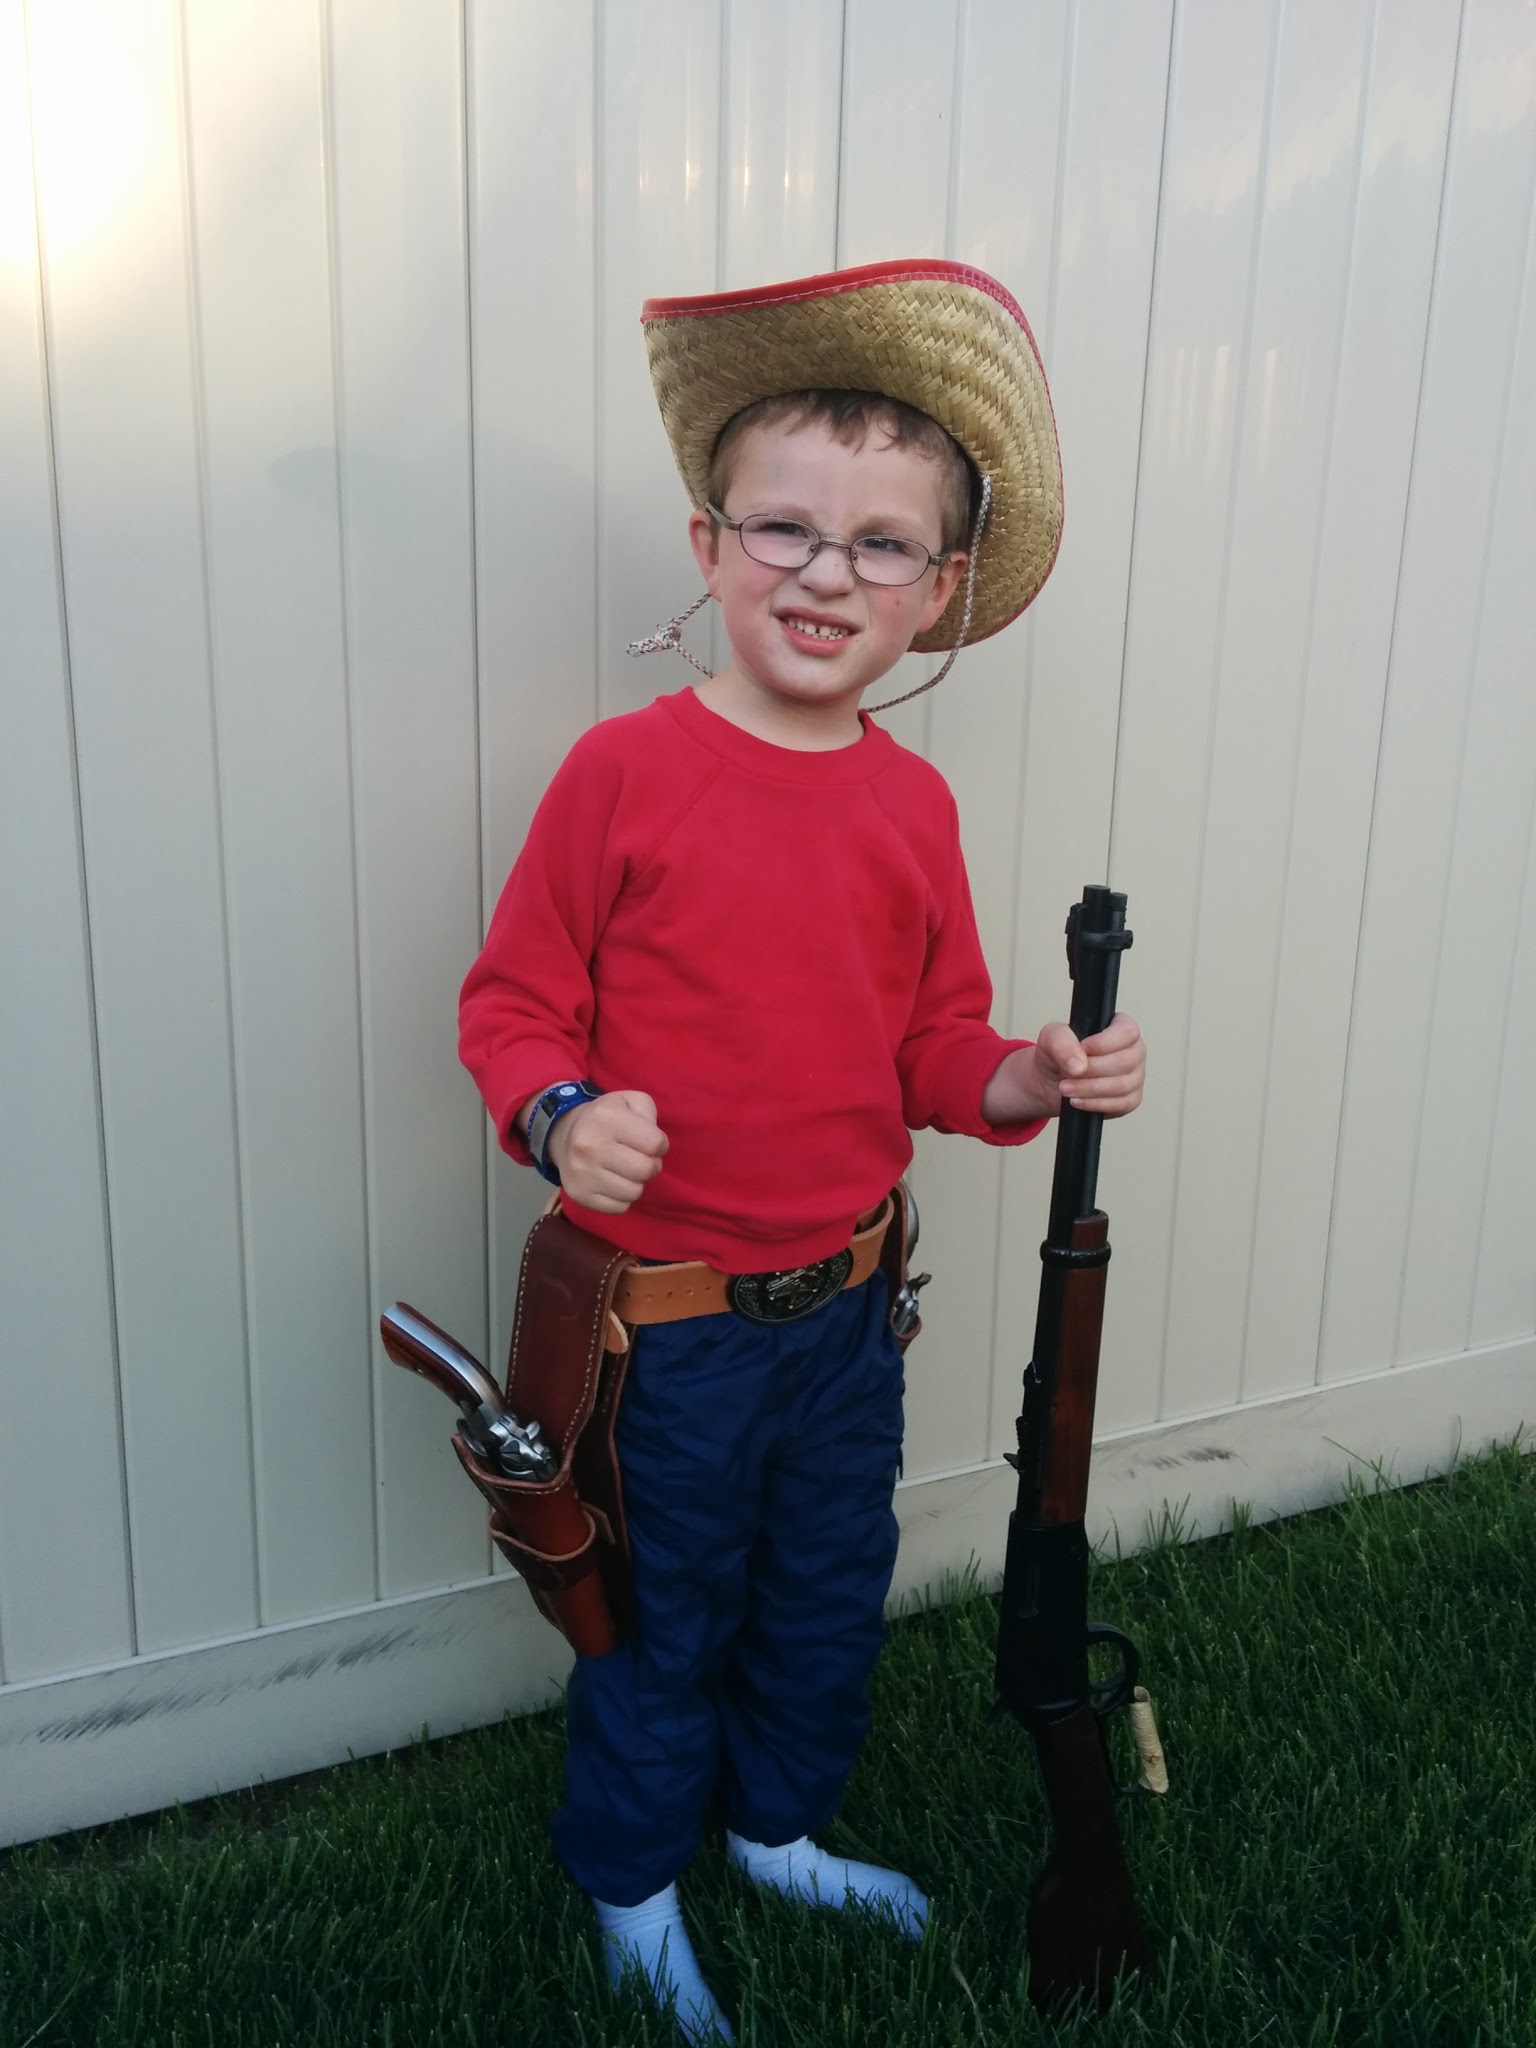
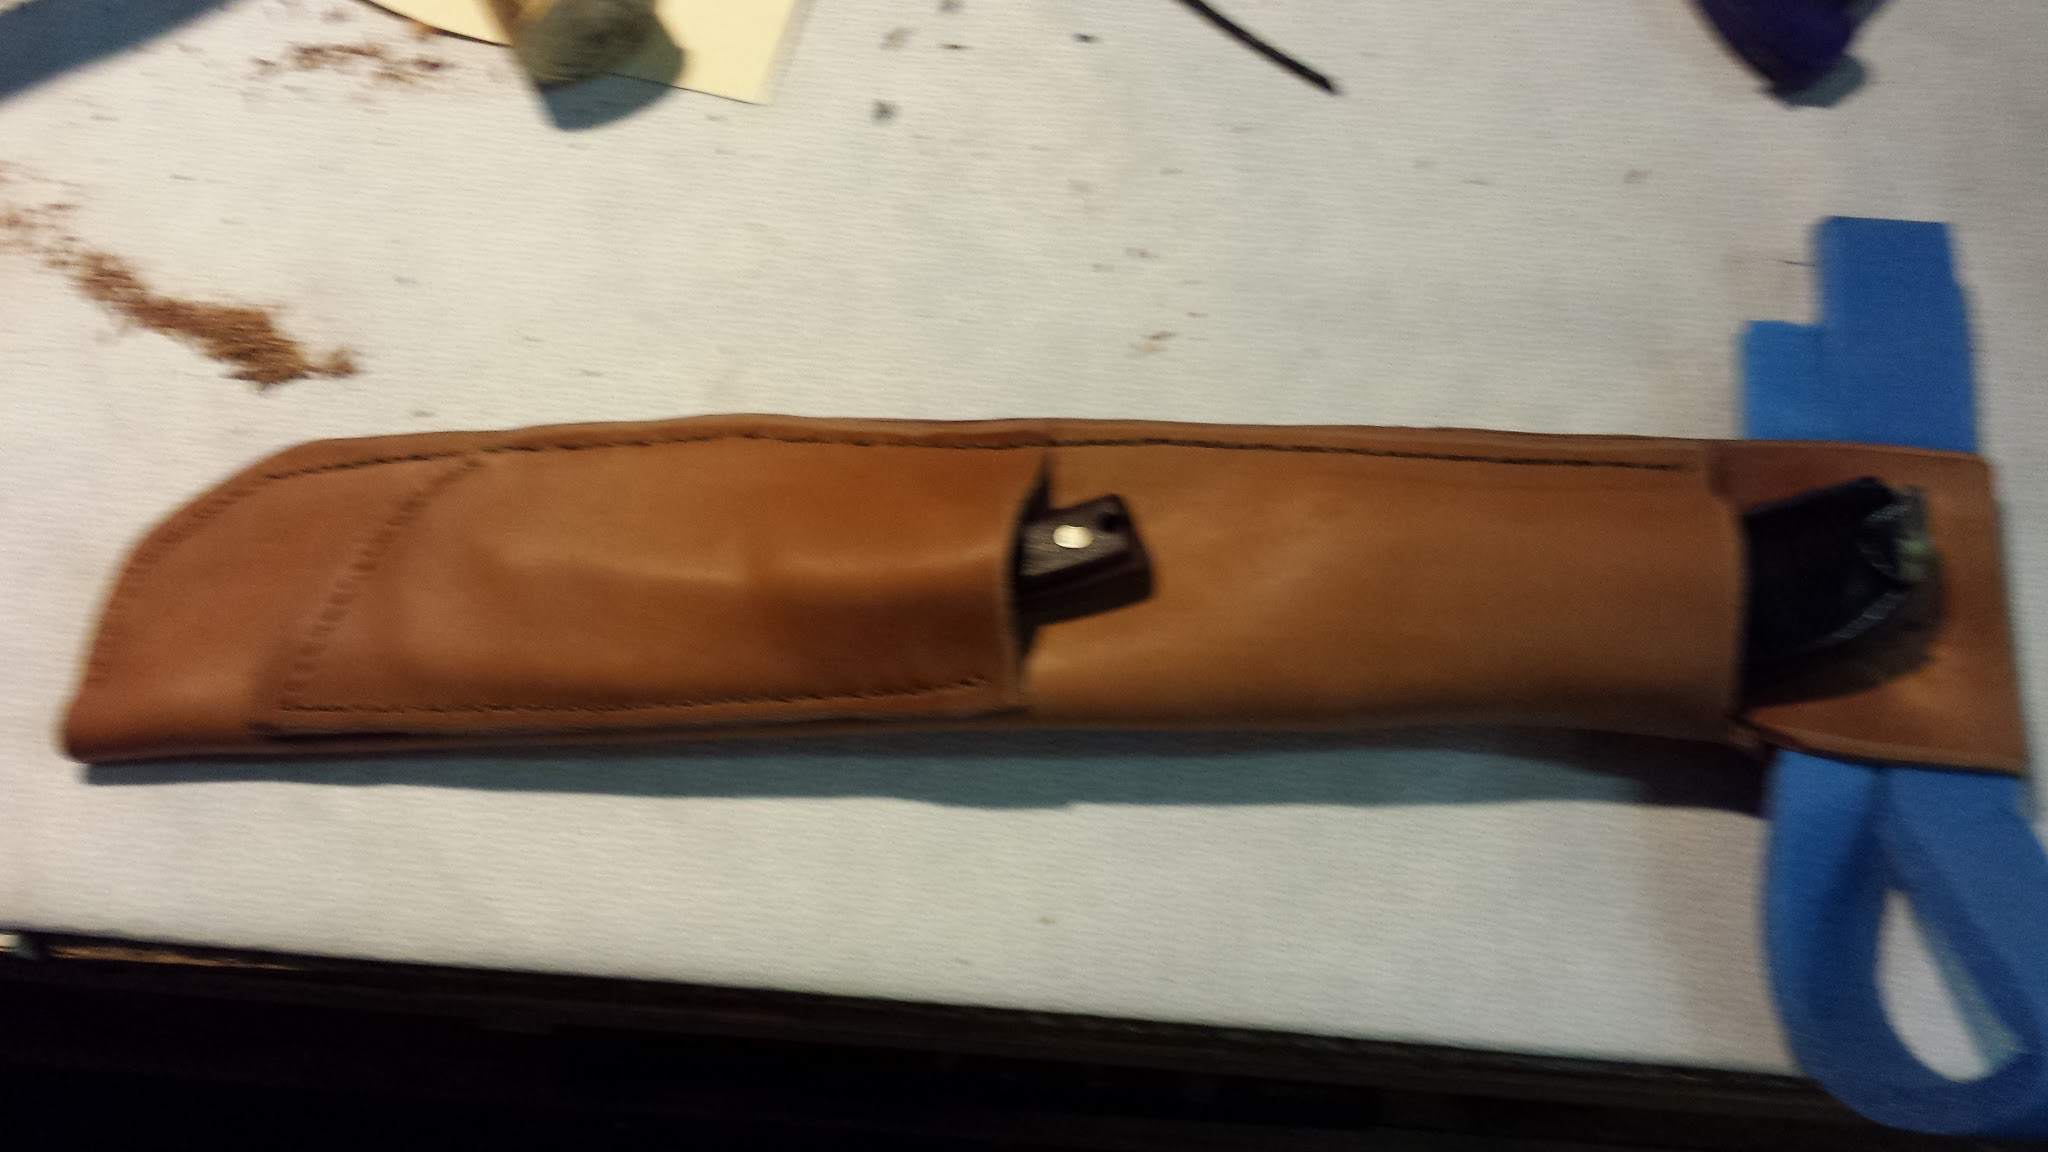
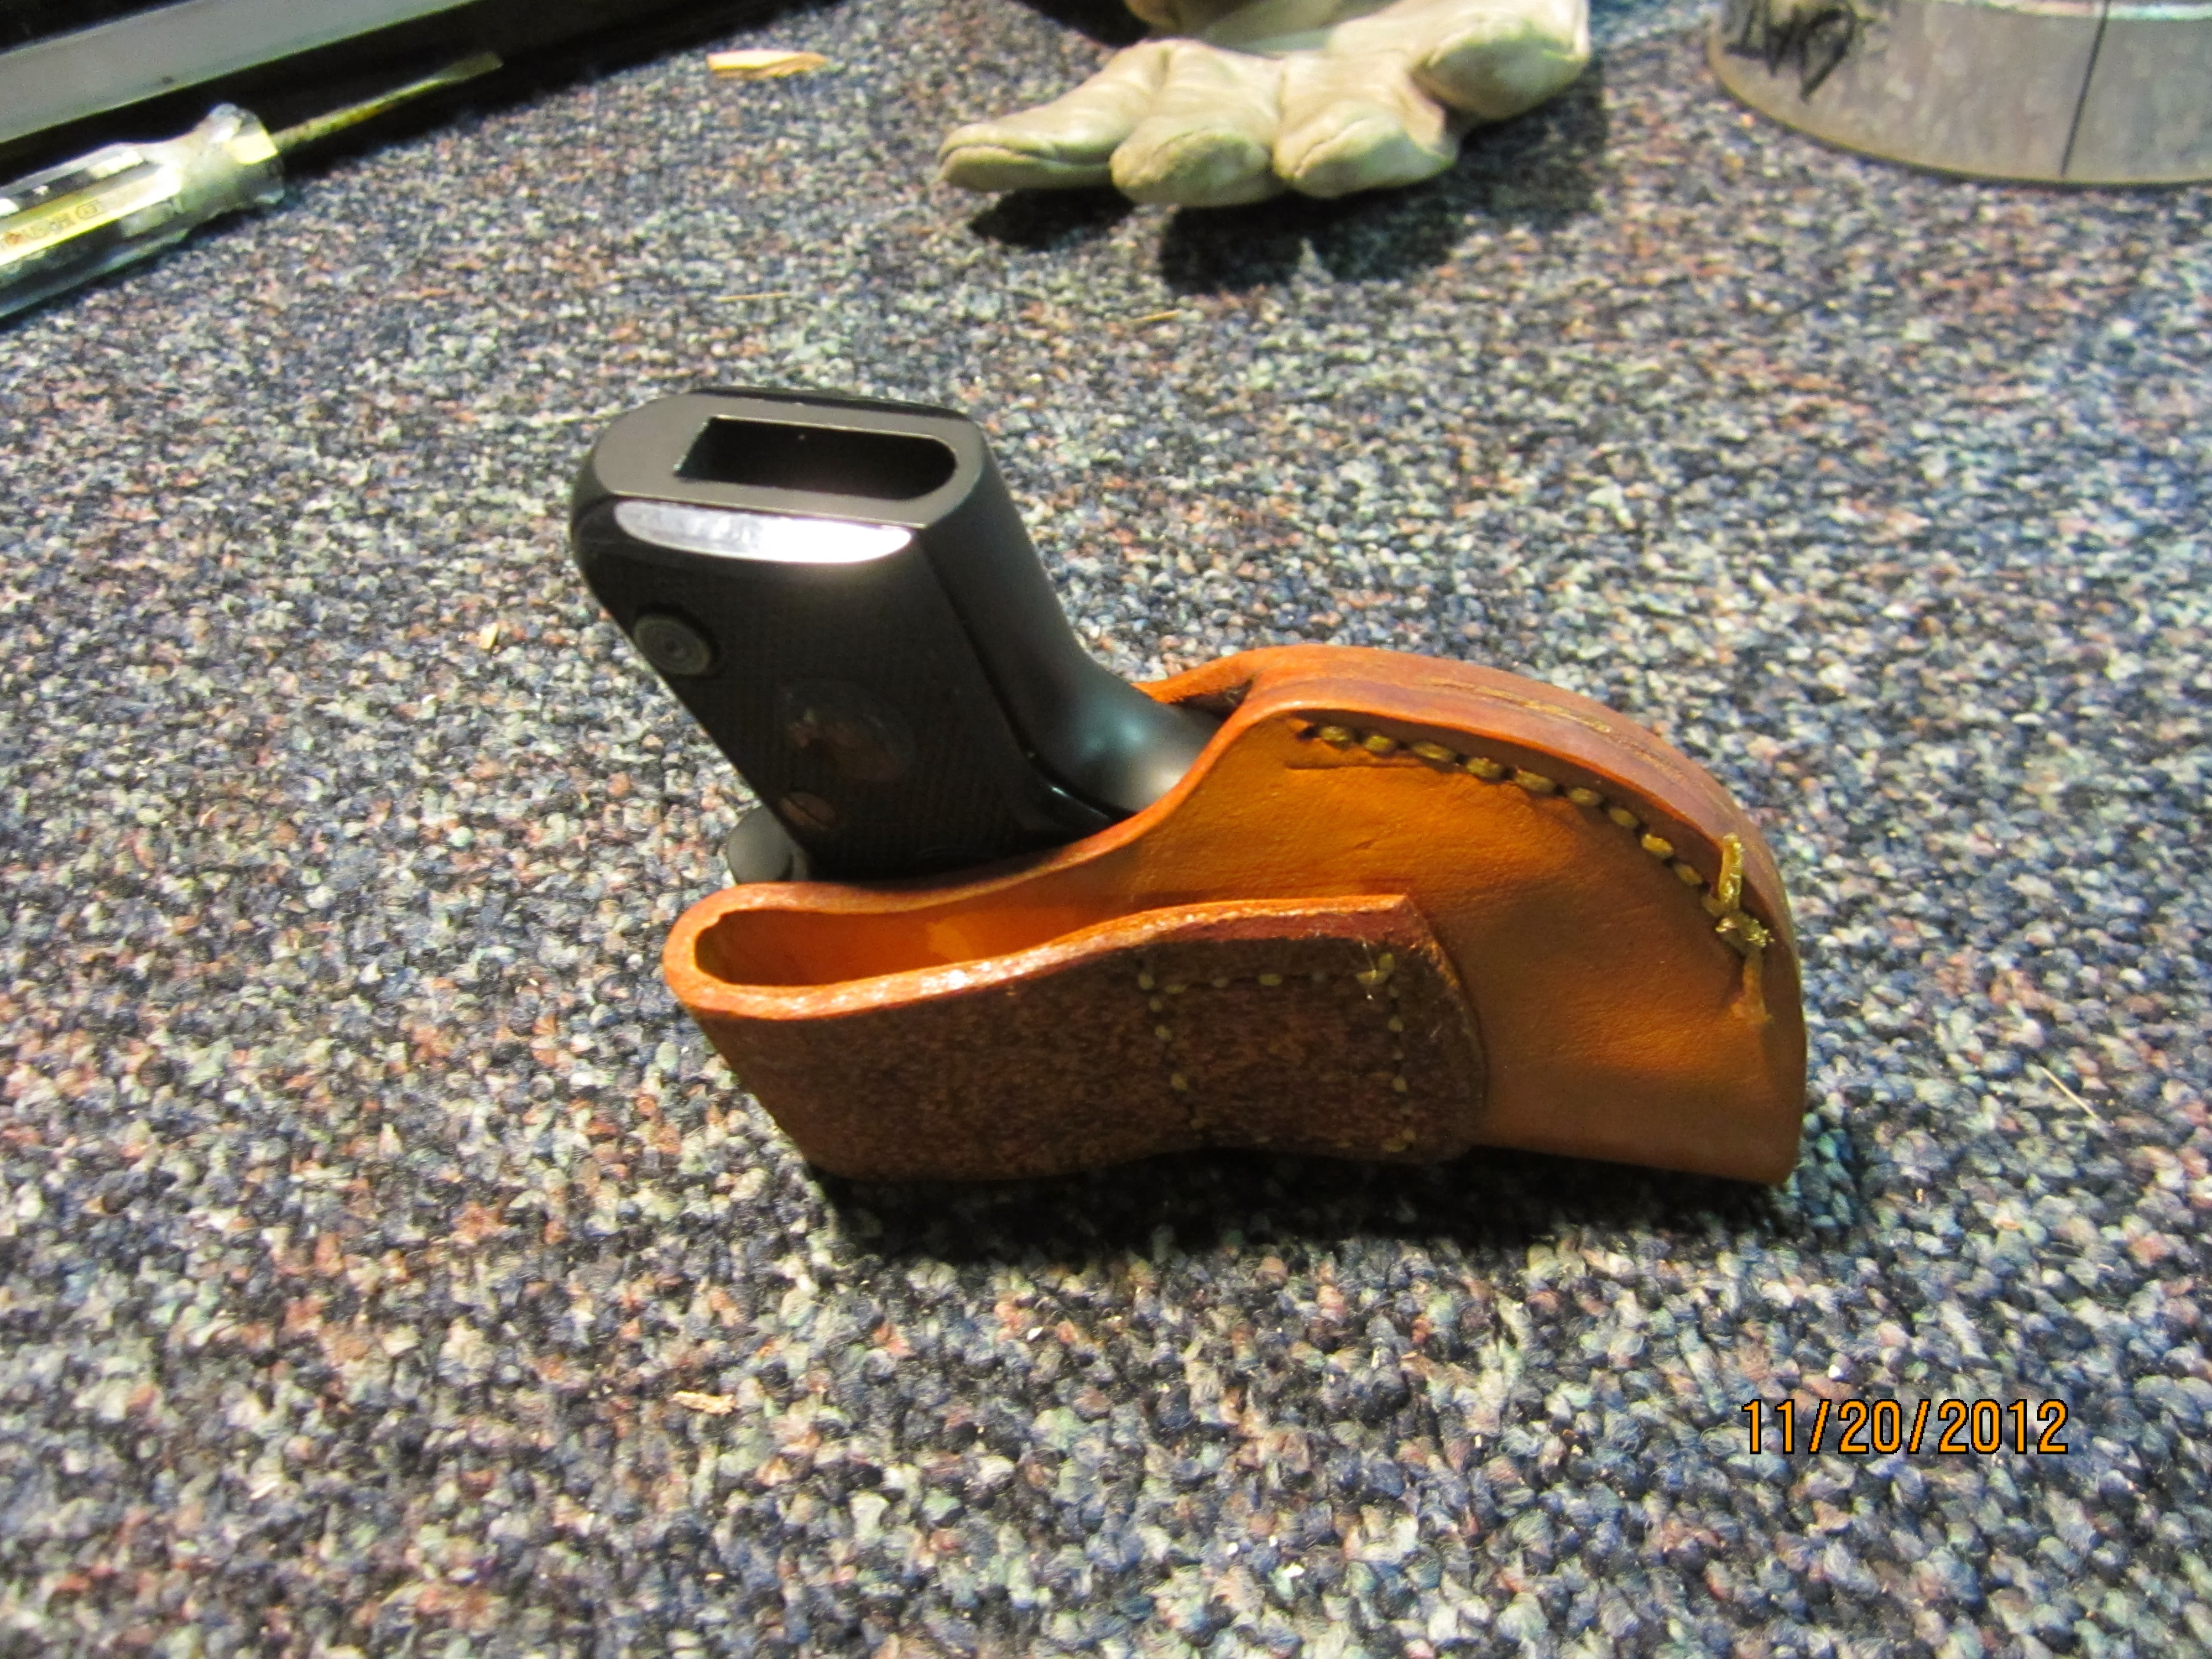
    Cowboy Action Shooting got me into Leatherwork to save money on holster rigs for me and my two oldest children. For the price of one “commercially” built holster, I was able to make 3 gun belts & 6 holsters.

    My first holster making class was taught by Tim Start of http://highdesertleather.com/ I think I just “happened” to take his first & only holster making class. Very foundational on building patterns and fundamental craft.

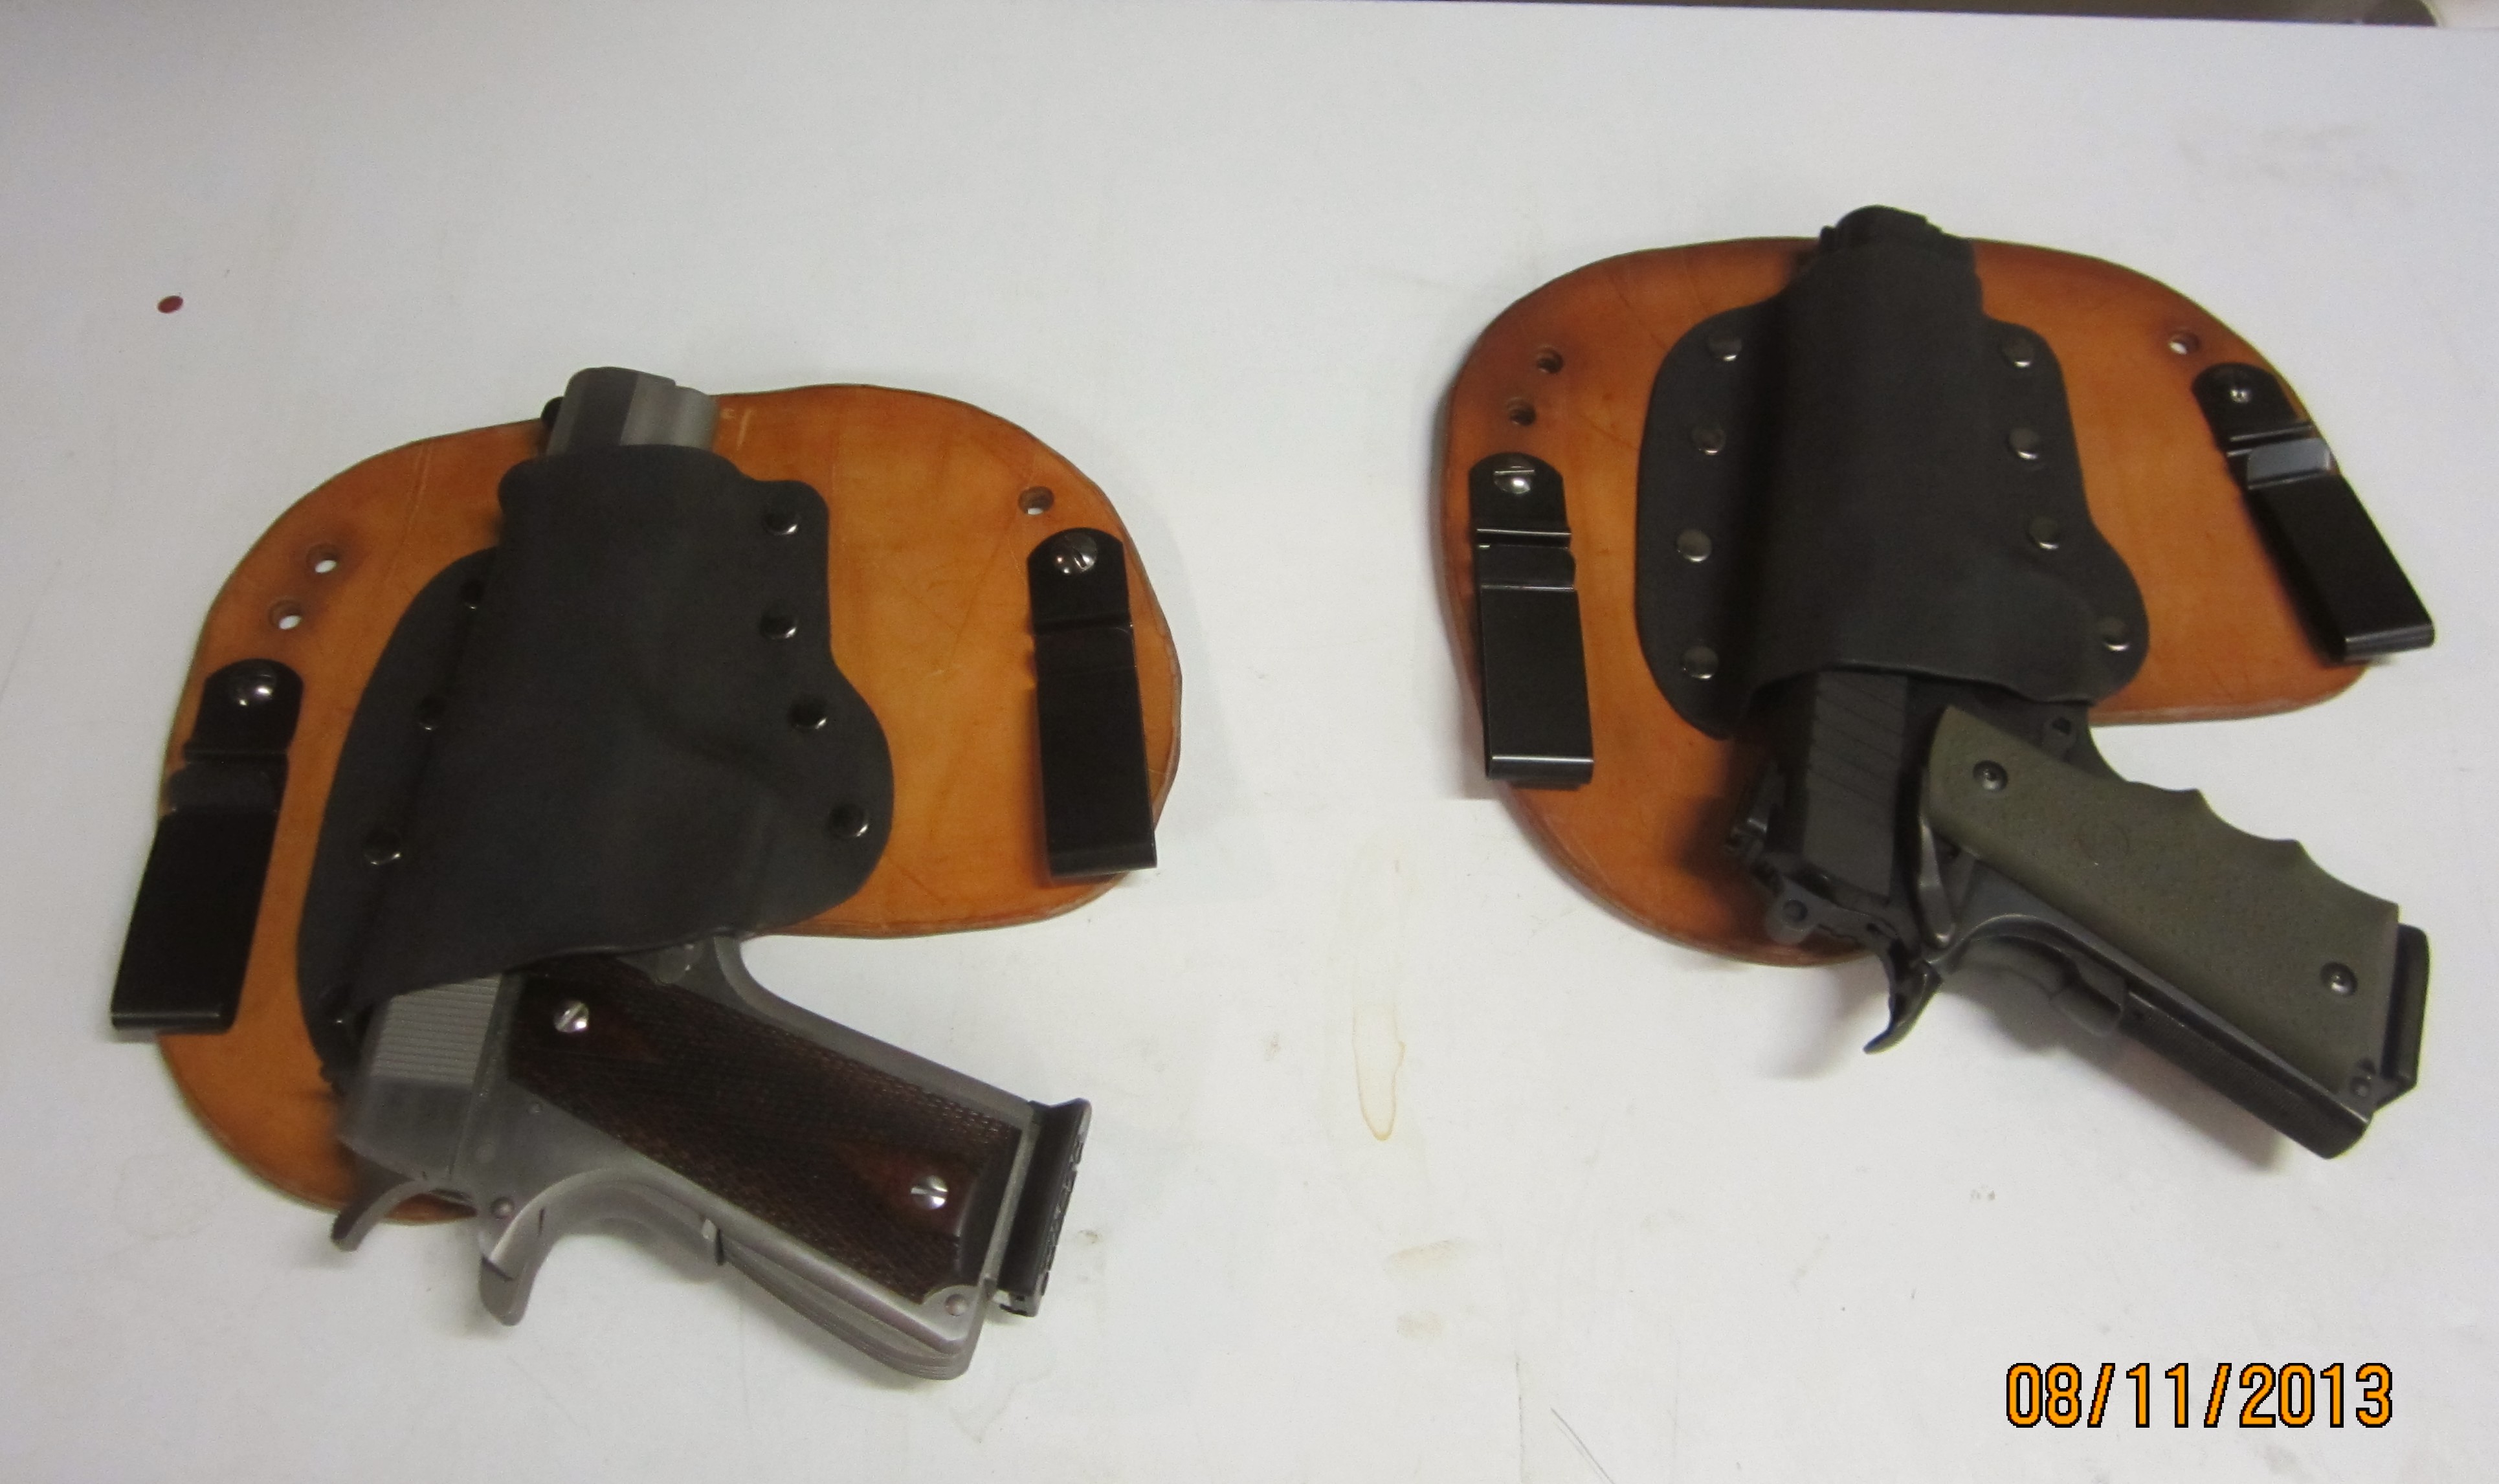
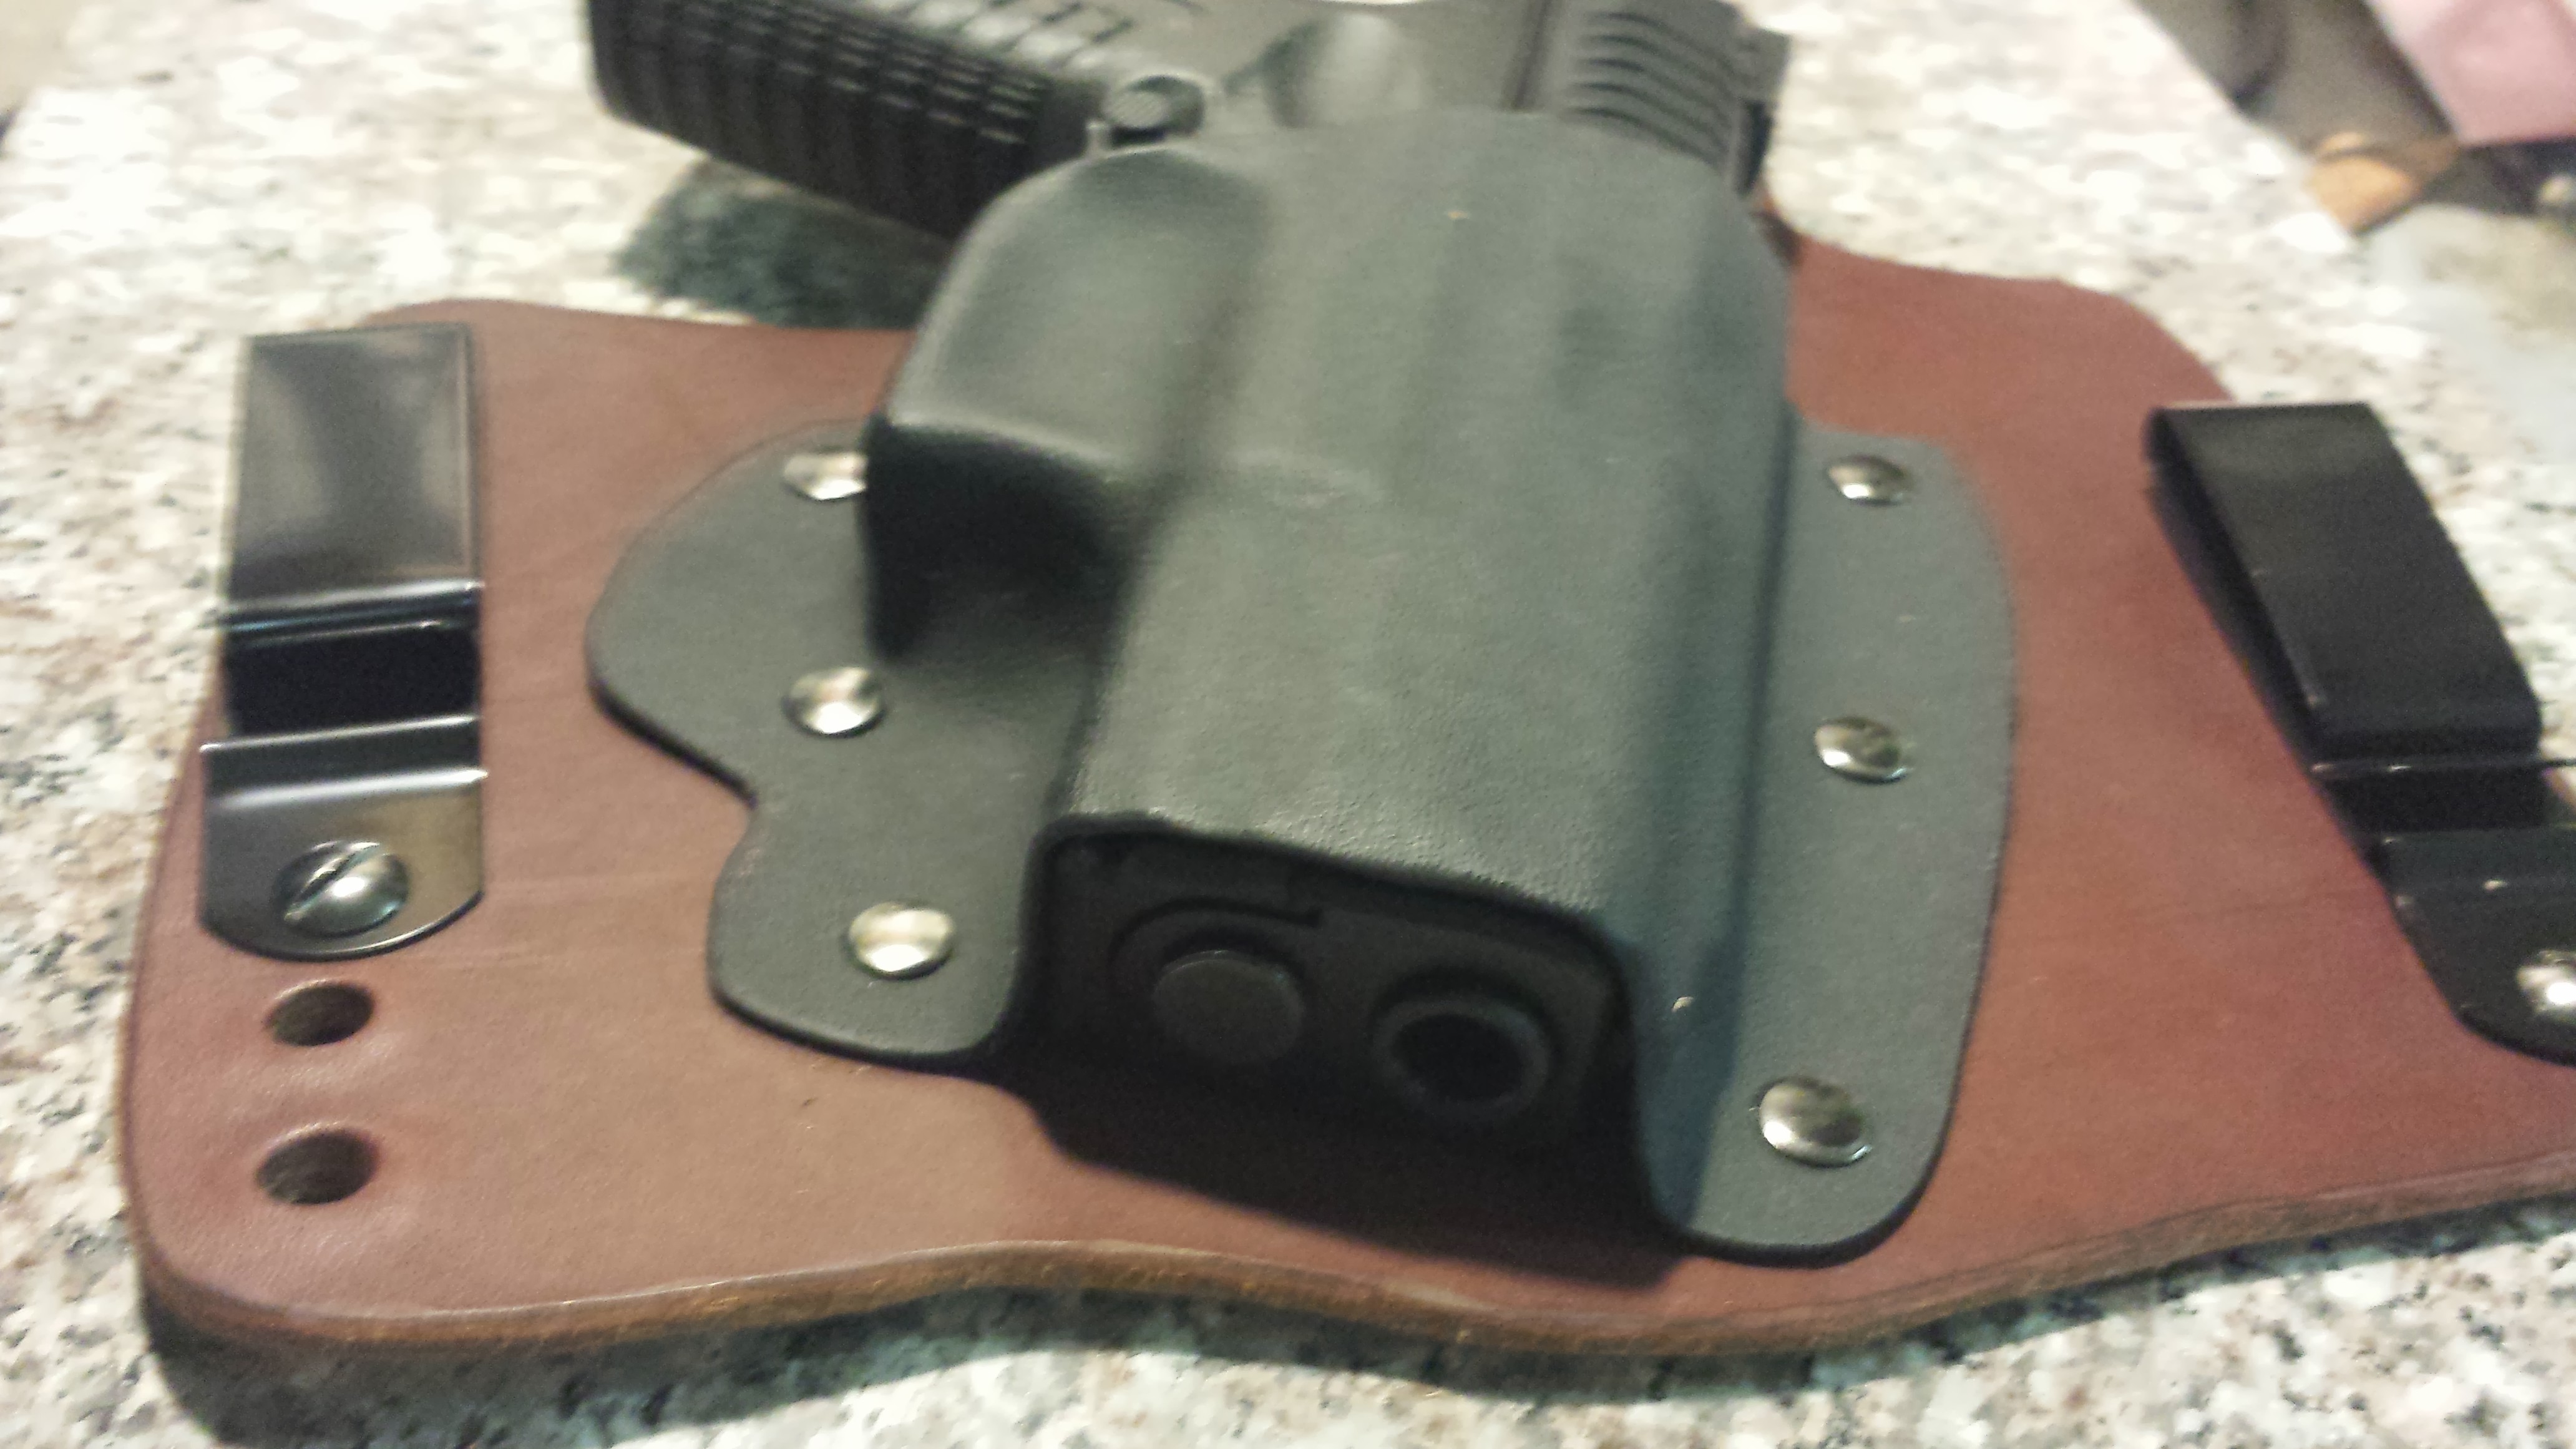
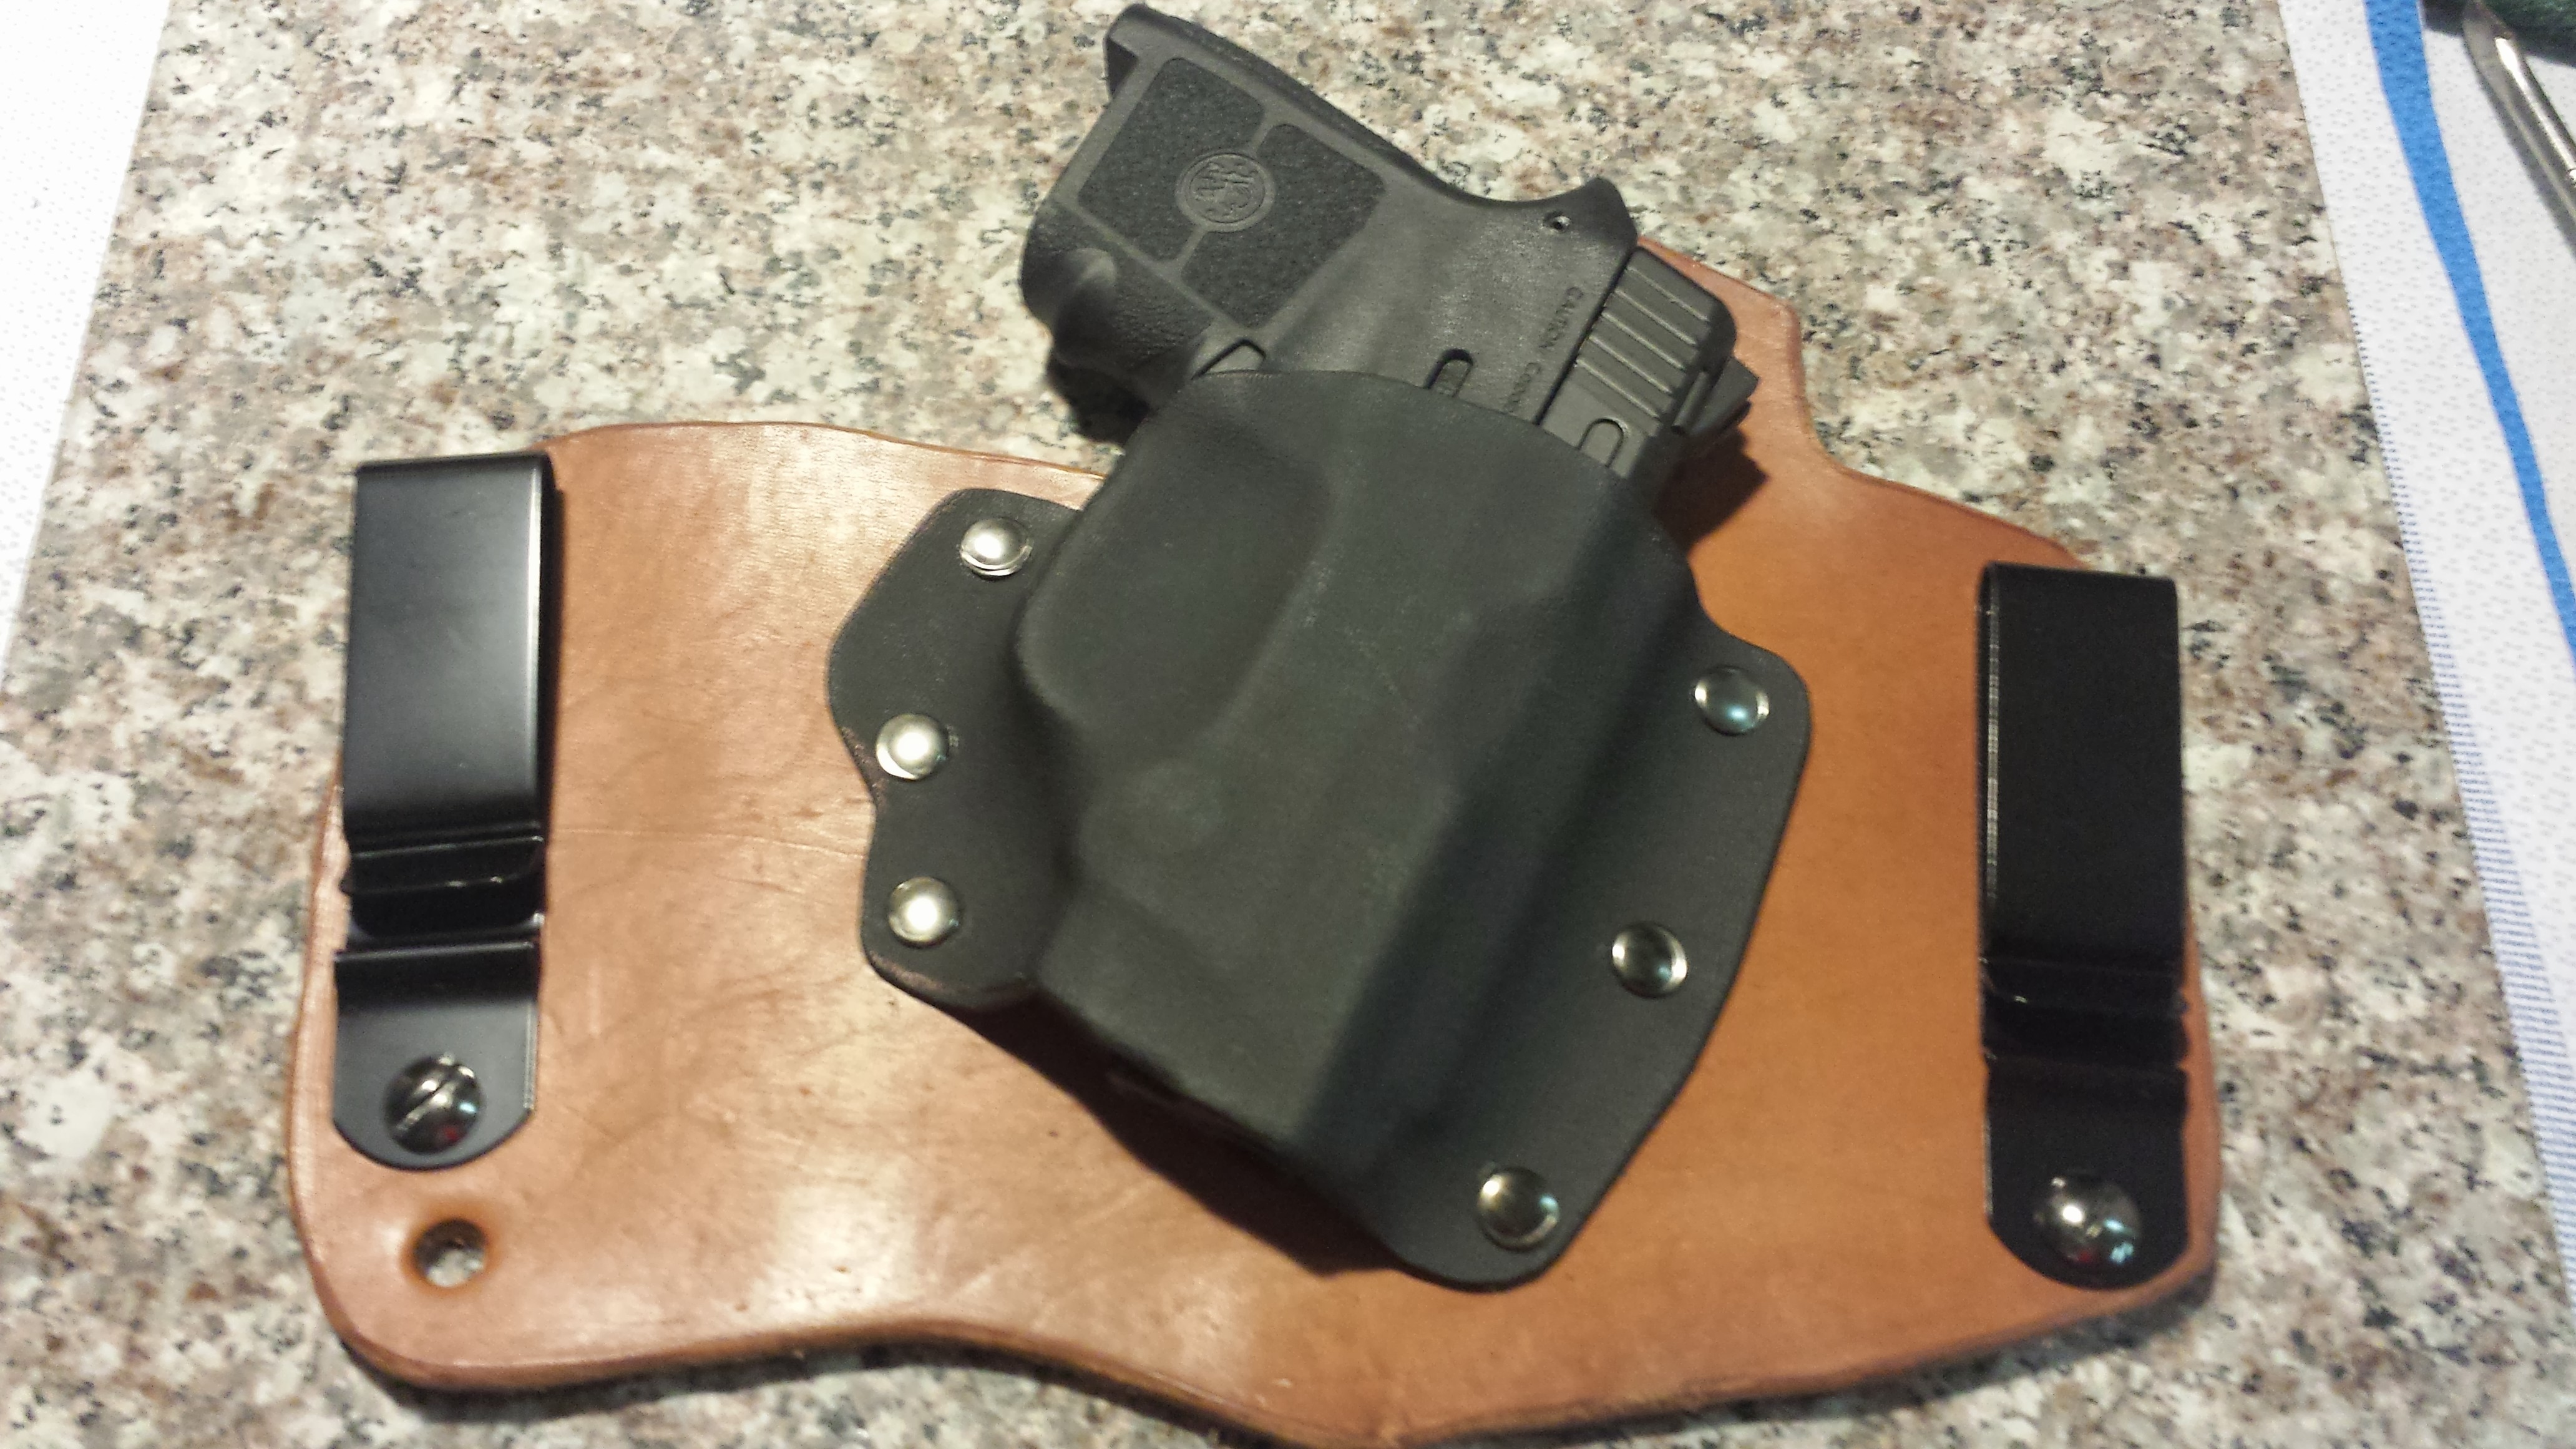
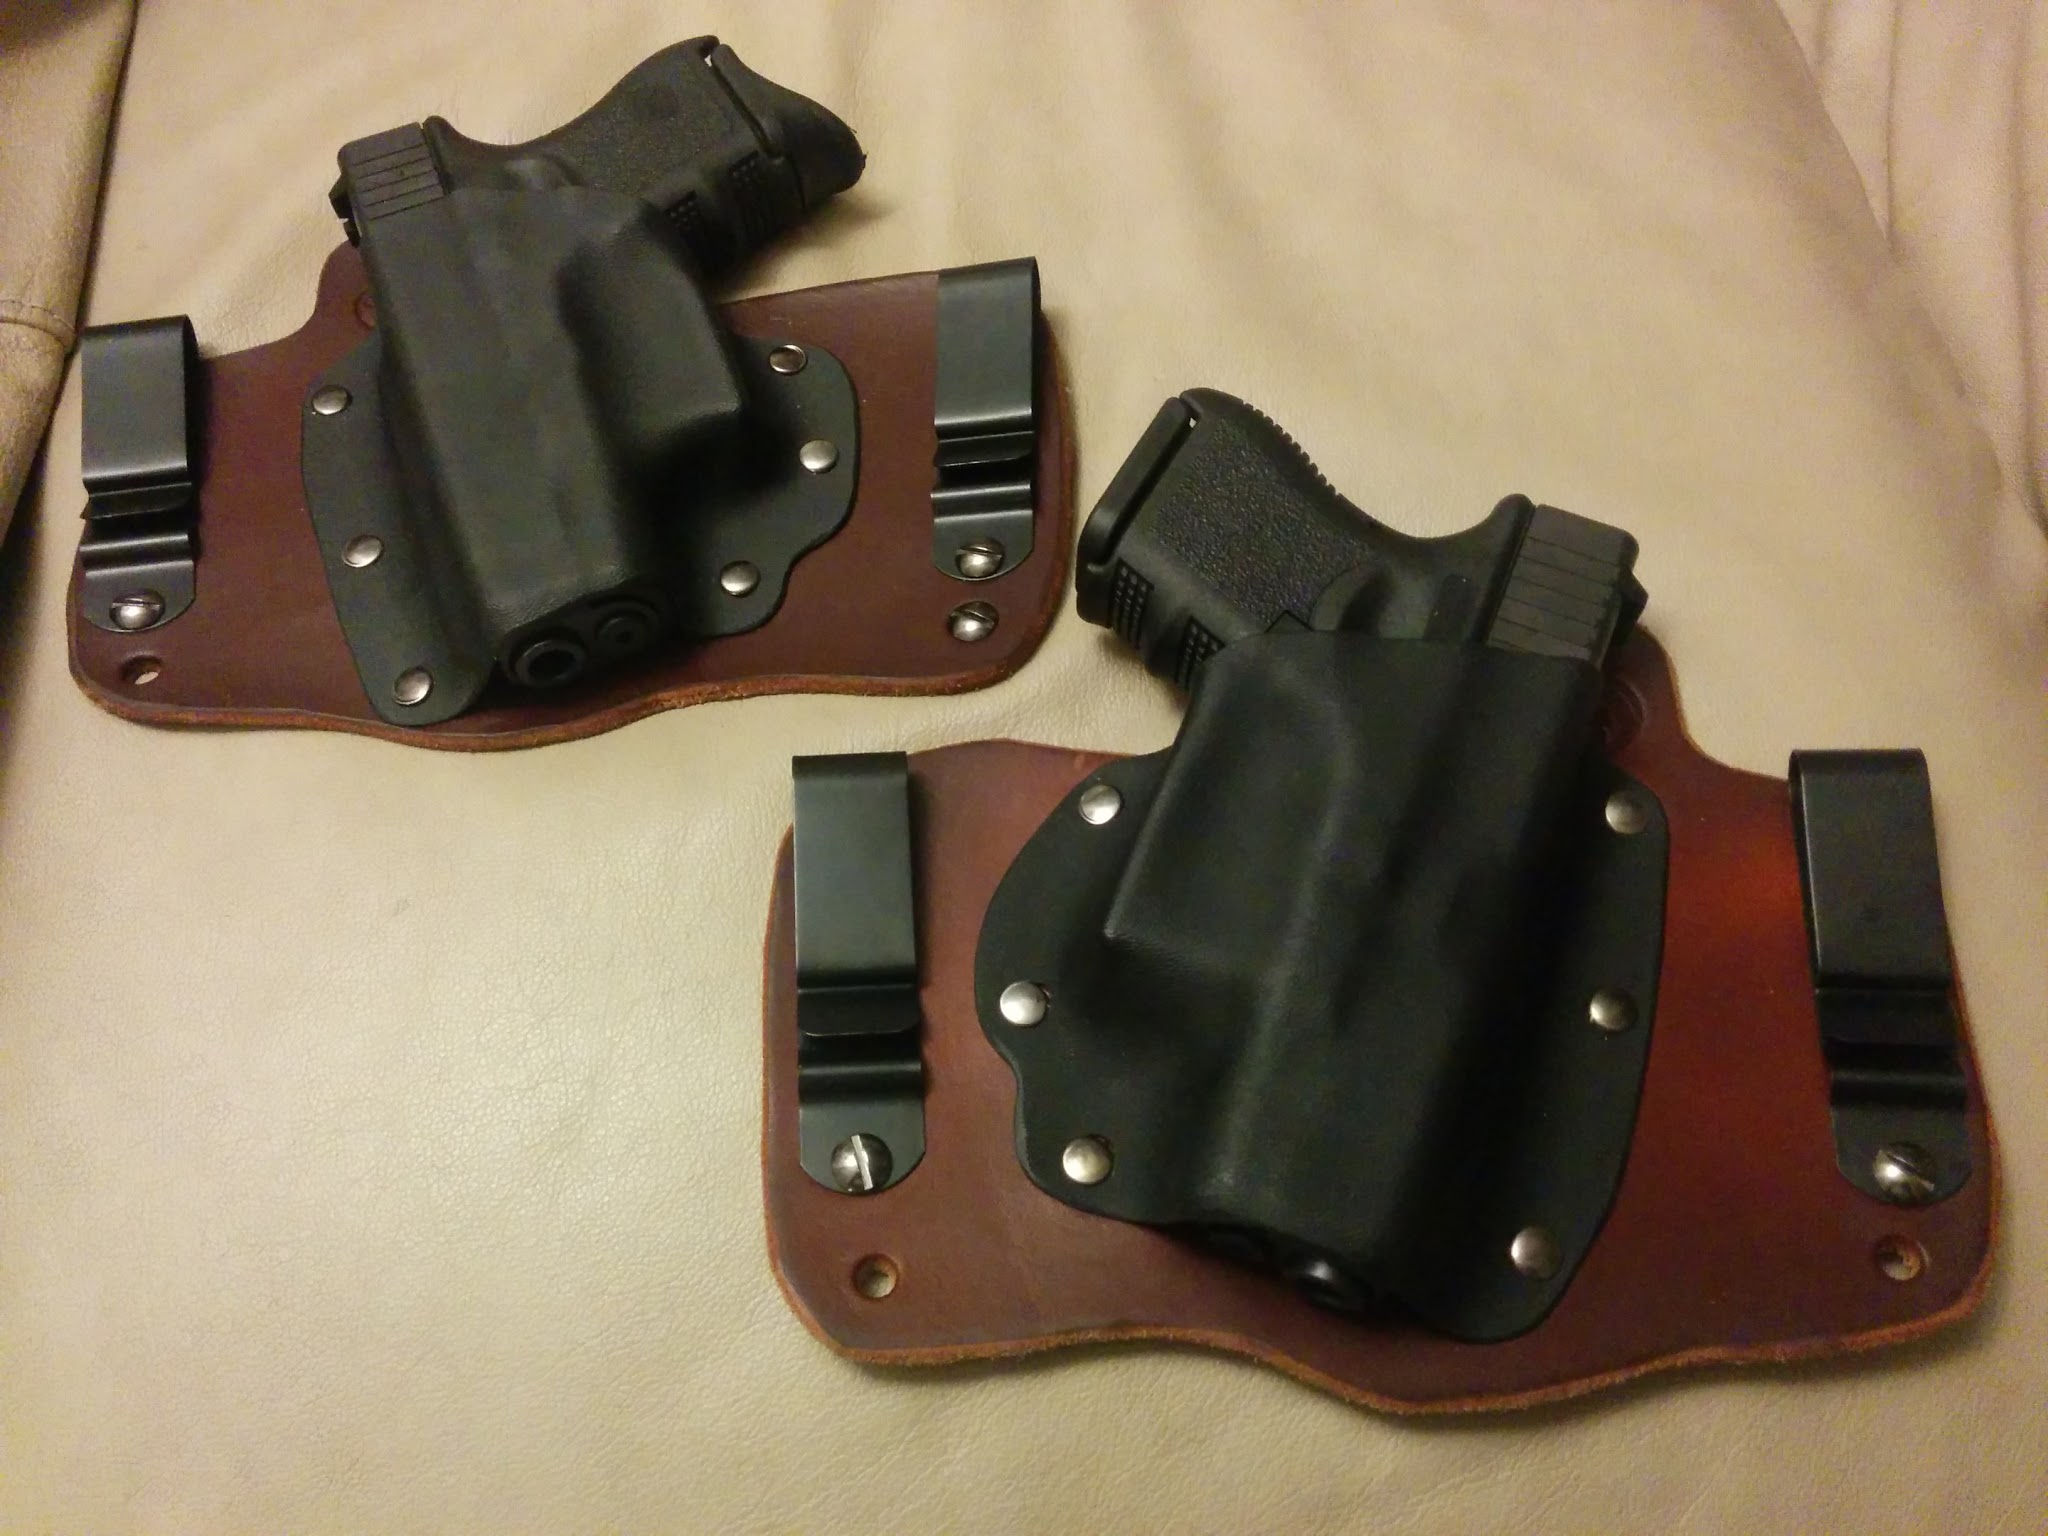
    Then, one day a friend needed an IWB holster and I have a “galco IWB” holster for my wife’s S&W 638, after about making 20 of those, the “Foxy Tuck” was born a real Gen1. Each one I built got better and better, until now we have a Gen2 “Foxy Tuck”.
    Mid 2014 I asked Simon if he would mentor me on holster making. From him I learned where to buy the best holster making leather on the planet! The old-school way of “finishing” leather that has been done for hundreds of years. He doesn’t like “cross breed” holsters, he likes full 100% leather custom made holsters. Simon made custom holsters for Freedom Arms (about 100 a month for decades), to say he is the best in the world is an understatement. I learned more from him in 60 minutes, than I had in a year of making Foxy Tucks.

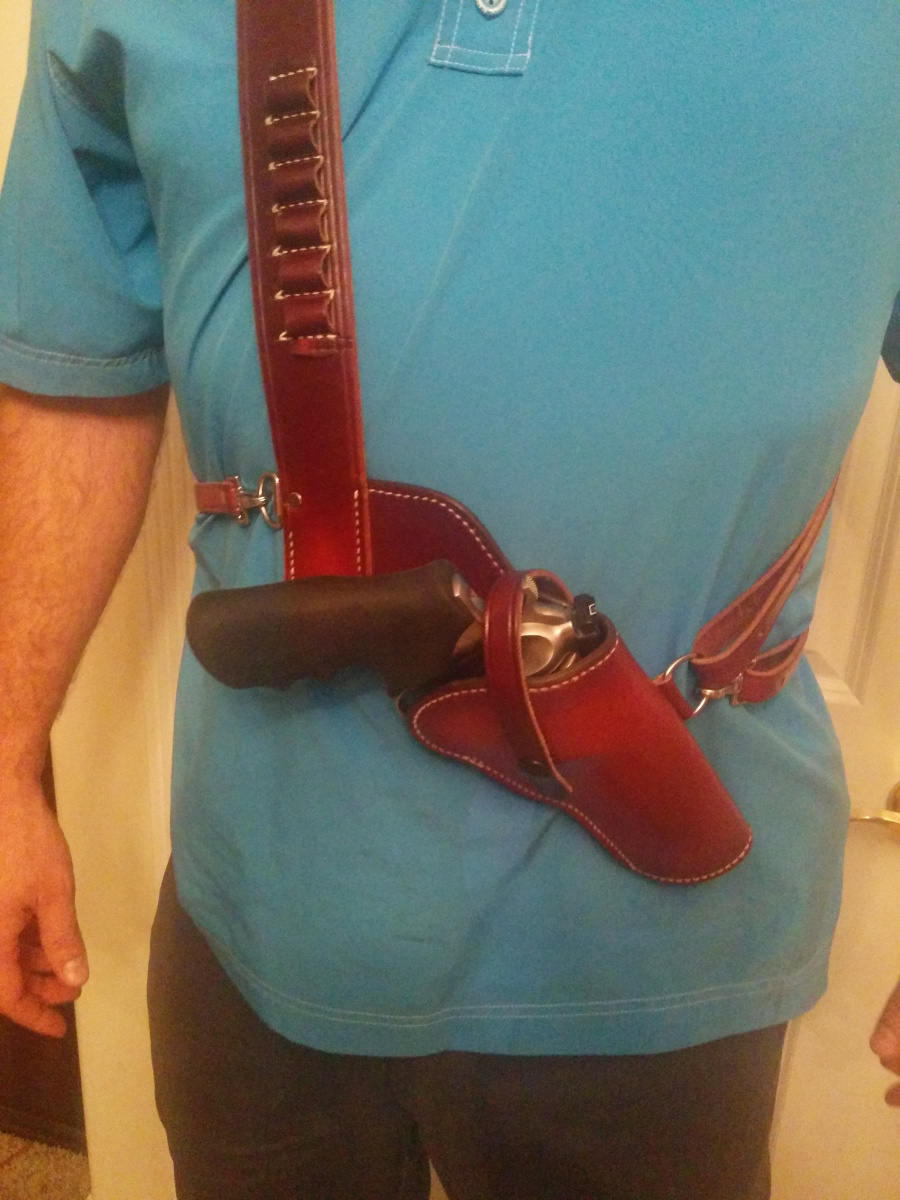
    Early 2015 I hired Simon to “mentor” me on a special chest rig for a 454 Predator Defense gun to be worn in the field. He invented this design decades ago and many have tried to “copy” it.

    This second mentoring session enabled me to get to Gen3! I invested about $1,000 in equipment to cut my production time in about half and increase quality by 2x to get to Gen3. I have NOT released Gen3 yet, but standby its going to be awesome!

    Foxy Tucks & Leather working projects through the years.

    GENERATION1 Foxy Tuck-$50 (2013)

    • cut out leather with scissors…sharpening them frequently.
    • tan/black dye..that had to be sealed…that dried out the leather. 1 even bled onto a customer.
    • kydex tenting and cut out with a jig saw (yuck!…dangerous).
    • each holster improved significantly
    • sucky tandy leather double oak shoulders
    • drilled holes for clips instead of punching them (crazy huh?)
    • not covering full barrel (like all the other makers), so it “catches” your frontsight and your barrel wears out your clothing.
    • used “kitchen oven” (crazy huh?!)


    Gen1

    GENERATION2 Foxy Tuck- $55 (2014)

    • high quality/high cost leather, planed and tanned to perfection 9-9.5 oz W&C backs
    • purchase hardware in-bulk to offset higher price of leather
    • neatfoot oil “dyed”
    • kydex look & function doubled in quality IMO
    • cut kydex with large scissors and used bench grinder, then dremel, then “scotch-bright” to “polish” edges of kydex
    • edging by hand and sanding by dremel.
    • Custom “Maker Stamp” with brand & Scripture (“The Lord has said that: Ye shall defend your families even unto bloodshed. …to defend themselves, and their families, and their lands, their country, and their rights, and their religion.”  Alma 43: 47)
    • kydex high on the handgun and snug on the slide, with sight groove (details matter!)
    • dedicated toaster oven in garage
    Gen2 Foxy Tuck


    FUTURE PLANS – GENERATION3 Foxy Tuck-$55 (2015)

    • custom die to automate-cutout pattern for compact and 4″ service pistols
    • better edging due to “professional” sander & polisher (no more dremel). $750 “professional sander & edger”
    • decorative line around Foxy Tuck
    • Professional Photography


     TIME LINE


    buckskin shirt


    Cowboy Action…addiction
    1st & last appendix holster


    weapon mounted lights (awesomeness!)
    hi-temp & home-made “vacuum press”


    shopvac & “vacuum press”
    magpouch


    maker-stamp


    Note gap high up on the slide (sight groove too long). I no longer do the gap. Sight groove only goes to front of trigger guard, for better retention.


    This is the 1911 that pushed me over the edge, and I had to buy one!


    Did I mention I LOVE M&Ps…especially the 22 LR version


    NextGen leather therapy


    As American as young’ns wanting to grow up to be Cowboys…to ride & shoot!


    oh how I love the bearcats. My son feels loved because of the bearcats!


    larger knife is my work. the esee 4″ sheath is commercially produced.
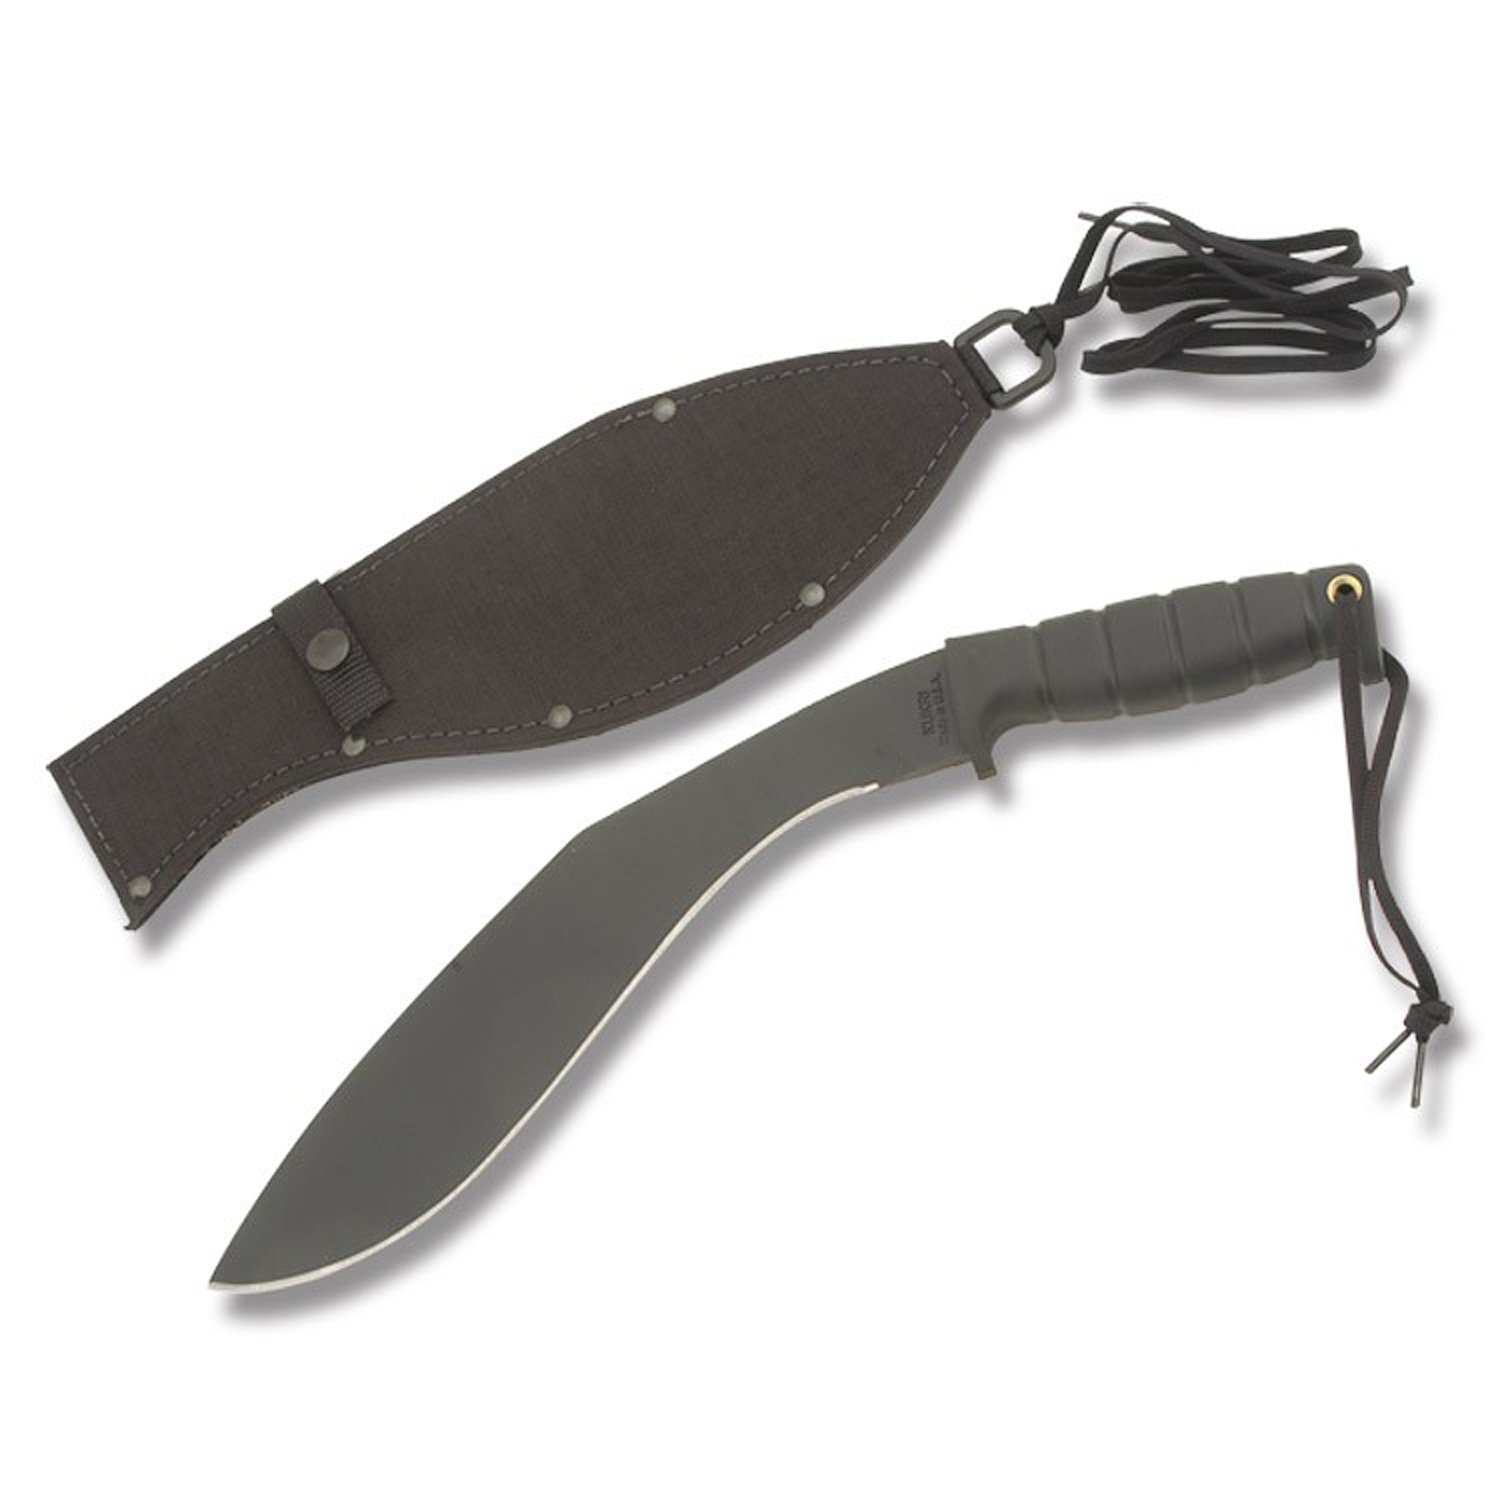
    Pre-oil “dyed” Piggy Back Skinner & machete “chest rig”


    PF9 & XD9 with weapon mounted light
    one-off hand stitched OWB holster 25acp


    I have a soft spot in my heart for Ruger Revolvers. Owner is WELL armed!


    M&P 40…perfection


    cutting out…by hand.


    M9 March 2015
    G20…perfection. Notice high on the slide retention.
    1911 with “sissy kydex clips” instead of the manly steel clips 😉


    G23 with “sissy clips”


    xds 45 acp…can’t live w/o one!


    Note sight groove “depth” and orientation.


    454 Super Redhawk 5″, chest rig with “Simon” assistance mentoring me.


    G23 perfection


    PF9 with light.


    G19 spouses


    H&K DA only


    XD perfection!


    Special Projects! ESEE 7 (yeah…hand stitched!)
  • Doc Gunn Reviews Foxy Tuck Holster

                                                                                        March 7, 2015

    Foxy Tuck Designed for a Glock 23

    Dear Friends:

    Over the last 3 months, I have been wearing and testing a new Inside-the-Waistband holster.  It has become my favorite holster (IWB or Belt) by far, easily and comfortably concealing a service-sized Glock 19/23/32. 

    Every Foxy-Tuck holster is hand-made by my new Good Friend Thomas Erickson whom I met during a course in the high desert mountains outside Saratoga Springs, UT last June.  Both Thomas and his holsters have my highest recommendation.

    https://libertyfoxdefense.com/foxytuck/ 

    I have worn kydex IWB Blade-Tech holsters (and leather IWB holsters by Milt Sparks, Horseshoe Leather, Mitch Rosen, and others) for more than 30 years.  The Foxy-Tuck is far superior.  It is simply the best holster I have worn for comfort and concealment!  It mates a kydex outer portion with a thick cowhide inner (next to body) section, with smooth-side facing the weapon and rough-side out, both sides in a stingray shape with widely-spaced belt clips that distributes weight evenly and allows a firm anchor of the holstered weapon comfortably against your body in such a way that the entire system stays put without allowing your pants to slip and sag!  No need for suspenders!  Its design positions the weapon much closer into the body than would an all-kydex version, and this aids the “concealability” of the system.  I’m not sure exactly what makes it so comfortable, but it is! 

    The one criticism I had was regarding the metal steel-spring belt clips.  Although very functional, they tended to scratch my leather gunbelts and had the potential to gouge leather, wood or upholstered chairs or seats unless well-covered with a thick cover garment.  The answer to this was substituting kydex clips for the metal ones.  (See link below.)  That made my Foxy-Tuck the perfect IWB holster. 

    UPDATE: Thomas now offers metal or kydex belt clips for no extra charge!

    The one additional comment I have comes as the natural result of the holstered weapon being held so much closer (30-50%) into the body than would be possible using an all-kydex IWB
    design: it is slightly harder to reholster. There is a learning curve involved that can easily be mastered through practice but it is easier to reholster into the wider mouth of the rigid all-kydex
    designs. However the negligible decrease in reholstering ease/speed is more than compensated by the increased comfort, concealability and anchoring effect of the Foxy-Tuck design.


    <paste email from Doc Gunn>

    I LOVE IT ALL!  The G43 mag pouch is perfect.

    Your Kydex clips are perfect.

    Both holsters are great!!

    I love the flashlight holder!   I will use it frequently, if not constantly.

    Thanks!

    best!

    Doc
    </paste>
    My Summary of the Foxy-Tuck is as follows:

    Impression:

    Superior concealment holster. 

    Unique Features And Strengths:

    1/. Extreme comfort and concealability.

    2/. Tucks very close to body.

    3/. Very good at “anchoring” the handgun/holster to the body, preventing shifting and preventing the weighted-down pants from slipping and sagging. 

    Weaknesses?
    1/. The metal spring steel clips used. These are in a position to gouge chairs and car-seats, or the overlying cover garment.  They may also mark leather gunbelts. 

    Solution to Possible Weaknesses:

    1/. Replace the steel spring clips with kydex QD clips, such as these from amazon.com.

    http://www.amazon.com/Kydex-Belt-Clips-One-Pair/dp/B00PPWXAU0/ref=sr_1_2?ie=UTF8&qid=1425782001&sr=8-2&keywords=+Kydex+Belt+Clips+%28One+Pair%29+by+MTO+HOLSTER+LLC

    (Thomas is looking into supplying kydex clips as an alternate to his usual steel ones for customers who request them.) 

    THE purpose of an IWB is concealment.  The Foxy-Tuck does that admirably, better than any other.  It is also very comfortable and uniquely anchors the pistol, belt and pants against the body without slipping down!  Most highly recommended!

    Each Foxy Tuck has the following scripture stamped into the leather.
    “The Lord has said that: Ye shall defend your families even unto bloodshed. …to defend themselves, and their families, and their lands, their country, and their rights, and their religion.”  Alma 43: 47

    Respectfully Submitted, 

    Doc Gunn


  • gearing up for a rifle class


    SLING

    You MUST have a two point sling.  Condor Speedy Sling

    Optics.

    If you have shot A LOT of iron sights, then you are ready for phase 2 (optics). If you are still learning iron sights, you’ll learn a ton with irons in Larry’s class.

    Iron sights are often overlooked, but are very effective, inexpensive & rugged.  Shooting steel at 100y with iron-sights is very do-able.
    I took Larry’s class with iron sights. Taking it a 2nd time, I think I’d do a 1-4x or red-dot.
    but for sure, Iron sights for first class…unless you have vision issues or eye issues.
    I wouldn’t go any lower than the trs25, good value, but if you can afford it go higher quality. everyone I know that owns a trs25, LOVES it.
    I have recommended trs25s for years, when it came time to purchase, I bought the sparc
    I went with the sparc for my “shotgun/ak74 systems, putting it on an ar15 also works, but I mostly got it for m590 & ak74. right now its on my ruger predator 308…for coyotes, but I need to get it on my 590 and get it dial’d in for Larry’s shotgun class.
    lifetime warranty, good company.
    Another vortex red-dot option is the Strike Fire
    In Larry’s class, max range is 100y.
    I have a supersniper 1-4x scope that is on my “go to system”.  IMO, that is hard to beat. 1x is almost as fast as  a redot, and you can zoom into 4x or 3x.
    I was saving up for an acog, but my scope mentor talked me into the supersniper.
    acogs are pricy, but have a legendary reputation: http://swfa.com/Acog-C208.aspx
    I’m a bit of a supersniper snob. I have the 1-4x, 3-9x, 16x and 5-20x…
    3-9 ar10 24″ HB 308
    1-4x sig556
    5-20 rem 700 308.

    Shooting Mat

    I like the drag-bags that are also shooting mats.
    do NOT get black! (it heats up FAST and can be spot’d a mile away!)
    this is the one I have:
    acu camo…perfection IMO.
    I LOVE it, I use it all the time. almost every trip shooting, I bring this. packs my gun, when I get there, its a shooting mat.
    all my precision rifle buddies, have this exact shooting mat.
    This one looks similar and has good reviews:

    knee pads

    these are a good value, careful of a small/hard “cup” that rocks when you are trying to be stable, the voodoo knee pads do good on this.
    elbow pads, I didn’t really need those, but I don’t have sensitive elbows.
    you’ll see a lot with a hard cup pads, I don’t get that, seems like you’d be fighting that hard cup all the time. we are NOT swat, so I don’t see the need for the hard cup.
    you going to speed kneel on glass?
    I’m not 😉
    I have the defective hard-cup elbow pads. Some guys hate the neoprene…too much bounce, but a thin elbow pad, makes a lot of sense to me.
    I’d be interested in others opinion on this!

    Magazines

    20 round magazines, I can’t over emphasize how awesome 20 round mags are!  I was converted to the 20 round ar15 magazines when I took Larry’s rifle class in 2012.
    I LOVE these things (makes you wonder how magpul got its start 😉

    CHECKLIST

    here is my checklist, you’ll see a handgun tab and a rifle tab:
    looks like the rifle tab is more precision rifle purposed

    binoculars

    8x binocs. These 8x binocs have been on my wishlist for a while

    RIFLE

    bring a frick’n standard m4 ar15!
    nothing fancy! or strange!  for sure not a 5.7 upper! nor an m1 garand  😉
    the 5.11 protac pants, have an insert for knee pads, gives you almost enough protection for gravel. If at the “Farm”, you’ll want external knee pads like the voodoo tactical ones.
    If on the “ranch range”, the inserts might be enough…I will spend any amount of money to protect my knees…cuz I have knee issues.
     
    PRINT THIS OFF and check off as you make your pile of stuff to take.
     
    you do NOT want to be unprepared!
  • Selecting the correct Predator Defense system

    By Thomas E.

    With significant contributions & guidance from Larry Mudgett

    Introduction

    After taking Larry Mudgett’s Predator Defense(PD) course, I began down this journey of finding the ideal “PD & outdoor survival” system. I HIGHLY recommend you take this course from Larry!

    Before taking this course, I was convinced that a 10mm would save me from large predators. In this article, we will compare “defense” calibers and then compare “defense platforms” to arrive at an ideal PD System. By synthesizing the current literature we can make a solid decision to protect ourselves and those we love while enjoying the outdoors!

    Background:

    There is no good substitute for a powerful firearm to defend your life from large/determined predators.

    Mace has many limitations including distance, wind blowing in the wrong direction and “cooked”/fabricated statistics.

    Which handgun are you willing to bet your life on…or more importantly, the life of your loved ones when faced by a grizzly?

    Deciding Questions:

    Would you rather face a criminal assailant in the woods while armed with a revolver or would you rather face a large bear while armed with a 10 MM auto pistol?

    My understanding is that black bears if wounded GENERALLY take off and leave the area. Also, do NOT try to play dead with a blackbear; as they will likely eat you.

    Grizzly bears once wounded will ether kill or be killed (there is no quit in the grizzly bear MO). Playing dead, MAY work with a grizzly, but I wouldn’t count on it!

    Consider the mis-information from govt-sources! If they really cared about you, they would recommend you carry a 454 Casull 😉

    Instead, they recommend wearing bells, bear-mace and playing dead! Sounds like yet another “Government-unicorn-scam(GUS)”

    Logic and the experiences of those who have been attacked by bears say otherwise!

     Philosophy of Use (POU) for PD:

    1. hard hitting (heavy bullet); massive penetration (hardcast flat-nosed 30 degree sloped bullet–that do NOT veer-off, but continue penetrating ).
    2. multi-option system for snake-loads, 4/2 legged predators
    3. portable/pack-able.
    4. commonly accepted that light-weight fast bullets do not “stop the attack of a large bear”– you are attempting to “ground-the-bear” by braking a shoulder so it cannot continue toward you and your loved ones. For bone braking effectiveness, you will need heavy large caliber; PENETRATING bullets.
    5. Re-loaders/hand-loaders have much more flexibility/options with a quality launcher(Ruger Revolver). 

    Likely the most ideal portable caliber for bear is the 45-70. Hiking/fishing/guiding with a 7 lbs lever action 45-70 may not always be feasible, so we must look to handguns to fit the niche (Ideally we would have a 45-70 AND a 454, but often we must go it alone with a handgun). 

    “In hunting situation, if using a bullet designed to expand significantly, you may have to pass on the shots — and that’s a problem if the trophy bear, elk, or deer of a lifetime makes an appearance. I personally choose bullets that can kill a large animal from any and every angle presented, and hardcast, flat-nosed bullets allow me to do just that  (Prasac M., 2012, p. 93).”

    “What is a large meplat? In independent testing, we have found that a surface area between 75 and 80 percent of the overall bullet diameter seems to be optimal. Below 70 percent, the wound channel size is compromised, as is stability(..sometimes tumble in flesh or veer off course) (Prasac M., 2012, p. 91).”

    Think of the metplat as a flat hard hitting side of the bullet, with just enough cone to go straight and true for massive penetration. 45’s are already “pre-expanded”.

    STANDARDIZATION:


    “No slouch even in blackpowder form, the .45 Colt in modern times really takes on a different persona. Load it to its full potential and it will give the much-vaunted .454 Casull a run for its money and leave the .44 Magnum sucking wind in it’s rear view mirror…It’s just that I’m an even bigger fan of the modern .45 Colt. If there ever was a do-it-all cartridge, the .45 Colt would be at the top of the heap (Prasac M., 2012, p. 16).”

    Also, your cowboy guns & predator defense share the same heritage for commonality.

    The .454 is probably the most powerful gun of its size. Think of building +P 45 Colt cartridge, do you want the strongest gun commercially available..that also shoots the 454?

    First decide on the caliber.

    If you already own a 41, 44, 45 long colt, 500SW; then you are pretty squared away and may not have justification to seek out another predator defense/outdoor survival systems. 

    I believe the 454 has a lot of merit for this POU because of the hard hitting bear loads, and lengthened case for a custom-snake-load like a “buck & ball”.

    Having the OPTION to run soft-45-colt loads for plinking/practice OR the hottest 454 you can cookup, is powerful. Having more options is always good(if you are within a POU).

    Looking at the numbers

    454 hardcast 400 gr @ 1400 FPS (http://www.doubletapammo.net/index.php?route=product/product&path=303_355&product_id=148)

    Power Factor Calculator is weight*speed/1000=560

    Foot Pound Calculator 

    The following chart is from three different sources (doubletapammos.com, Larry Mudgett & “big-bore revolvers book page 8)


    Caliber Weight FPS Power Factor Foot pounds Classification
    10mm 230 1040 239 553 Category 2 (220-300)
    45 Colt 255 1450 370 1191 Category 3
    45 acp 255 875 223 434 Category 2
    44 mag 320 1248 399 1107 Category 3(300-400)
    50 AE 300 1223 336 977 Category 3
    454 360 1500 540 1800 Category 4 (450+)
    454 400 1400 560 1741 Category 4
    500 SW 400 1800 720 2878 Category 4
    Larry’s numbers:
    44 mag 300 1250 375 Cat3
    44 mag 335 1300 437.5 Cat3
    45 Colt 300 1250 375 Cat3
    45 Colt 335 1300 437.5 Cat3
    Personally Tested (Chronographed)
    454 360 5″ barrel (Super Redhawk) 360 1347 484.92 1451 Cat 4
    454 300 5″ barrel (Super Redhawk) 300 1400 420 1306 Cat 3
    big-bore revolvers chart p.28 (re-created)
    Bullet Grain fps pressure penetration
    454 Casull 360 WLN 360 1450 59,000 32″
    44 mag 320 WLN 320 1300 36000 25″
    45 Colt 335 1150 30000 26″

    Larry Mudgett of MarksmanshipMatters.com’s numbers – small sampling to show NO-significant-difference between 44 mag and 45 colt +P

    I HIGHLY recommend Larry Mudgett’s Predator Defense/outdoor survival course!


    LIFESAVING 454 Redhawk!

    The Camera-man might be just a bit smarter than to get within 20 feet with a sharp stick 😉

    Second, decide on the platform.

    It is commonly accepted that 9mm snake loads in a semi-auto malfunction frequently and have a max-effective range of only a  yard or two!

    The .45 ACP CCI snake load will function reliably with a stock recoil spring and has the best pattern and penetration of any of the CCI snake loads. Far better than the factory revolver loads. The 9MM tends not to function the gun. The .40 will also function the gun well in a normal size gun (not a Glock 20) which has a heavier recoil spring and heavier slide.

    With regard to snake loads, the advantage of the revolver is that you can make custom snake loads with little effort. Making your own snake loads for autos is a project.

    I have the most training/mileage with a semi-auto pistol, so of course I would want to use that system to defend myself against two legged predators.

    However, I would rather have an ideal system for outdoor survival for wolves, cougars, bears…and most importantly snakes! Snakes kill more people than all other predators combined!

    Revolvers have a reputation of robustness, but if mud gets into the cylinders they may not be able to rotate! Thus your holster should protect the cylinder area!

    There is no perfect system for all POUs.

    If you plan to load +P for 45 Colt & 454, you better get a Super Blackhawk or Super Redhawk!

     “How strong are the Ruger Blackhawk and Bisley model revolvers? Reports from the prestigious H.P White laboratory prove to us that most American Made revolvers offer approximately 100% safety factor with current Industry standard pressure level ammunition. Example: The .44 magnum is loaded to 40,000 CUP (Copper Units of Pressure). H.P White’s lab reports states that the Ruger Super Blackhawk was destroyed in a controlled test at approximately double that pressure. (80,000 CUP) (Linebaugh)”

    “To check our findings we again turned to H.P White Labs and their findings paralleled ours. Ruger Blackhawks in .45 Colt caliber were destroyed in controlled test conditions at approximately 60,000 CUP pressure levels.(Linebaugh)”

    That is just less than twice the CUPs before the gun was destroyed.  MAX is 32,000, destroying/damaging the gun at 60,000 CUP).

    “Linebaugh concludes the Ruger Blackhawk is good for loads up to 32,000 CUP. Firearms similar in strength are: Blackhawk, Super Blackhawk, Bisley, large frame Vaquero, and Redhawk revolvers. Firearms that cannot withstand this type of pressure: small frame Vaqueros, Colt SAA and Colt reproductions (D’Alessandro)”

     Single Action OR Double Action?

    I like the way Single Action (SA) handle & recoil. Being a Cowboy Action Shooter, I come naturally to SA.

    Also, if you ride a horse and have to shoot from the saddle, your horse might jump or run after a shot. This might cause you to grab the reins or saddle horn to avoid falling from your mount. With a SA you cannot fire again until the weapon is re-cocked. So, there is no way your horse (and thus you) can get hurt by an accidental follow-up shot. However, with a Double Action (DA) you could accidentally fire/squeeze off another round into your horse.

    Pros of the SA
    1) recoil rolls up and over
    2) Horseman benefits!
    3) mileage/experience if you are a Cowboy Action Shooter (CAS).

    Pros of the DA:
    1) If you are wrestling with a bear, you can fire multiple-follow-up shots one handed. You can fire shots one handed faster and more easily with the DA than you can with the SA.
    2) speed reloaders & speed strips

    Barrel length?

    2.5″ barrel is too short in my opinion (IMO) & 7.5+ is too long (unless of course you are hunting), 4-5″ is IDEAL IMO.
    With a 2.5″ barrel, you will experience more recoil & muzzle blast.


    Ruger Super Redhawk 454/45 Colt SS 5″

    Accessories

    chest-rig-holster


    Here is my custom holster my mentor Simon helped me build!

    Simon charges about $150 for this rig, they are worth twice that!


    Speed Strips

    I LOVE speed-strips! they fit well in a pocket, don’t budge out and are very concealable & practical for tactical reloads!


    Speed Loader

    Conclusion

    There are many great choices out there to select from. Having one of each would be costly and difficult to support (maintenance, accessories, ballistic charts etc).  Fear the man that has one gun & knows how to use it! I would change that to, fear the man that has one system per POU and is squared away with each of those systems!

    I would be interested to hear your thoughts/input. I fear most people are willing to bet their life on a 40 S&W while in bear country!

    I try to balance “standardization”, POU & support-ability (its easy to say, ALL OF THE ABOVE, but that is costly and inefficient).

    Based on my research, I’m betting my life on a Ruger Super Redhawk 454 Casull SS 5″. If your game is more hunting, then elect for the 7.5″


    REFERENCE ARTICLES:

    The .45 Colt – Dissolving the Myth, Discovering the Potential

    Heavy Hitting with the 45 Colt Part I  By Joseph D’Alessandro Editor | RealGuns.Com

     Single Action Revolvers for self-defense, by Larry & Stacey Mudgett

     Gunblast.com’s Ruger’s Super Redhawk Alaskan .454 Casull


    454 Super Redhawk mods (modifications)

    I ordered a Super Redhawk Spring Kit from Brownells.

    I wasn’t sure which springs to use, so I started with the lower pound springs. I soon realized that the trigger return was too light (the trigger on follow up shots was too slow to return forward to be pressed again).  I also noticed I had many (more than 50%) “light primer strikes”. Light primer strikes means the firing pin doesn’t hit the primer hard enough to “go off”.

    I recommend going with the strongest hammer & return springs in the Brownell’s spring kit. UPDATE. The strongest hammer spring from brownells will NOT hit the 454 rifle primers hard enough. I ended up going back to the default hammer spring from Ruger.

    After much validation, I went with the hammer spring of 12 (factory is 14 lbs) & trigger return spring of 12 lbs (factory is 15 lbs). Using the strongest springs, I had ZERO failures.


    Shooting the 454 full power 360 grains at 1347 FPS, 5″ barrell (Ruger Super Redhawk

    Chrono’d 1316 & 1378.

    5″ 454 300 gr, 1400 FPS


  • AR15 Assembly

    So, you want to build the ideal AR15 without breaking the bank?

    Here is how I assemble an ar15 without specialized tools (though I do own a lot of ar15 armor’s tools).

    https://ugetube.com/watch/ar15-lower-assembly-without-special-tools_89LmSl1SlFBiYrC.html

    Thanks commie youtube! I’ve never made a dime off youtube, but you still remove my content. How could this video harm anyone?

    I hope someone steps in and takes youtubes business for being so stupid (not enough guts to remove all gun videos, which is likely 40% of their business, but trying to remove as much as possible w/o affecting their business. Thanks UGEtube for hosting my video! 

    UPDATE 2022, hit this Spreadsheet>https://docs.google.com/spreadsheets/d/11nF6Bl-Av9Jasv6iKHjv-VCRLX-HPNiGKWQEmdeWhs4/edit?usp=sharing

    UPDATE FEB 2022:

    I’m pretty much fully converted over to Aero Precision on what I buy and recommend currently.
    I really like the company, the standards, quality, value and the 1 MOA guarantee. The hand gaurd ATLAS S-ONE (slimmer) OR atlas r-one (thicker for suppressors or personal preference.

    Here is the build out I recommend for those that want mid-grade (not cheap like PSA and not over priced like…Daniel Defense).

    LINK Desc
    https://utahgunexchange.com/ads/new-anderson-ar15-stripped-lower/
    ar15 lower – this is THE gun and has a serial number and it requires a transfer/background check. I’ve had good luck with Andersons at about $50-$60, but I also have high end lowers $100-200
    https://www.aeroprecisionusa.com/m4e1-threaded-complete-upper-16-5-56-m4-cmv-carbine-barrel-atlas-s-one-handguard complete upper
    https://www.aeroprecisionusa.com/556-bcg-no-logo-black-nitride
    bolt carrier group
    https://www.aeroprecisionusa.com/ar15-charging-handle

    OR

    https://www.aeroprecisionusa.com/ar15-breach-ambi-charging-handle-w-large-lever-black-blem

    charging handle, or get the
    https://www.aeroprecisionusa.com/m4e1-moe-lower-parts-kit lower parts kit
    https://www.aeroprecisionusa.com/ar15-carbine-buffer-kit-w-heavy-buffer buffer tube kit
    https://www.aeroprecisionusa.com/magpul-moe-sl-carbine-stock magpul sl stock
    https://www.aeroprecisionusa.com/magpul-mbus-rear-flipup-sight rear iron sights
    https://www.aeroprecisionusa.com/magpul-mbus-front-flip-up-sight front iron sights
    https://palmettostatearmory.com/holosun-micro-sight-dot-reticle-with-solar-shake-awake-hs403c.html
    red dot $210 OR $315 ish. I have several of these holosun solar with shake awake, they are awesome and affordable.
    https://www.aeroprecisionusa.com/magpul-pmag-30-ar-m4-gen-m3 pmags

    Here are some kits that I recommend:

    UPDATE: Brownells discontinued my fav upper 🙁 So, look for one on Palmetto state armory OR Aero Precision.  See my requirements below to guide you. 

    https://palmettostatearmory.com/ar-15/rifle-kits.html?caliber_multi=5.56x45mm+NATO&upper_barrel_length=16%22

    Thomas recommendations/requirements:

    1. Free float for better accuracy
    2. 1:8 twist barrel, non-chrome lined if you can find it. This is counter to most of the industry, if you plan to abuse your rifle maybe chrome lined is proper for you. non-chrome is more accurate.
    3. no fixed frontsight, so if you have a reddot or less than 1.5x magnification, you don’t have a field of view issues.
    4. 1 MOA or close to 1 MOA (1″ at 100y, 2″ at 200y and so on).
    5. non-milspec trigger, ugg, the milspec triggers are so nasty. I recommend the rock river match trigger!
    6. non-poky hand-guard, those quad rails are sure a PIA! I suggest a m-lok 15″ ish handguard.

    https://palmettostatearmory.com/psa-16-mid-length-5-56-nato-1-7-nitride-13-5-lightweight-m-lok-classic-rifle-kit-with-mbus-sight-set-5165448515.html

    1:7 twist is not my fav., but still doable.
    1:8 IS my fav, because it excels with 55gr to 77gr

     build out custom ($480 plus lower $50)

    Don’t forget to look for coupons:

    https://gun.deals/content/brownells (the best coupon is a 10% off with free ship, usually posted on sundays for 24 hours only).

    Lower parts kit: (please note, that if you are going with an upgraded trigger control group, don’t get a LPK that has trigger control group)

    https://www.brownells.com/rifle-parts/receiver-parts/parts-kits/lower-parts-kits/ar-15-lower-parts-kit-prod24955.aspx $55

    or: https://www.brownells.com/rifle-parts/receiver-parts/parts-kits/lower-parts-kits/ar-15-lower-parts-kit-prod73612.aspx

    https://www.brownells.com/rifle-parts/receiver-parts/receivers/upper-receivers/ar-15-gen-2-complete-upper-receiver-black-m-lok-5-56-prod116352.aspx $250

    https://www.brownells.com/rifle-parts/receiver-parts/buffer-tube-parts/buffer-tubes/ar-15-m16-buffer-tube-assembly-prod73363.aspx

    $38

    NOTE: make sure you get matching mil-spec or commercial tube & stock!

    https://www.brownells.com/rifle-parts/stock-parts/buttstocks/ar-15-moe-stock-collapsible-mil-spec-prod26706.aspx

    $35

    OR commercial

    https://www.brownells.com/rifle-parts/stock-parts/buttstocks/ar-15-ctr-stock-collapsible-commercial-prod72291.aspx

    https://www.brownells.com/rifle-parts/sights/sight-sets/ar-15-mbus-gen-2-sight-set-prod44044.aspx

    $75

    don’t forget magazines:

    $13 each (buy at least 6)

    https://www.brownells.com/magazines/rifle-magazines/magazines/ar-15-30rd-pmag-gen-m3-magazine-223-5-56-prod75487.aspx

    reddot (google it and youtube it!)

    https://www.brownells.com/optics-mounting/electronic-sights/red-dot-sights/hs515cm-solar-circle-dot-micro-sight-with-qd-mount-prod117500.aspx

    NICE TO HAVES:

    https://www.brownells.com/rifle-parts/triggers-parts/triggers/ar-15-national-match-2-stage-trigger-prod19696.aspx

    $115

    Assembling your ar15 stripped lower receiver(THIS video is pretty much what we do in the workshop, but w/o the fancy tools):

    https://www.youtube.com/watch?v=e1omm6jY7Gg

    See Thomas’ Recommended upgrades

    Details on a “stripped lower receiver”.

    1. The govt considers it “the gun” and the lower is serialized. So, you can NOT do a group buy on lowers!

    2. You pay for the lower online, the online vendor sends it to your FFL. When you go pick up the lower, its a “gun transfer” to you from the FFL. Usually your FFL will charge you about $20 to transfer the item to you.

    3. Other than the stripped lower receiver, you can have EVERYTHING else shipped directly to your house.

    4. You need a special license to manufacture ar15 for sale, but its ok to build one for your personal use.

    $50 lower receiver is the best price I’ve ever seen!

    http://www.brownells.com/rifle-parts/receiver-parts/receivers/lower-receivers/ar-15-stripped-lower-receiver-prod75094.aspx

    ASSEMBLY CHECKLIST

    I will teach you how to assemble w/o expensive tools, but you do need a few general tools.
    If you don’t have these already and it will be a hardship, you may use my tools.

    Workshop REQUIRED TOOLS

    • SAFETY GLASSES!!!
    • ar15 parts to assemble (your own lower, lower parts kit & stock kit–IF you buy from WDA “completion kit”, you have all this)
    • Best punches > Tekton gunsmithing punch (lifetime guarantee). OR “ok punches”
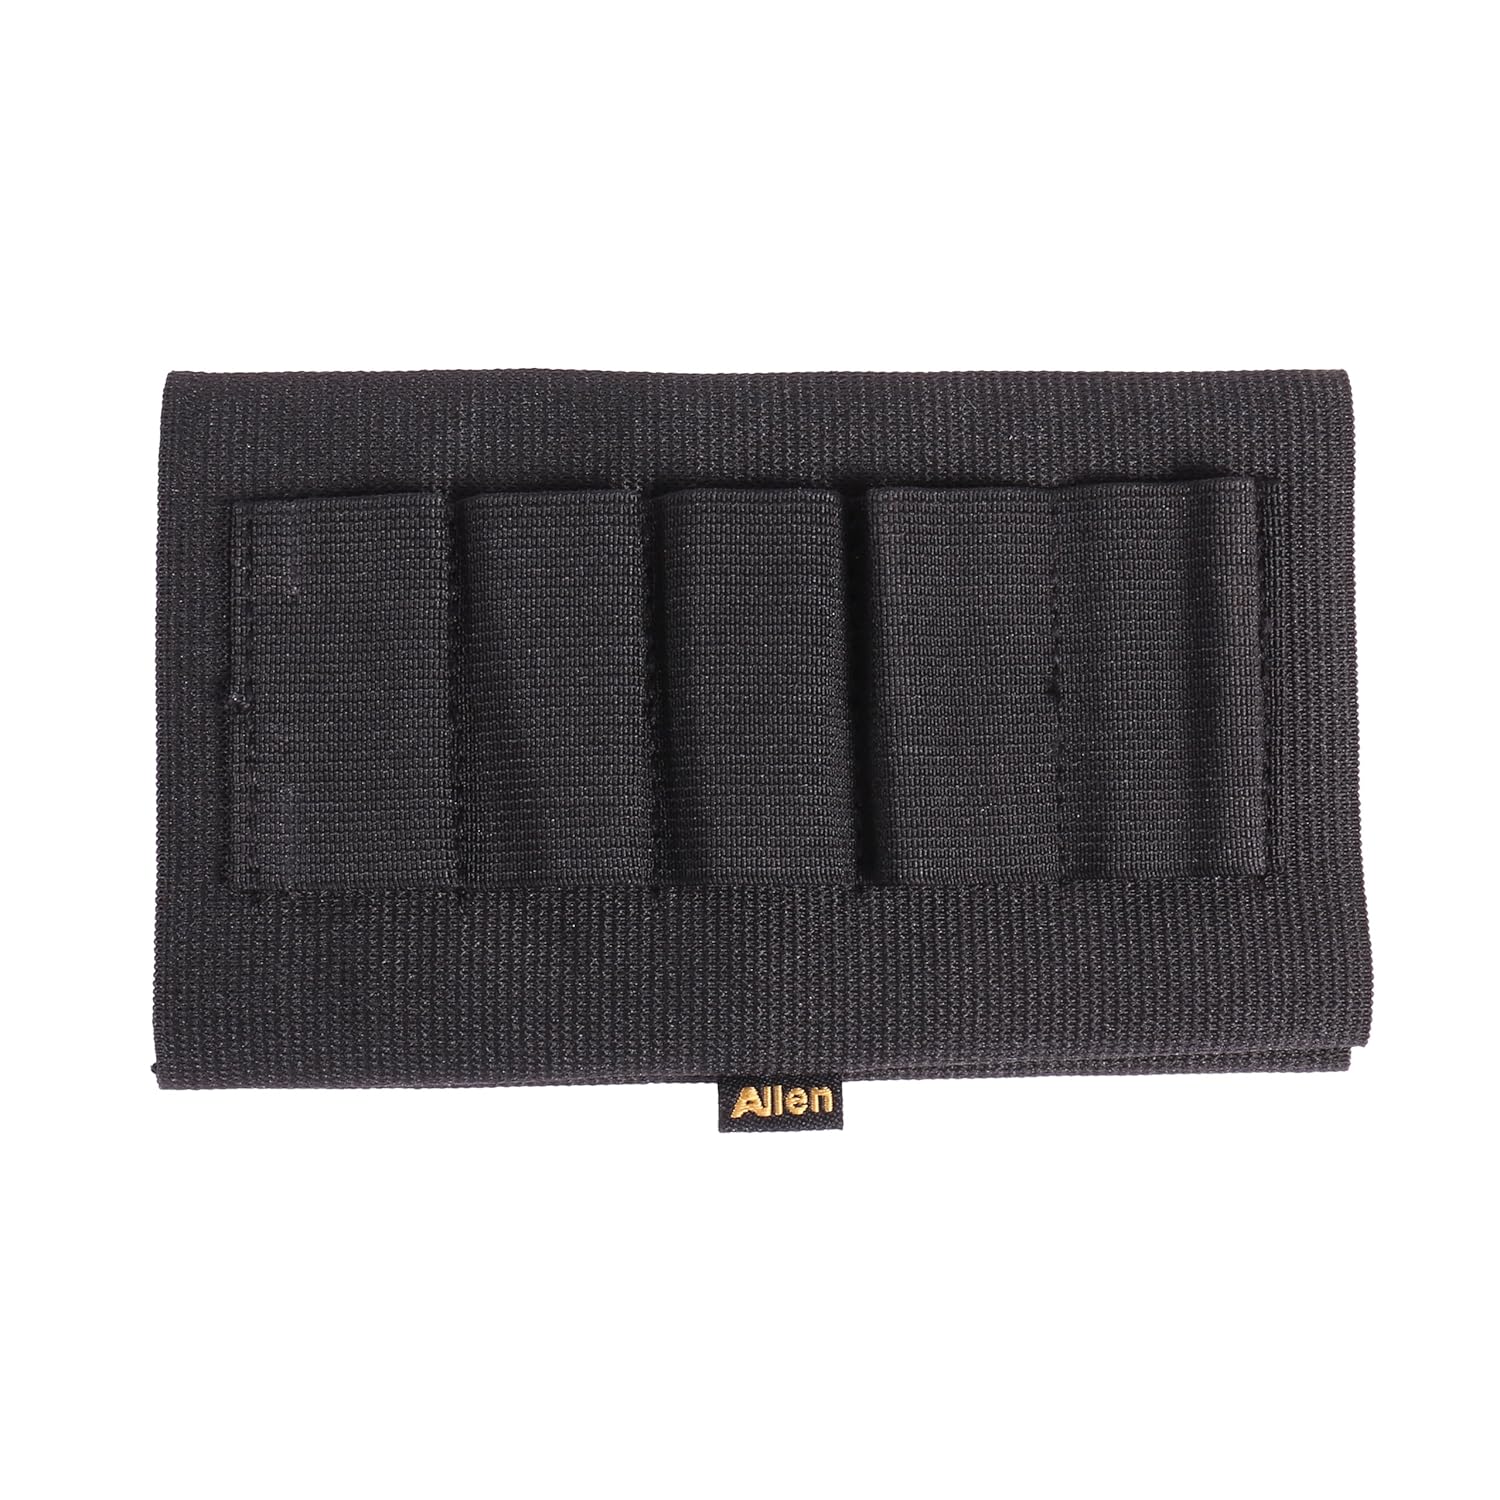
    • gorilla  tape (use this as an improvised pounding block AND to protect your lower from hammer scratches)
    •  Pencil (old school wooden pencil with eraser)
    NICE TO HAVE TOOLS
    1. non-marring hammer (nylon, leather, brass – whatever you have). This is the one I have…and I LOVE IT
    2. channel locks (almost required)
    3. large towel or old small blanket
    4. notebook – pad of paper to take notes on.
    5. snack or treat to share with others.
    6. needle nose pliers
    7. warm jacket to stay warm in garage(if cold time of year)

    For the tools-geeks:

    1. Wheeler AR Pivot Pin/Roll Pin Install Tool

    2. Gerber Short Stack AR-15 Maintenance Tool (you MIGHT use this during the workshop, then store it in your magpul pistol grip for field us!
    3. Rock River castle nut wrench. awesome, I own two! 

     Class Rules!

    1) do NOT attach complete upper and complete lower without permission. Once a complete gun is together, it IS a gun and must be treated as such.
    2) safety violations will result in being asked to leave — immediately.
    3) gun parts are gun parts.

    Build articles:

    http://www.itstactical.com/warcom/firearms/diy-ar-15-build-introduction-parts-and-tools-required/

    HELPFUL VIDEOS…that also “incent” you to buy tools

    http://www.brownells.com/.aspx/lid=11011/learn/

    Thomas’ Build sequence

    team-up. 4 hands are better than two!

    see also: http://www.thenewrifleman.com/how-to-build-a-lower-receiver/

    1) trigger guard roll pin. Use trigger guard to support ears.  needle nose hold the roll pin and use a punch to get it started. Consider setting ears on role of tape. (most risky first 😉

    2) start the bolt release roll pin (do NOT push too far). Once started insert bolt catch assembly.  Use channel lock pliers with gorilla/electric tape on the jaws to protect finish. Tape lower to protect finish.(2nd most risky second).

    Now, everything is easy from here on out!

    – mag release assembly, trick over push in mag button to thread on.

    3) prepare trigger assembly

    use punch to align trigger assemble, and push out the punch with the pin

    capture the hammer with a punch, push the punch out with the pin.

    razor blade to capture the front-take-down-pin (CAREFUL not to launch/lose your pin!) (WORK AS A TEAM, and point “launch” in a safe direction (so you can find your pin if you DO launch it).

    You’ll also need magazines & sights. Buy a 10pack, you’ll be glad you did…after the next “panic”:

    http://www.botach.com/magpul-pmag-moe-gen-2-5-56mm-30rd-magazines/

    The pmags are in vogue, but I much prefer the brownells ar15 mags (milspec):

    http://www.brownells.com/magazines/rifle-magazines/magazines/ar-15-m16-30rd-223-5-56-usgi-ss-magazine-prod71746.aspx

    I recommend these for iron sights:

    http://www.botach.com/magpul-mbus-back-up-sights-combo-sets/

    Value optics:  Trs-25

    Other Options for “completing your lower”

    1. build kit that has everything except the lower:
      http://www.del-ton.com/ar_15_kits_s/1.htm

    2. OR you can do the parts

      1. buffer tube kit: http://www.brownells.com/rifle-parts/receiver-parts/buffer-tube-parts/buffer-tubes/ar-15-m16-m4-receiver-extension-assembly-prod56055.aspx

        the trick is, the stock and tube MUST match. There is commercial OR milspec.

        http://www.brownells.com/rifle-parts/stock-parts/buttstocks/ar-15-m16-moe-buttstock-kits-prod65650.aspx

      2. IF you have some extra money, I LOVE the RRA National Match two-stage triggers! http://www.joeboboutfitters.com/RRA_Two_Stage_Match_Trigger_Kit_AR0093NMK_p/rra-ar0093nmk.htm
        seriously, if I was going to upgrade my ar15 and I had an extra $100, I’d put it into the RRA two stage national match trigger! I have a couple of these and they are AWESOME!

      3. completed uppers: your choice, there are hundreds of options:
        http://www.brownells.com/rifle-parts/receiver-parts/receivers/upper-receivers/ar-15-upper-receiver-assemblies-prod42974.aspx
        For your first ar15, 16” standard barrel is just fine. I would stay away from “quad-rails”, they are heavy & sharp. The magpul moe handgaurds & stock/pistol grip is pretty awesome!
        your upper should be able to accept 223 & 556!

  • Prepper Christmas Gift Ideas

    What do you want most for Christmas?

    I’m often asked, how did you get your wife to get professional firearms training?

    I say, I told her all I wanted for my birthday/Christmas was for her to take a defensive handgun class. IT WORKED!

    So, when your loved one asked you, what do you want for Christmas. Say, I’ll watch the kids, I want you to take a 5 day pistol class from Marksmanship Matters!

    Try it and let me know how it works for you!


    BUYING FOR THE PREPPER IN YOU LIFE

    CHECKLIST/GIFT IDEAS.

    #1 Give the gift of REAL protection & responsibility.  Depending on your prepper, this may include a Utah Conceal Carry class, a “Custom Foxy Tuck Holster” (10% off in Nov. & Dec)., or THE best defensive handgun training in the world by Marksmanship Matters!

    Of course, there is never a better time to buy a FREEDOM RIFLE. I can’t believe how cheap ar15s and ak47s are these days! BUY 3 of them, sell one at the next panic and pay for all of them!


    FOR HER

    Warrior Purse (HOT!)

    I would LOVE to do a group-buy, get dealer pricing for you on these! Its not too late to do a group buy for Warrior Purses before Christmas!


    I can get you dealer pricing on

    Gun Tote’n Mamas (hundreds of purses to choose from, yeah-I can get you dealer pricing! Just tell me which model you want)


     FOR HIM

    I don’t remember a Christmas I have not asked for preparedness items. When I was younger, I was getting scouting gear (sleeping bag, tent, hatchet, survival gear). When I was older its a multi-tool, knife or gun.


    ITEMS I CAN BEAT AMAZON PRICES ON!

    1) Large & Small Gun Safes.

    LockSAF biometric (beat Amazon by $50!)

    MY review of the biometric pistol safe (awesome…perfection!)

    AND my Everyday Carry (EDC) system of onboarding/offboarding each morning and each evening. Also, “part” of my system for reducing risk of home evasion.

    https://www.youtube.com/watch?v=eUhqb0pH880


    Bluedot Gunsafes (I can get you dealer pricing!)

    If you want me to help you get half-off, contact me on “Gun Safes”


    I’m going to refer to my Everyday Carry (EDC) list. Serious, I was WAY excited to open some of these goodies Christmas morning…years past.


    Be able to charge your communication device (cell phone!)


    One of my all-time-fav-watches! NEVER replace the battery!


    My favorite “dress pants” to carry all my EDC stuff!


    hard to beat for $35!
    This maybe the LAST EDC knife you buy!

    I bought one of these last year, and its one of my fav!


    I’ve carried one of these for 4+ years everyday! PERFECTION for under $30


    another “EDC Perfection”. 4+ years EDC!


    streamlight tlr-3, compact weapon mounted light PERFECTION


    mechanix gloves, perfection on the range or in the shop!
    Rifle grab-n-go bag perfection
    recon, dog hearing, tactical advantage in your home, etc
    TALL shirt perfection (IMO)


    Battle Dressing (EDC 1st aid)

    MY WISH LIST FOR CHRISTMAS

    Well, I’ve gotten a knife for every Christmas I can ever remember.

    So, I may get this one:


  • Extreme Cold Weather Clothing Group Buy & Workshop

    SUMMARY: This page gives you the details on getting a good deal on extreme cold weather clothing material AND how to build your own custom extreme weather clothing.

    Imagine how much you would spend to store enough fuel to keep the “area warm”, verse how much you would spend to keep the person warm with extreme cold weather “foam clothing”

    This is my MOST IMPORTANT GROUP-BUY I’ve EVER done!

    WORKSHOP

    WHEN: November 1, 2014 3-8pm

    WHAT: Come to an “extreme cold foam clothing workshop” with Mareen Robinson. Seamstress & foam clothing maker of the Jim Phillips Extreme cold weather Foam Clothing system.  Mareen will have patterns for attendees to “duplicate”.

    This workshop will cover making 1/2″ vest in 5 teams.
    After this workshop you’ll know if you want to tackle building your own or buying one.  You’ll also have the know-how if/when there is a collapse and you need to fabricate your own extreme cold weather clothing.
    WHY: Purchasing & buying enough fuel to keep your family safe is cost prohibitive, but extreme cold weather foam clothing is not. Mareen will be able to give us all practical hands-on advice and mentoring on building 1/2″ clothing.
    COST: $50  ($50 per sewing machine, assistant is free with one paying student)
    WHERE: Location sent to those that signup with the Group Buy form below.
    Or, if you would like to place an order with Mareen, Visit her website:

    To learn more about Jim Phillips and his systems. see:

    See also:
    and

    CHECKLIST for WORKSHOP

     In the workshop, you will be making/teaming up to make–vest/coat for men, lady or child

    1. sewing machine AND thread (ready to go)
      1. Black Coates Dual Duty XP thread, (this is heavier, but not heavy duty) make
        sure it is 100% polyester, not cotton covered Make your bobbin the same
        (Please do this at home, we have so much to cover–don’t waste time)(Same
        with serger–the cotton covered thread holds moisture) use Guterman upholstery
        thread –polyester)
    2. measurements for your project (see http://www.winterfoamclothes.com/how-to-take-measurements
      1. Use this measuring chart worksheet BEFORE the workshop
    3. extension cord
    4. black garbage bag, for each foam piece you will be working with (black will help block the sun (which can color the foam)).
    5. serger if you have one
    6. size 14 needles
    7. Measuring tape
    8. Sharp scissors
    9. Seam Ripper
    10. Scotch tape tissue paper or blank newsprint for copying pattern
      (you can use old sheet from DI to make a sample to be sure it fits–pants, etc)
    11. Long quilting pins
    12. Small trash can
    13. Black and 1 color marking pens
    14. Pen & paper for notes, but I’ll give you a manual
    15. Lint roller (foam is very electrostatic, it picks up everything)
    16. snacks/water

    ADDRESS

    you may purchase “mesh/shell” at the workshop from Mareen.


    ICE CHALLENGE in ALASKA

    https://www.youtube.com/watch?v=2Hs59EFv2Z0#t=1m30s

    MATERIALS GROUP BUY

    We are also doing a group buy on materials for foam clothing. By building it yourself, you are saving hundreds of dollars. How much would you spend for gore-tex everything, but still not be covered as well in extreme cold weather? The PALS system is at least TWICE as good as gore-tex IMO.

    We need to get these materials BEFORE the workshop. So you MUST order & pre-pay before Oct. 24th.  Those that signup, will be given details of where to pickup their materials before Nov. 1st.

    ONE SHEET of foam, should be enough for an adult for everything. hat, coat, pants, boots & mittens. 1 sheet is 88″x96″

    1/2 foam clothing is good for 10 degree, idle in a shelter.  If you are not idle (moving around), then a 1/2 setup will allow you to thrive in even colder.

    1″ foam clothing is good for 40 degrees below zero, in any condition (without shelter). 40 degrees below being idle.

    WARNING: you will need an industrial sewing machine for the 1″ foam clothing!

    SLEEPING BAGS: Mareen no longer makes sleeping bags, but can refer you to a sleeping bag builder.


    VOLUME DISCOUNTS

    Thomas will have pre-orders available BEFORE the workshop. The cost per half-inch sheet is $45.

    Those that pre-order/pre-pay, Thomas will  bring your materials to the workshop. OR you can pick them up at my house.

    MESH KIT, the mesh is what you enclose the foam in. Think of the mesh as a shell. gore-tex is NOT a good shell, you will want mesh if you want the foam clothing to work at its highest capacity.

    Mesh kit is $60.


    WORKSHOP & Group Buy are worth coming in from out of state!

    [gform form=’https://docs.google.com/forms/d/1r0_HO8BLLA8rGR6GjU7fiDE7JyFro-1yLzg3hfTIzY4/viewform’ ]


    Thomas’ plan.

    I plan to buy a foam sheet for everyone in my family (7 people). I plan to take all the training Jim is offering our group buy. With that training I plan to make two adult suits (top to bottom: hat, coat, mittens, pants, boots). One for me and one for my wife.

    The other 5, I will have the materials and build my children their extreme weather foam clothing when they stop growing, or when there is need in a winter/long-term emergency.

    Because I live in Northern Utah, and don’t have plans to visit Alaska in the winter, I’m going with the 1/2 inch sheets. I may buy ONE 1 inch sheet, just in case.

    I now only need to store fuel to cook and hygiene, I will literally be saving tens of thousands of dollars by not having to store 12+ months of fuel.


    I did a similar plan with my cowboy action holsters. By learning how to make them myself and getting a deal on the materials, for the cost of one holster rig, I was able to make a cowboy holster rig for everyone in my family.

    Additional Videos and resources

    Thermal Johns Freezer Test, 1999 (complete)